• Skip to primary navigation
  • Skip to main content
  • Skip to primary sidebar
  • About
    • Contact
    • Disclaimer
    • Privacy Policy
    • Terms & Conditions
  • FAQ
  • Vegan Recipes
    • Free Fridge Food
    • Special Diets
      • Anti-Inflammatory
      • Gluten-Free
    • Type of Meal
      • Breakfast
      • Lunch
      • Dinner
      • Snacks
    • Culturally-Inspired
      • Argentinean-Inspired
      • Chinese-Inspired
        • Dim Sum
          • 12 Months of Dim Sum
        • Noodles
      • Filipino Food
      • Italian-Inspired
      • Japanese-Inspired
      • Korean-Inspired
      • Malaysian-Inspired
      • Mexican-Inspired
      • Neapolitan-Inspired
      • Pacific Northwest
      • Russian-Inspired
    • Baking
      • Bars
      • Breads
      • Cakes
      • Cookies
    • Holiday Recipes
      • Christmas
      • Friendsgiving
    • Season
      • Autumn
      • Winter
    • Condiments
  • SHOP
    • My Pantry Favorites
  • 12 Months of Dim Sum

Bakeroise

Vegan Filipino Afritada Inspired Tomato Stew

Mulled Pear and Apple Cider

Bakery Style Chocolate Chip Cookies

Shortcut Vegan Bolognese

Kimchi Chickpea Bowl

Hearty Kale and Chickpea Tomato Soup

Vegan Upside Down Pear Cake with Crushed Candy Caps

Golden Beets and Brown Rice Bowl

Vegan Longevity Noodles – Yī Miàn

Farewell, 2021. Hello, 2022!

12 Months of Dim Sum Project 2021

Fennel Cake with Lingonberry Sauce

The Truth About MSG – Is MSG Bad for You?

June 18, 2021

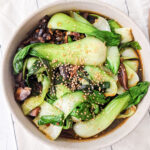
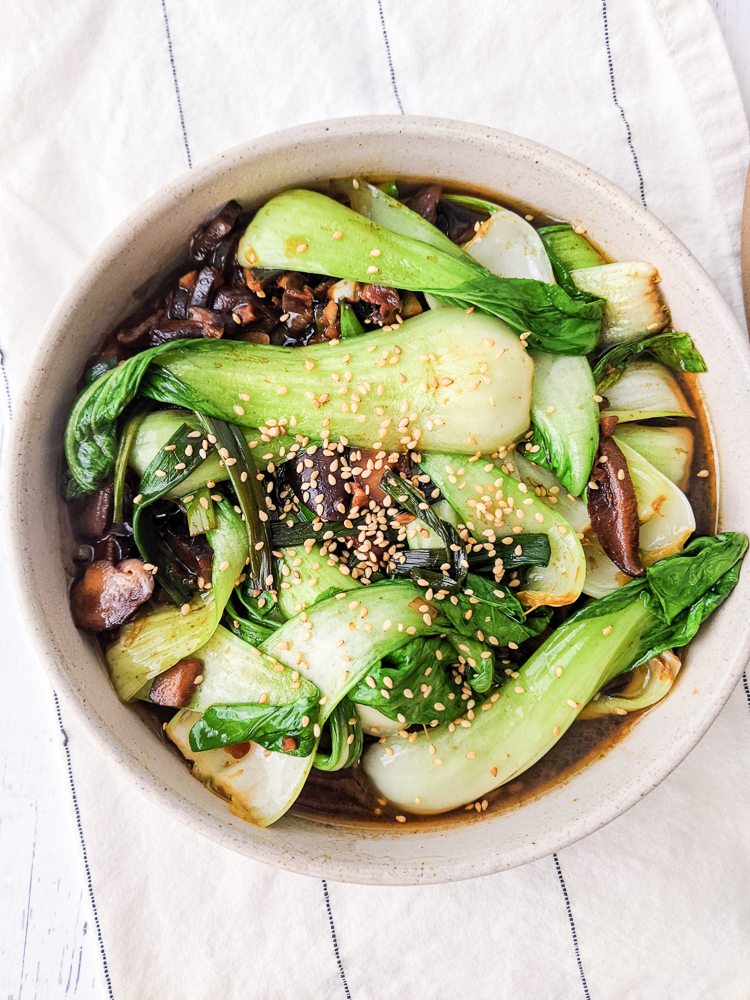
Bok choy from my longevity noodles recipe that would taste way better with MSG – oh but wait it already has mushrooms!

Oh dear. Even after all the time that has passed and all the scientific information that is readily available out there, MSG still has a bad reputation. Yikes. So I’d like to talk about the truth about MSG. Is MSG really bad for you?

I’m posting the truth about MSG because of a simple Instagram story where the owner of one of my partner’s favorite carts was rightfully lecturing certain white people that MSG is not as awful as people think it is. Fortunately, most of the people who commented agreed so that was refreshing. I loved how he bragged about using so much MSG! Ha!

But the fact that there were a few commenters who tried to counter with fake information and continue to spread a myth that is deeply rooted in xenophobia was rather troubling.

What is MSG?

Haha people hate it but don’t even know what it is.

MSG stands for Monosodium Glutamate. It’s a flavor enhancer – a salt, actually- that was developed in the early 1900s by Kikuane Ikeda, a Japanese chemist, who discovered the taste of “umami” which pretty much means “deliciousness” or “pleasurable”.

Umami is the fifth taste after bitter, sweet, salty and sour. Ikeda wanted to replicate the “umami” taste of the dashi in his soup so he extracted the glutamic acid (also known as glutomate) from the kelp that made the dashi and he crystallized it and formed MSG , the flavor enhancer that many eateries use today. He also was able to trademark the process of creating MSG.

The truth about MSG though is that it naturally occurs in many foods such as aged cheeses, tomatoes, mushrooms and more. In this case it’s the glutomate I mentioned above. The only difference between the two is that one naturally occurs and one doesn’t. The glutomate that’s found in foods naturally just doesn’t come with the sodium. However, our bodies process both glutomate and MSG in the same way. They’re virtually the same.

Nowadays, MSG is made differently via fermentation of sweeter ingredients like cassava, corn, sugar beets or even sugar cane.

However, the general public doesn’t seem to know this and MSG is also known as a bad ingredient that they think is only used in Chinese restaurant that makes everyone sick.

Despite resources that are available on the internet and in scientific journals, people still choose to believe that MSG is bad or might genuinely not have it on their radar to even research it because the belief that it’s bad is so ingrained in their brains.

Why does MSG have such a bad reputation?

Because in 1968 a man wrote to the New England Journal of Medicine” and complained about how he supposedly felt ill after he would eat at Chinese restaurants. The ingredient MSG became the scapegoat. He titled his piece “Chinese Restaurant Syndrome”.

Other people started writing to the journal to support his idea because of their own supposedly similar experiences whereas other people who wrote in thought the idea of Chinese food making people sick was laughable.

So that was when and why the myth and debate about MSG started and it is still happening today despite more and more people finally learning the truth about MSG.

The truth about MSG is that the myth is deeply rooted in xenophobia and was only further exacerbated by gullible and/or racist people who liked to flaunt their fake claims yet regularly ate other foods with MSG in it…and they turned out fine.

Where and in what foods is MSG used as an add-on?

Well it is definitely used in a lot of Chinese cooking. Unfortunately, many Chinese restaurants have given into the myth because so many people are still uninformed and these restaurant owners need to make a living too. Hopefully they’ll realize that more and more people are starting to understand that MSG isn’t the enemy and they can cook the way they want.

The truth about MSG though is that it is used in many fast food chains and processed canned and frozen foods that Americans love to gorge on.

No one complains about them though.

How is it racist though?

Three words: Chinese Restaurant Syndrome

That was the title of the letter that dude wrote in 1968. He had an American Chinese name but I don’t know if he was Asian or white. For all I know, he could’ve been both or neither. Either way, titling his piece in that way that was flat out racist but of course people didn’t talk about that back in the day despite open racism being prevalent.

In the land where many, many people live off of unhealthy food that contains MSG, it’s interesting how people don’t complain about it when they’re stuffing their faces with certain, popular canned soups yet try to avoid Chinese restaurants unless there’s a sign saying that they don’t use MSG.

You see: Chinese people and anyone deemed “different” or “foreign” or “exotic” can’t use MSG.

They (KFC, Chik-Fil-A, Doritos, etc) can use MSG. See what I mean? Many people don’t even know what they’re putting in their bodies. Because why would you complain about Chinese restaurants using MSG yet you stuff your face with other items that use MSG?

Yes. That’s why.

The truth about MSG is that people who continue to open their mouths and spread lies about MSG and linking Chinese restaurants to the nonexistent “problem” of MSG are contributing to racism whether they know it or not.

Why does all this matter?

Because racism isn’t okay and MSG rules. Straight up. And I’m honestly tired of rolling up to a Chinese restaurant to see that sign on the door that says there’s no MSG. It makes me want to eat somewhere else because I’m not trying to go to a place that doesn’t cater to people like me. But of course I want to be able to patronize a Chinese restaurant.

Spreading misinformation about MSG, especially with the “Chinese Restaurant Syndrome”, is an assault on Chinese culture and cuisine and it’s time for it to stop.

If people get sick after eating at Chinese restaurants, I can think of a million reasons because the truth is that many of them sadly don’t use MSG anymore.

Maybe the sick person had a specific fried dish they get is too greasy for their system? Maybe they ate too much? Maybe they truly are unknowingly gluten intolerant so they liberally splash loads of soy sauce (which contains wheat) on every dish they have while gorging on noodles also made out of wheat.

The one time I got sick from eating at a Chinese restaurant, it was in 2007 in San Francisco. It wasn’t some hole-in-the-wall but at a “nicer” trendier spot. I always suspected it was a fluke food poisoning. I was violently ill and the symptoms were identical to two other times in my life I got food poisoning (once at home from food that had been unknowingly left out and another from some food stall at the Emeryville Public Market where the food sits on the counter in what should be supposedly hot trays under heat lamps).

After growing up in Oakland and eventually moving to San Francisco as an adult, I have had various types of Chinese food (from Sichuan to Guangdong to Hunan). I have eaten at Chinese eateries in different regions in the US, South America, Asia and Europe for over three decades.

And I’ve gotten only sick once.

So what is the truth about MSG?

The truth about MSG is that it isn’t an awful creation meant to make people sick. There is no conclusive evidence that shows MSG to be “bad” or “harmful” for most people..

Will you get sick if you eat loads and loads and loads of MSG? Probably! But in the way you’d get sick if you eat too much salt or sugar or, well, just about anything! Moderation is key.

And, of course, like with almost everything else, some people will have a true intolerance to it the same way they have intolerances to other things such as wheat, sugar, peanuts, legumes, certain fruits and veggies, etc. The list just goes on.

But if someone has been eating loads of fast food and lives off of processed food but are scared to eat at a Chinese restaurant then they should probably assess themselves.

So go forth, my readers if you haven’t already, and get down with the real MSG…not the MSGs in them fortune cookies. *ba dum tss*

Sources:

https://www.mayoclinic.org/healthy-lifestyle/nutrition-and-healthy-eating/expert-answers/monosodium-glutamate/faq-20058196

https://en.wikipedia.org/wiki/Kikunae_Ikeda

https://www.fda.gov/food/food-additives-petitions/questions-and-answers-monosodium-glutamate-msg

https://www.umamiinfo.com/ikedakikunae/

https://fshn.illinois.edu/news/dietitians-say-there-no-scientific-evidence-msg-bad-you
https://www.healthline.com/nutrition/foods-with-msg#:~:text=Fast%20food,-One%20of%20the&text=MSG%20is%20also%20used%20by,MSG%20(9%2C%2010).

Toasted Cumin Scallion Pancakes

June 4, 2021

Affiliate Disclosure: As an Amazon Associate, I earn from qualifying purchases. Thank you for supporting Bakeroise.
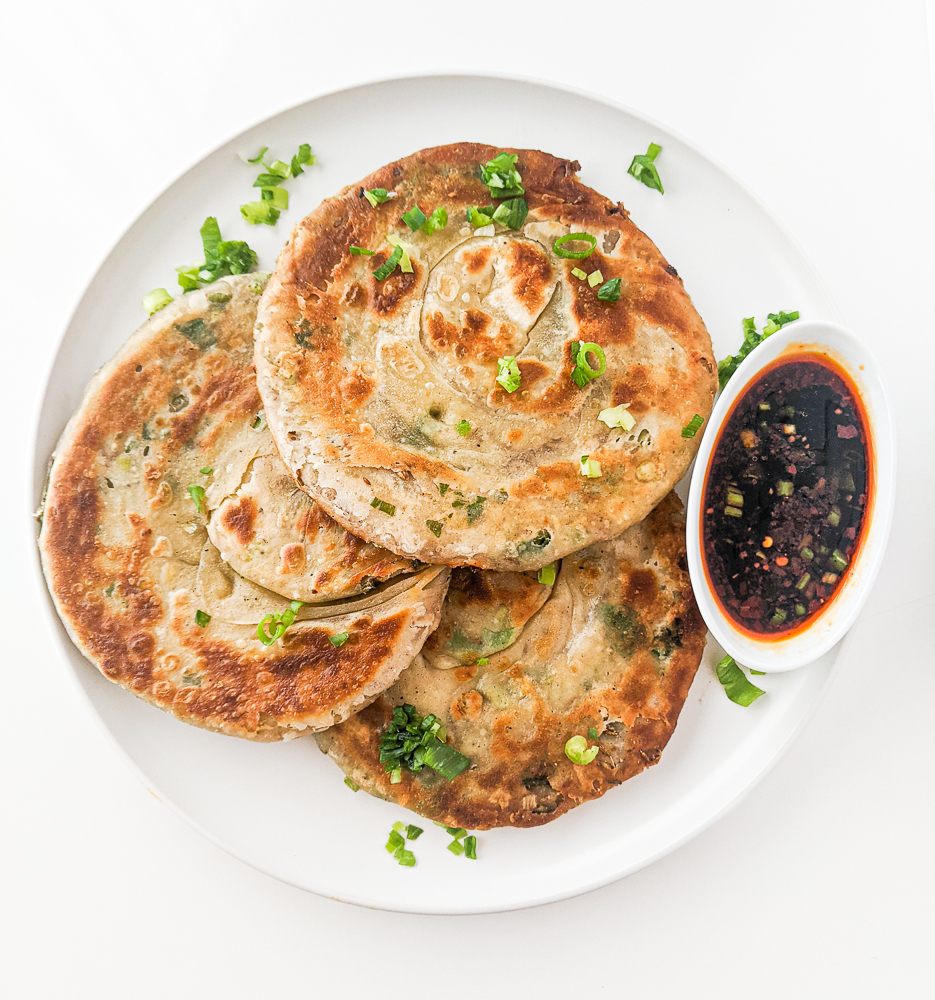
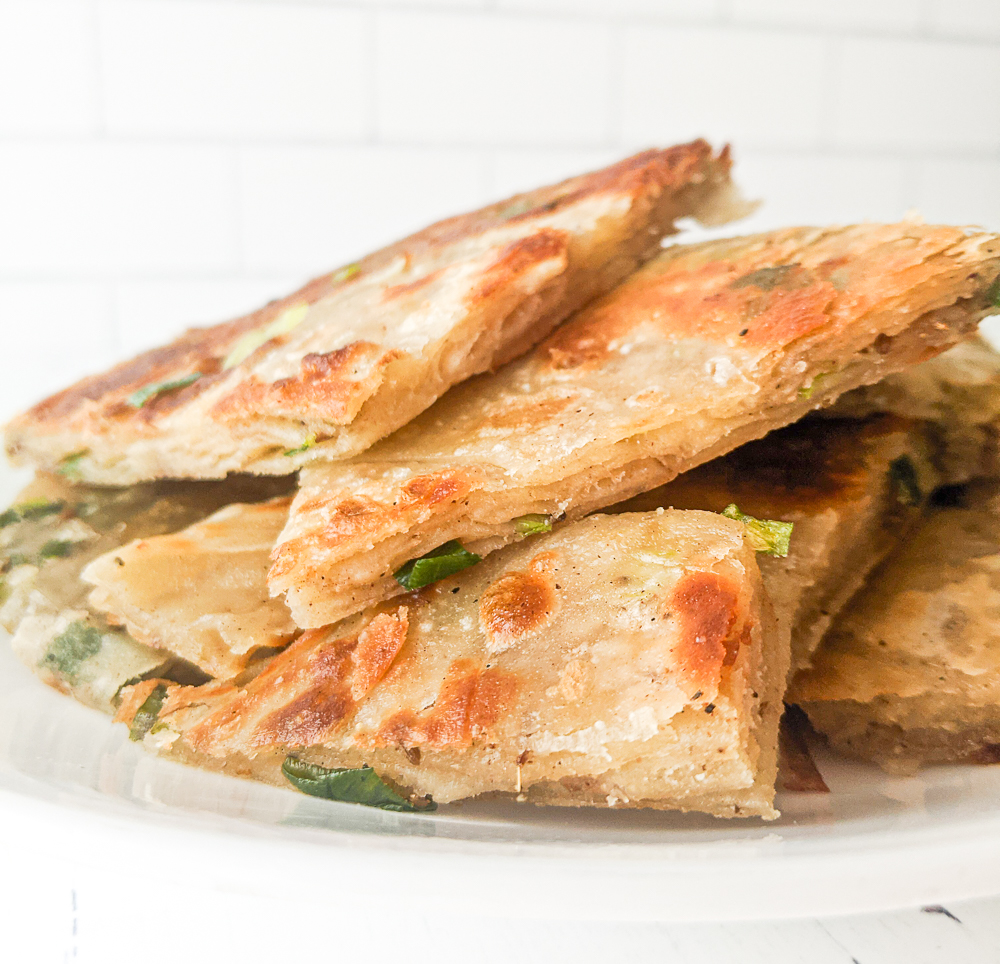
For this May’s 12 Months of Dim Sum project, I share with you a toasted cumin scallion pancakes recipe. This recipe yields perfectly spiced, crispy-on-the-outside and flaky-on-the-inside scallion pancakes that make it hard to not get full of right away! Just one piece of this crunchy, fluffy, flaky goodness is never enough so don’t say I didn’t warn you.
I chose to share a toasted cumin scallion recipe as I’ve always loved scallion pancakes (pinyin: cōng yóu bǐng). When I became vegan, it became a go-to option whenever we’d go out for Chinese food. I’ve been lucky enough to find scallion pancakes at both Chinese and Taiwanese restaurants here in Portland and finding them on most dim sum menus. Since we won’t be going out for dim sum next Christmas (or any other Christmas in the foreseeable future), I’m glad I will have the option of enjoying these at home. You can also make these in advance and freeze until you are ready to cook them.
Chinese scallion pancakes differ from American pancakes in that they are made from a dough instead of a batter. They are savory whereas American pancakes are famous for being sweet. As with a lot of Chinese food that uses dough, scallion pancakes are a lot more labor intensive and time consuming than our syrupy American pancakes.

But it’s worth it. I love crispy fried food and scallions are one of my favorite bulb vegetables. Cumin seeds that are toasted are one of my favorite additions to almost any kind of hot, savory dish. So to me, there is nothing better than fresh off the stove, crispy yet flaky toasted cumin scallion pancakes. These are great served with sweet and spicy Chinese chili oil with a soy sauce and a splash of vinegar dim sum dipping sauce!

I’ve made toasted cumin scallion pancakes in the past but tend to only do it when I already have leftover dough from making other recipes like my vegan potstickers.

I looked at multiple recipes to compare how different cooks made them and found all of them to be interesting yet so different from one another…which made me feel more confident about winging it and making my own based on techniques I’ve learned throughout the years. I’m not trying to show off or be inventive. I’m just trying to to figure out what works for me.

Some extra tips before we get started: Adding oil helps the dough stretch while rolling out without sticking to the placemat and avoids us having to add flour to our workspace. The toasted cumin scallion pancake dough is similar to the dough in my lentil and spinach empanadas recipe. I tried to do it without oil but the dough wasn’t as workable. Hot water is also best for the gluten. Cast iron for cooking helps with the browning of the pancake as well in comparison to a stainless steel or nonstick frying pan..although those work too. I just love cast iron the most for the toasted cumin scallion pancakes.

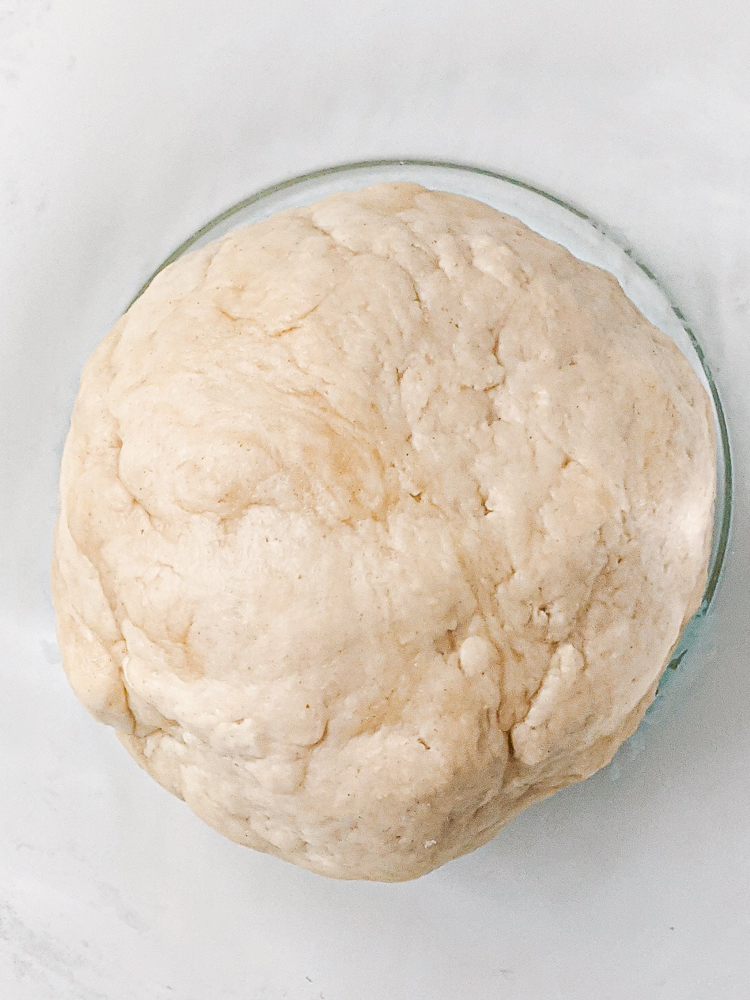
So how do we make this wonderful dish? We start with the dough. We take flour, hot water, kosher salt and sesame oil and mix it in a bowl (using chopsticks first and then hand) until it looks like this:

It’s not super smooth or anything but the texture is just right. We let this rest for 20 minutes covered in the fridge.

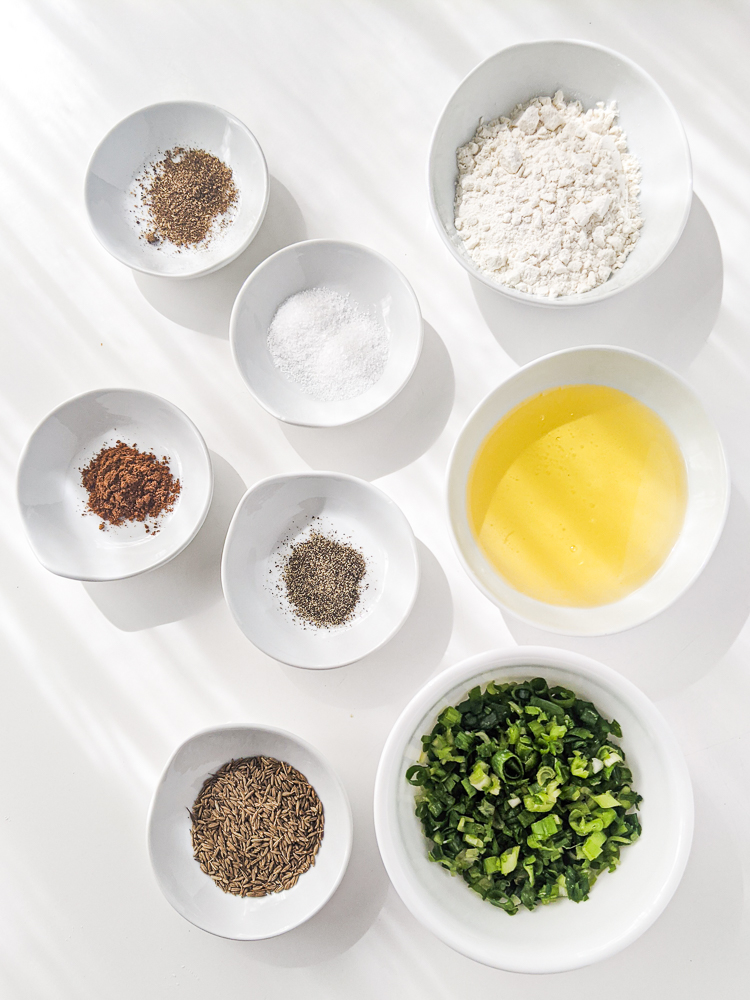
While the dough is resting, we start working on our filling. These are the ingredients:

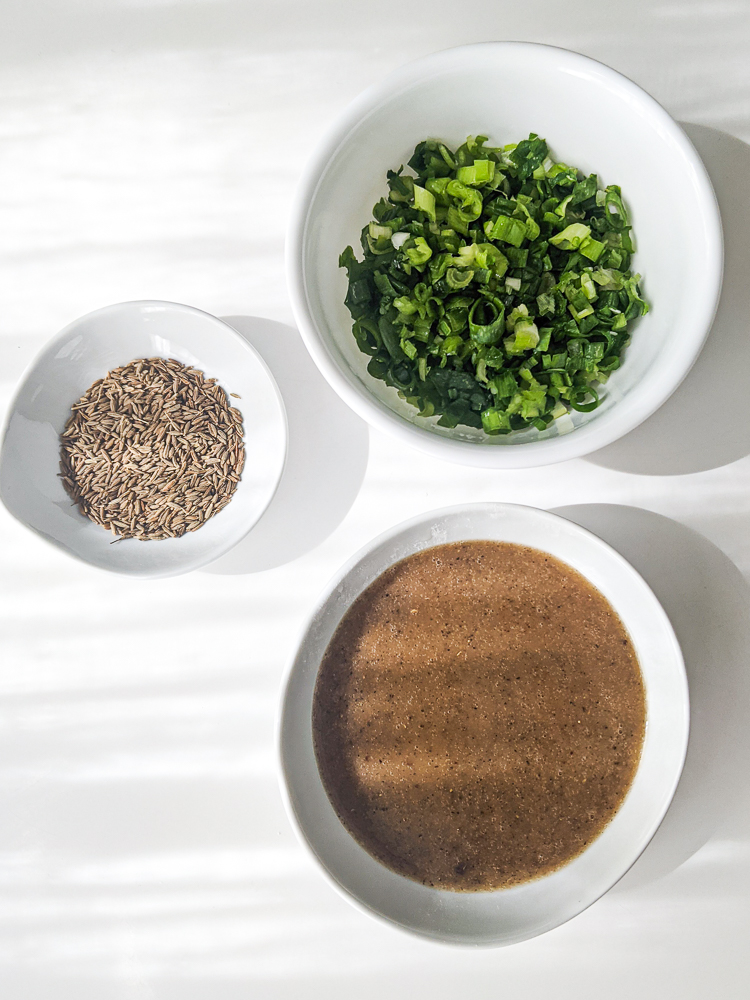
Taking “natural lighting” to a whole new level. HAHA

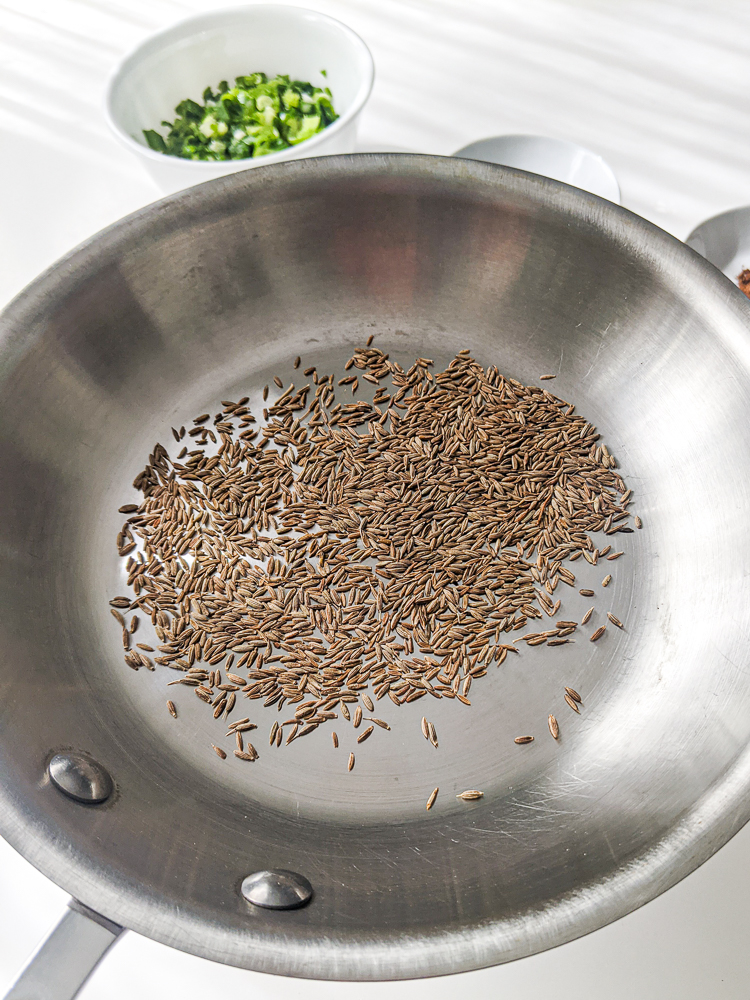
First we take the cumin and toast it in a pan for 2-3 minutes until aromatic. Then we set it aside.

Next we combine everything, except the scallions and cumin, and mix well to form a seasoned oil and flour mixture. When assembling, we have the three bowls below containing green onions, cumin and the paste.

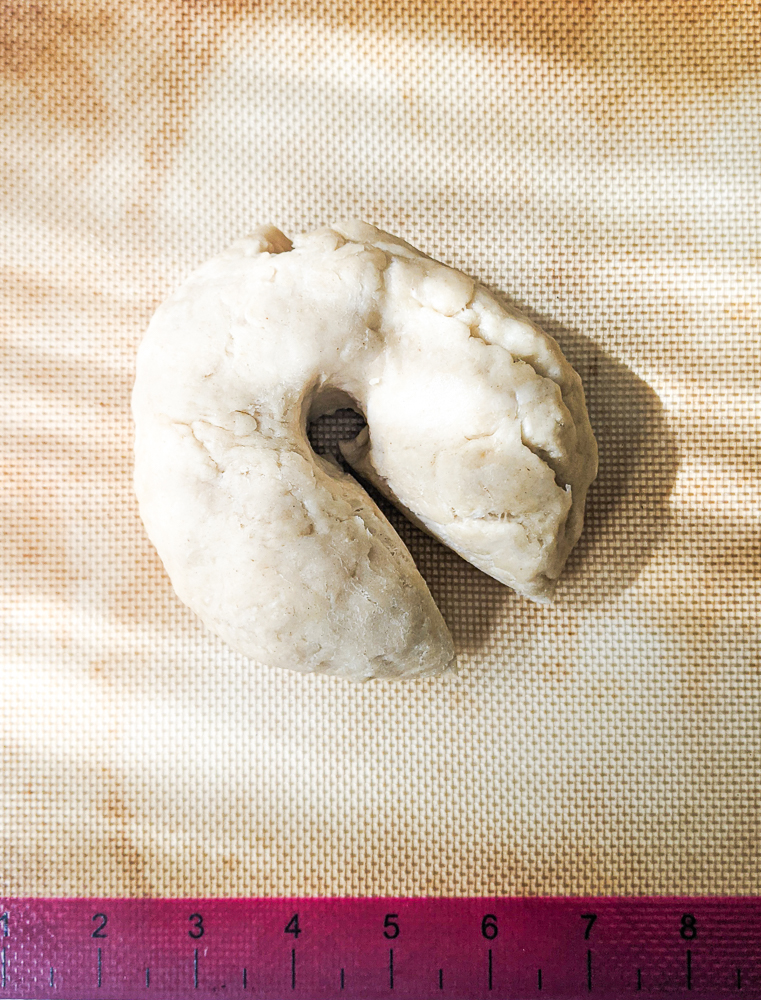
At this point, the dough should be ready and the oil and flour mixture should sit for the flavors to meld. We start to get to work on our dough. We take the dough that’s been resting in the fridge and put a hole in it to make it look like a donut or bagel. We then cut through one part of the dough and turn it into a log.

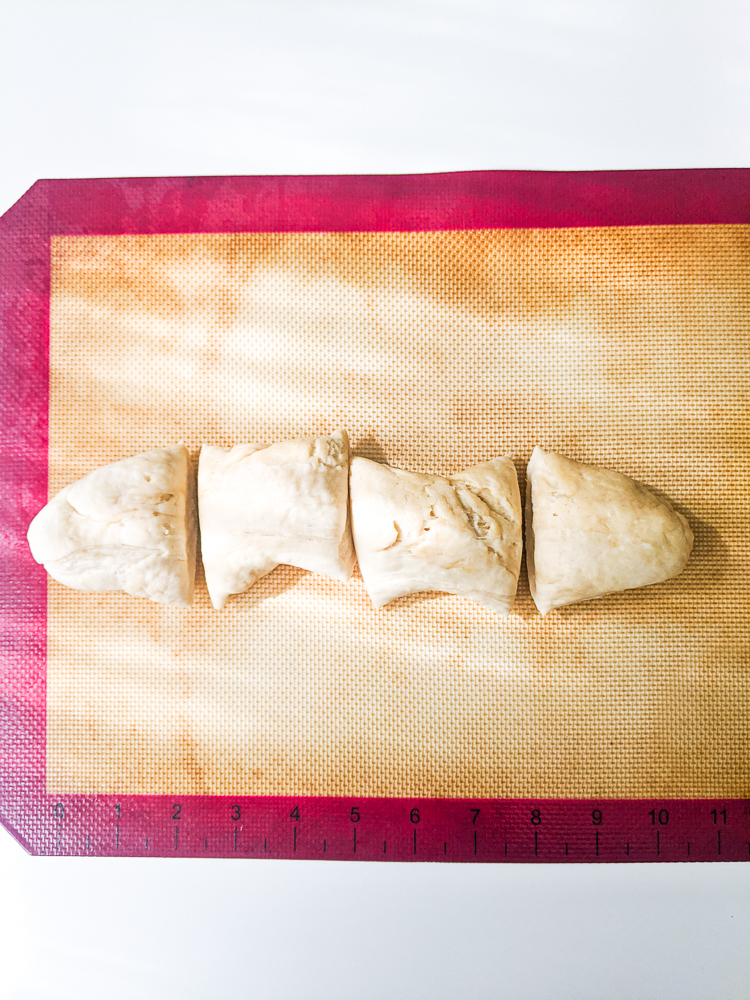
We then turn that into a log and cut into four equal pieces.

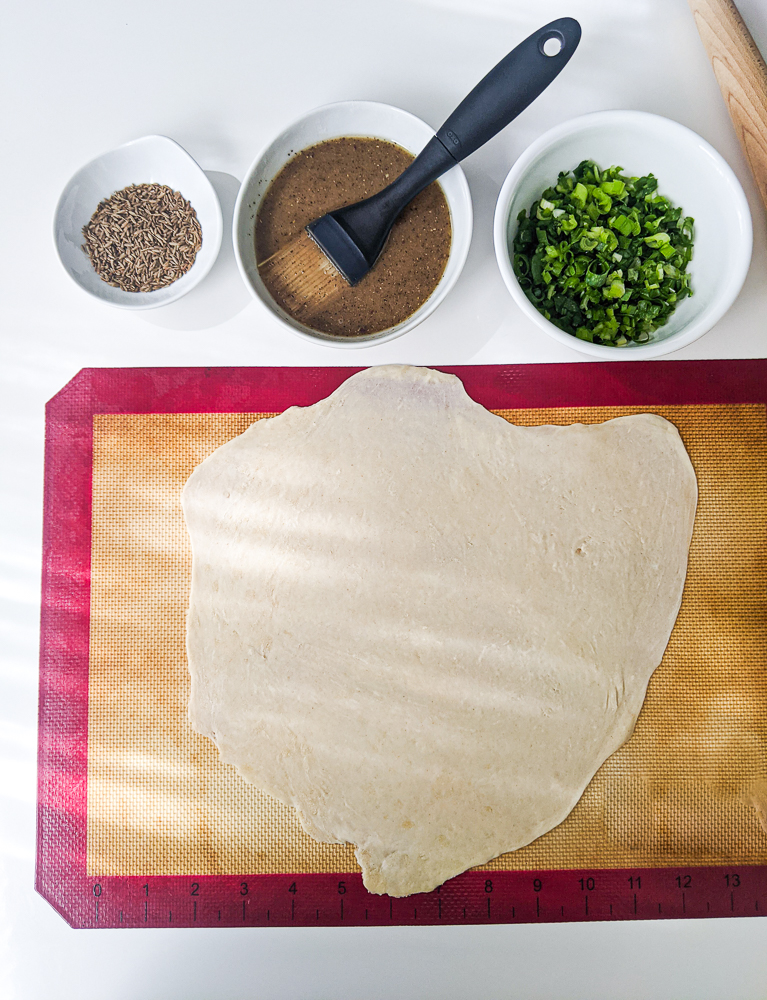
We take one piece and roll it out as thin as possible in totally imperfect shape. It does have to be extremely thin because the thinness is what makes the layers.

See that tiny hole above? Let’s try to avoid that. Not a super big deal because we’re going to roll it up but still. If you get that, just patch it up by bringing some of the dough together until it’s filled out.

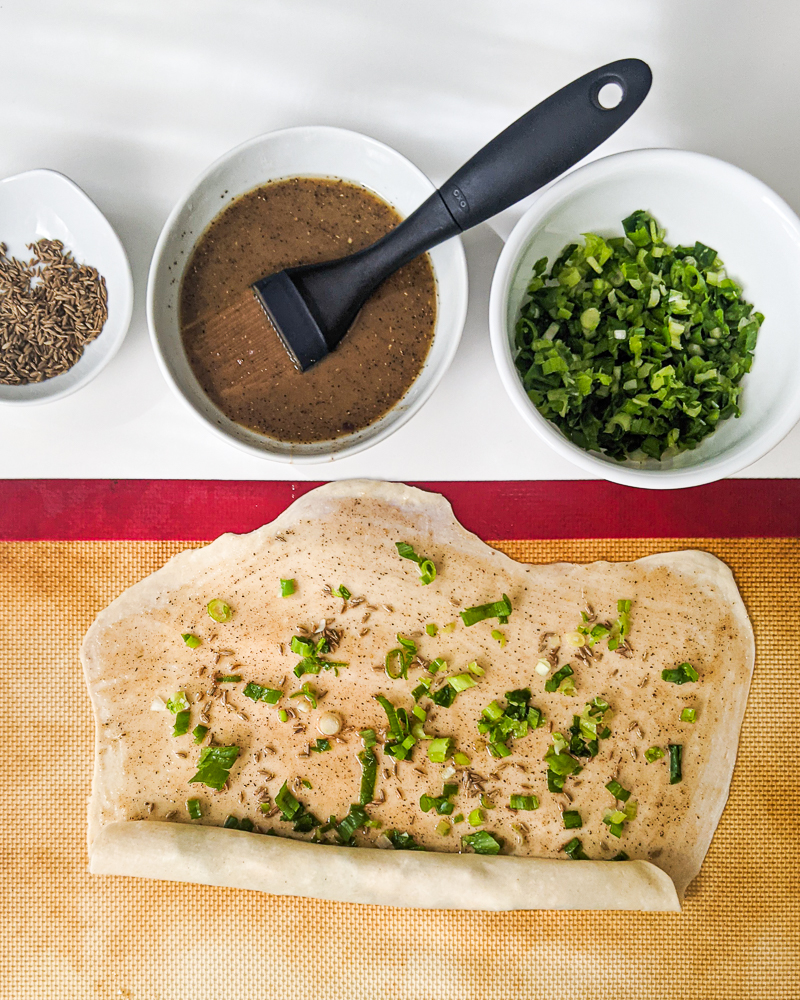
Next we spread a liberal yet still thin layer of the oil and flour mixture on the surface and sprinkle evenly with ¼ of the toasted cumin and ¼ of the scallions. We don’t want too much liquid as it’ll just spill out. But we still want enough so that the toasted cumin scallion pancakes are perfectly seasoned.

Then we roll it up as much as we can without pressing or smashing the layers together.

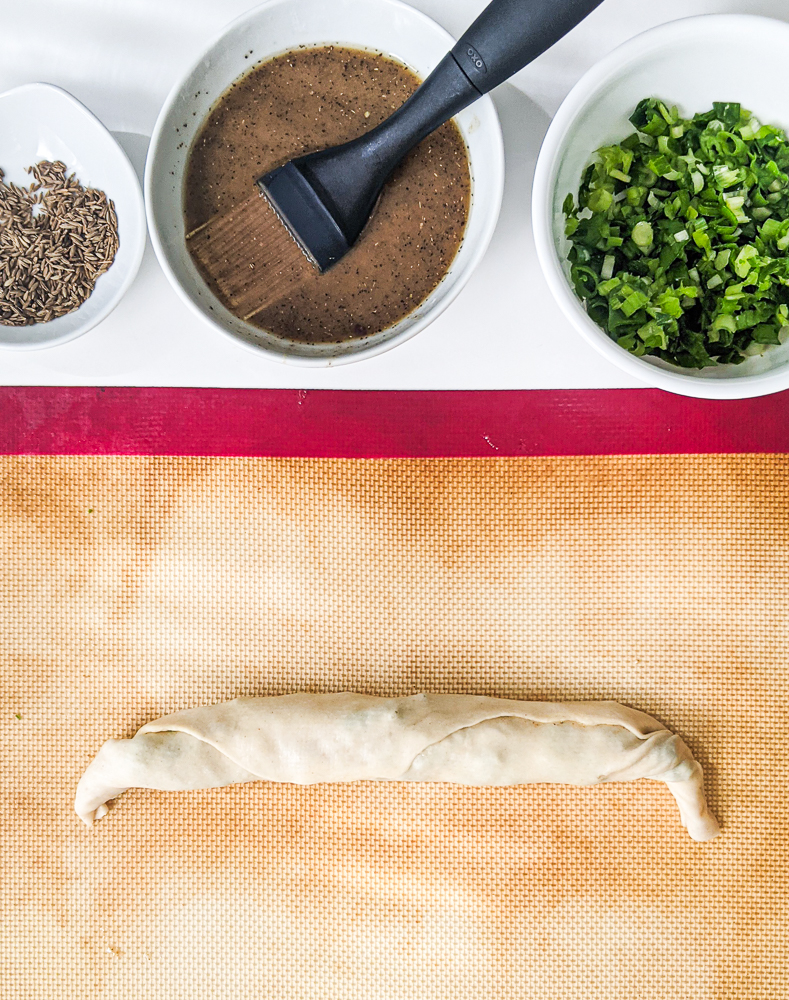
When we have it rolled up into a log, we twist both ends so that it looks like unwrapped candy.

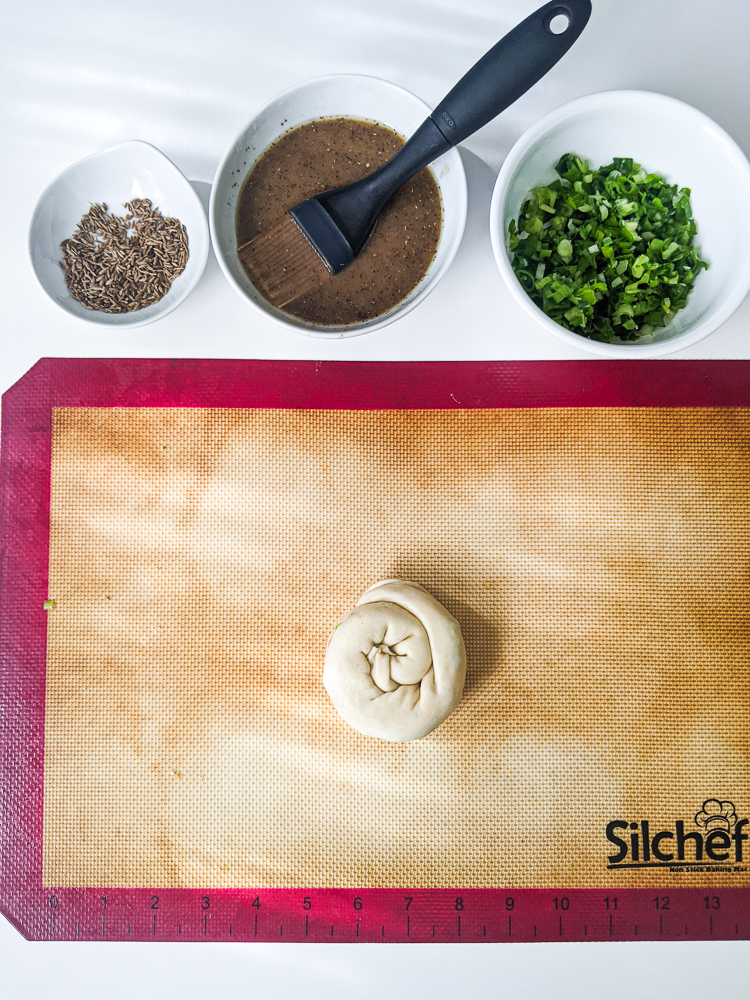
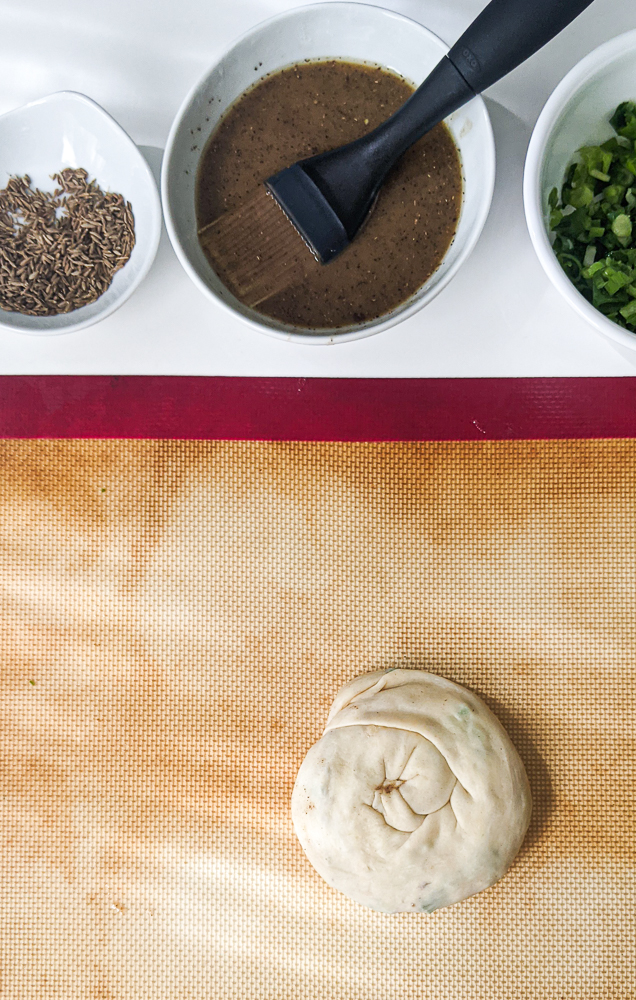
Then we take one end and roll it so that the log becomes what looks like a swirl, tucking the exposed end underneath.

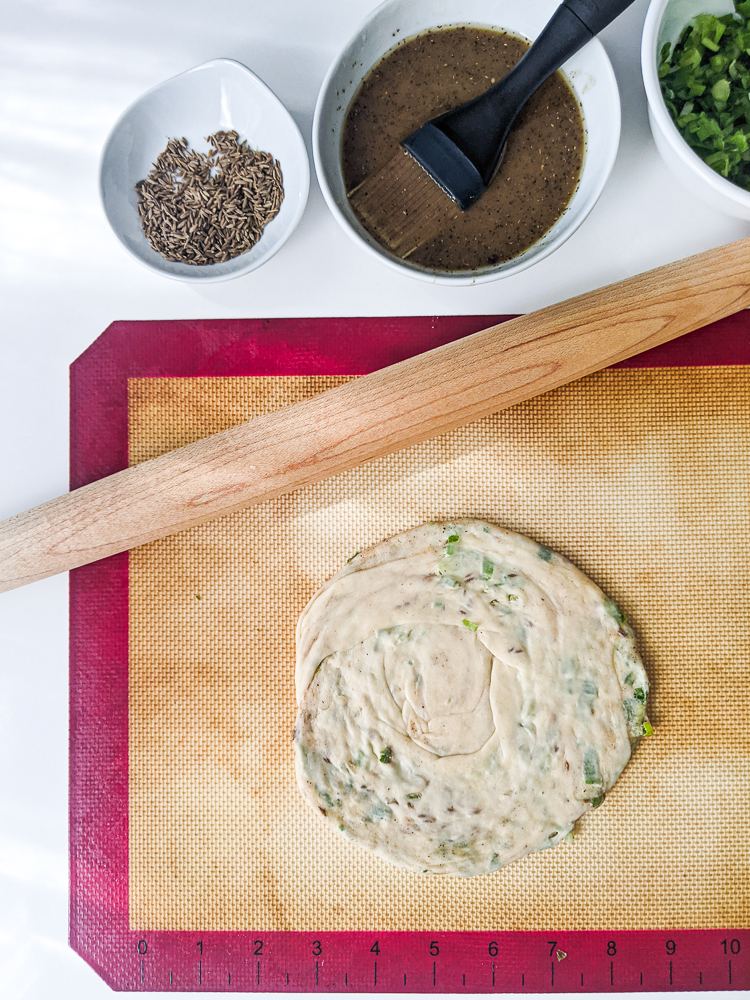
Then we press down gently with our hand to help retain its round shape. At this point, we do want to make as perfect of a circle as possible to ensure we have even slices when we cut later on.

Make sure not to press too hard and not to “pop” super early as there is still air inside. Having it pop like a balloon would also make it messy.

We also don’t want to roll and press down too hard and have the layers stick to one another, creating a dense pancake instead of a flaky one. We roll out the dough into a 6-7″ pancake. As you can see above there was some popping at the edge right there but that didn’t happen until towards the end and no liquid filling seeped out.

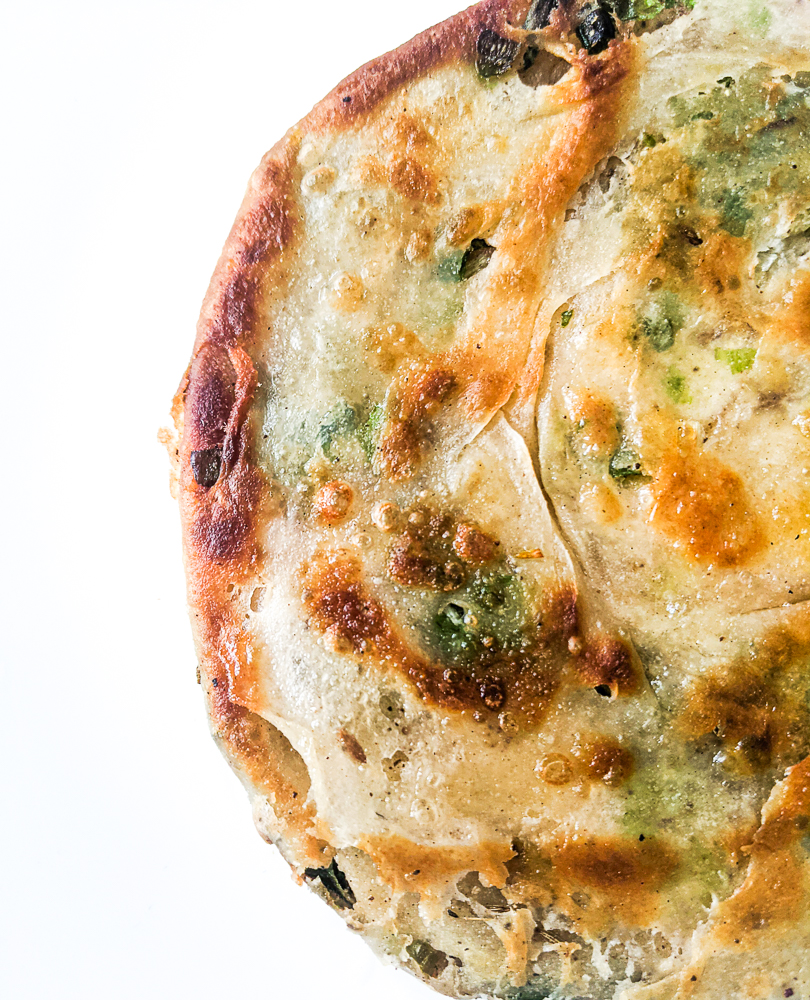
We took the first side of this pancake in hot sesame oil in a large cast iron pan for 4-5 minutes on medium heat (on my induction stove that tends to be more powerful) the first minute then down to low medium heat to ensure even cooking through the whole pancake. We don’t want undercooked middles!

Then we flip and work on the second side which is on low medium heat for 3-4 minutes or until golden brown patches appear. Careful not to burn.

And you’ve got your toasted cumin scallion pancakes! Put them on a white plain sans paper towel.

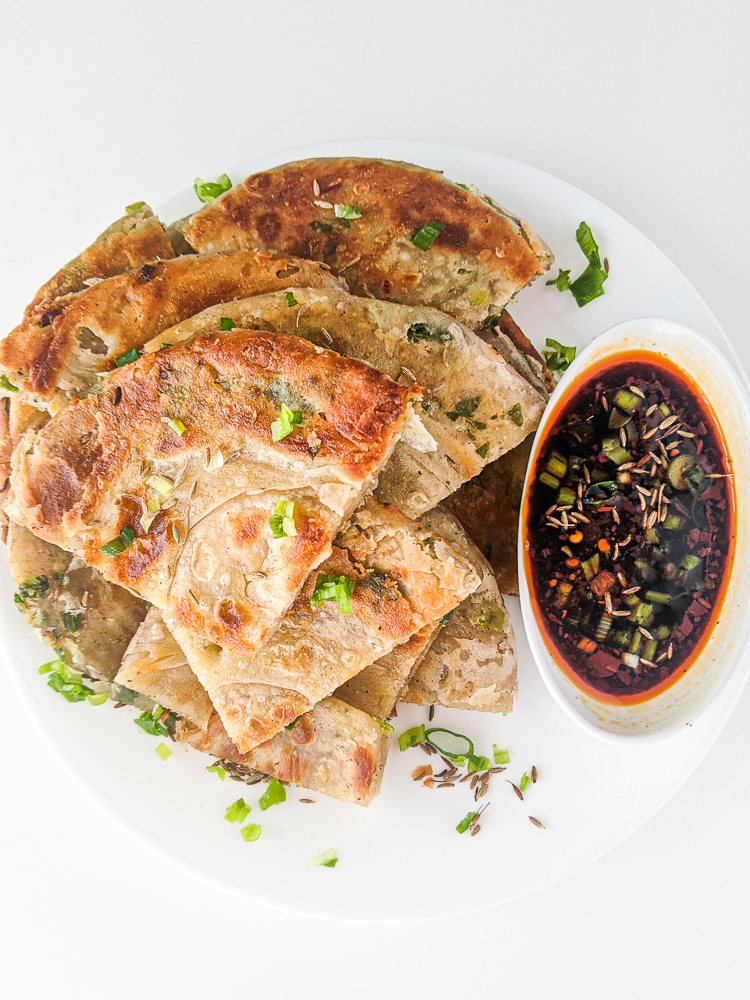
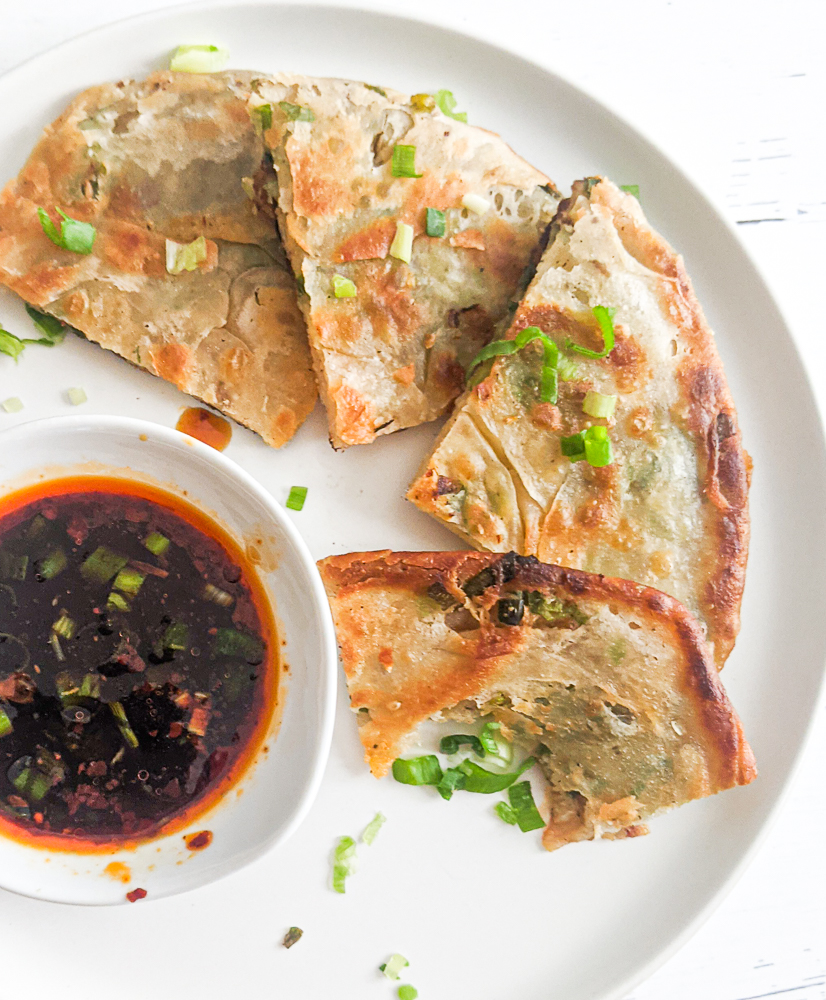
Cut each pancake into 8 even slices and serve with your favorite dipping sauce. The one pictured above is a dipping sauce that is a 3:2:1 ratio of soy sauce, white vinegar and Chinese chili oil. I added some leftover green scallion and toasted cumin for fun. Update: Here is a recipe for 2-minute, 3-ingredient, gluten-free Asian dipping sauce here)

All those layers!

Let’s get messy and enjoy our toasted cumin scallion pancakes!

12 Months of Dim Sum Recipes:

January 2021: Vegan Siomai

February 2021: Instant Pot Congee

March 2021: Vegan Potstickers with Ginger Scallion Tofu

April 2021: Crispy Golden Fried Tofu

May 2021: Toasted Cumin Scallion Pancakes

June 2021: Gluten-Free Asian Dipping Sauce

Print

Toasted Cumin Scallion Pancakes

Print Recipe

A recipe for toasted cumin scallion pancakes that are hot and crispy on the outside and perfectly fluffy and flaky on the inside!

  • Author: Jan Carlisle @ Bakeroise
  • Prep Time: 30
  • Cook Time: 30
  • Total Time: 1 hour
  • Yield: Four (4) 6-7″ pancakes

Ingredients

Scale

Dough:

  • 2 cups or 260 grams of all-purpose flour
  • 1 teaspoon salt
  • 1 cup of hot water, divided
  • 1 tablespoon of sesame oil 

Filling:

  • ⅓ cup sesame oil
  • ⅓ cup or 43 grams flour
  • ½ teaspoon of ground Sichuan pepper
  • ½ teaspoon of Chinese five spice
  • ½ teaspoon ground black pepper
  • 1 teaspoon kosher salt, plus more for sprinkling
  • 1 teaspoon cumin seeds
  • 4 stalks or about 2 cups of very thinly sliced scallions, including the white parts with ends discarded – see notes

Dipping sauce using 3-2-1:

  • 1 cup soy sauce
  • ⅔ cup white vinegar
  • ⅓ Chinese chili oil

Instructions

  1. In a large bowl, mix the flour, salt, sesame oil and ¾ of the hot water with chopsticks until you get a shaggy dough. The dough should end up being smooth enough to press on but not sticking to your hands. Drizzle a little bit of hot water if dough is too dry and add very small amounts of flour if the dough is too sticky. Use your hand to finish kneading for a few minutes until the dough is smooth and not too sticky or dry. 
  2. Leave the bowl of dough in the bowl, cover tightly and let it sit in the fridge for 20 minutes. Work on the pancake filling while the dough sits. 
  3. Bring a small frying pan to medium heat and toast the cumin seeds, tossing around for 2-3 minutes. Set aside.
  4. Bring a small saucepan to medium heat. Add  ⅓ cup sesame oil. Once hot, add the flour, ground Sichuan pepper, ground black pepper, Chinese five spice and salt. Whisk until combined and runny. Remove from heat and set aside. 
  5. When the dough is ready, portion the dough into four equal pieces. Make sure the dough is as perfectly round as possible and make a donut-esque hole in the middle. This is to ensure even portions when splitting.
  6. Cut all the way through one part of the dough to make a log that should be perfectly even. Split into four even pieces using a dough cutter.
  7. On a silicone mat, roll it out one piece of the dough as possible without tearing. This will create flaky layers.
  8. Brush the oil and flour filling over the whole surface. Take the bottom of the pancake and start rolling upwards until it forms a log. Then twist the ends so that it looks like a wrapped piece of candy. Start at one end and roll it so that it looks like a swirl or a snail, tucking the other end underneath. Using a rolling pin, gently flatten the pancake with your hand to help it keep its round shape and then gently roll out into a 6″ disc. Avoid “popping” the pancake as much as possible. 
  9. You will cook and assemble simultaneously unless you want to assemble all of it at once. This is when you store anything you want to freeze for another day. Take any toasted cumin scallion pancakes you want to freeze by snugly wrapping in cling wrap and sticking in the freezer.
  10. Took the scallion pancakes, bring a large cast iron pan to medium heat and cover the bottom with oil. When the oil is heating up, start assembling another onion pancake if you are assembling simultaneously.
  11. When the oil is hot, add the pancake and for the first minute cook, then turn down heat to low-medium heat and cook for an additional for 3-4 minutes on each side or until golden brown patches appear. 
  12. Put finished pancake on a plate without paper towels on a plate to cool down before cutting into 8 slices.
  13. Repeat with the other pancakes. 
  14. Serve with dim sum dipping sauce (3:2:1 ratio of soy sauce, white vinegar and chili oil)

Notes

  • The thinner the scallion slices, the easier they will be work into the dough. Large pieces can tear the dough.
  • When rolling out the dough, be gentle as to create layers instead of a thick, dense texture.
  • To make in advance, roll out the pancakes wrap and tightly using cilng wrap. Stick in freezer until ready to cook. Good in freezer for 3-4 months.

Did you make this recipe?

Share a photo and tag us — we can’t wait to see what you’ve made!

Perfect Oven Brown Rice

May 18, 2021

Affiliate Disclosure: As an Amazon Associate, I earn from qualifying purchases. Thank you for supporting Bakeroise.

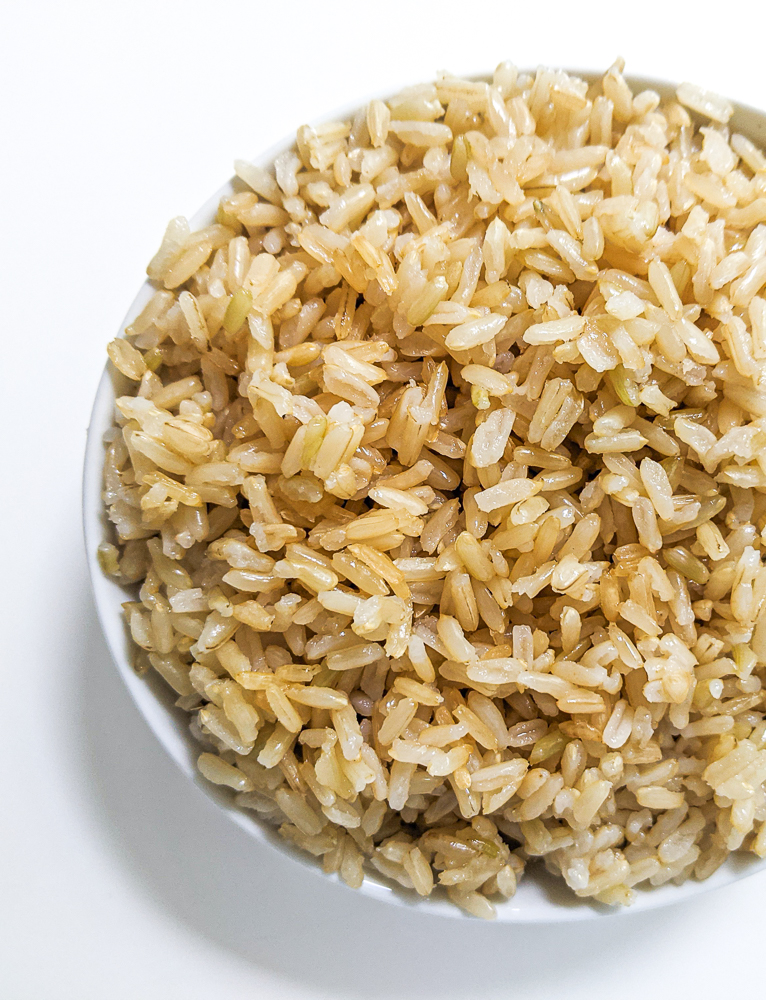
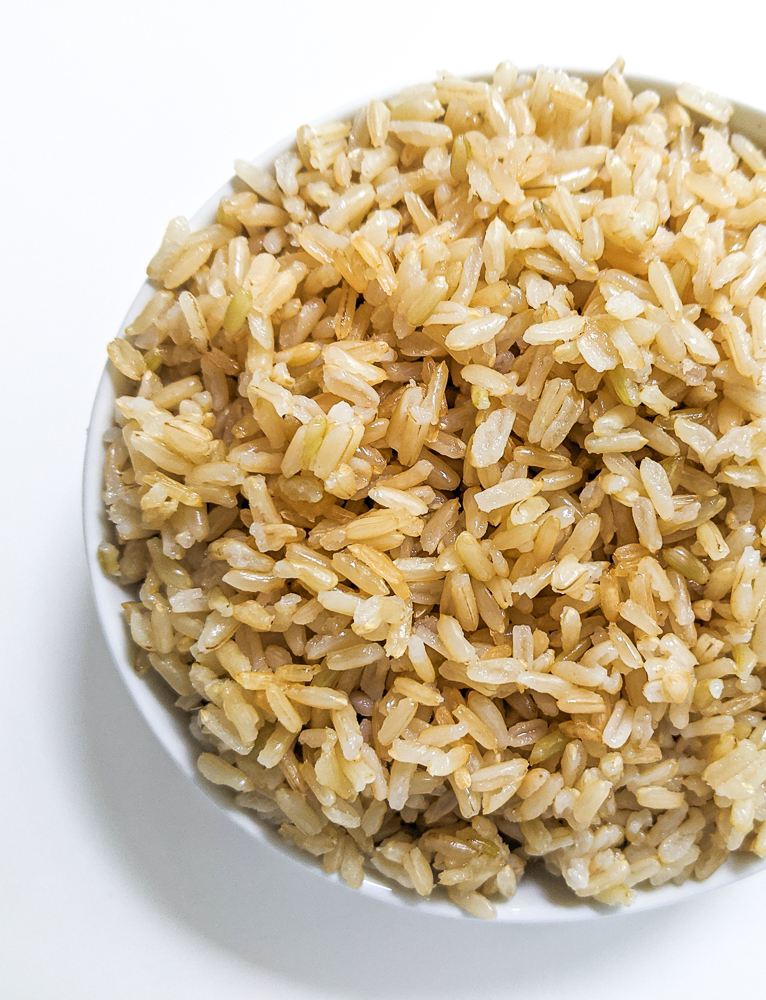
Hey y’all! Today I share with you my Perfect Oven Brown Rice recipe. A recipe that allows your to steam rice in the oven instead of a rice cooker! This brown rice would go perfectly with my 30-minute vegan Filipino afritada.

As I love to make it known, I’m Filipina-American. I grew up in a traditional Philippine household which means I grew up eating white rice. Outside of the home, from the white basmati rice at Indian restaurants to my a good friend’s tasty Mexican rice, white rice was simply a staple in my meal. Brown rice was a nonexistent option at the time.

Obviously I still prefer white rice – as evident in recipes such as my adobo one which encourages pairing with white rice or this Instant Pot congee recipe or vegan Filipino champorado recipe both of which straight up use white rice as the base for each dish!

However, it’s good to switch it up especially if I want my kid to grow up eating a variety of foods. Unfortunately, brown rice can take up to two hours when using our rice cooker. So I needed to test out some different ways to make the brown rice.

I came across this oven brown rice recipe from Cooks Illustrated that I thought would be a good starting point. For those not familiar with Cooks Illustrated, they are basically The Authority In The Kitchen. They know All The Things. I’ve been a fan for over a decade now thanks to my partner who was already an avid home cook when we met. He had their magazines and, present day, I am now a regular reader of their site and love watching America’s Test Kitchen and Cooks Country videos. Both shows aren’t flashy like the ones on the food/cooking channels but are instead more down-to-earth and technical yet warm and relatable.

So the recipe…how was it? It was pretty awesome, unsurprisingly. However, we all have our preferences and I had to make a few changes based on my own. Yes, it’s possible to not blindingly follow all the rules. Mostly, I changed the amount of salt and substituted the oil.

This perfect oven brown rice passed the kid test. Not only does it come together in almost half the time but, in my opinion, tastes way better than plain ol’ steamed brown rice because of the avocado oil and salt that actually makes it tasty and not like cardboard.

While it would be good paired with this chickpea soup or even one of my partner’s favorite dishes, my vegan Filipino afritada, it can actually stand on its own! In fact, once I got it right, I ate a whole cup of it to “test it out”.

Oops. Ha kidding. Totally did that on purpose!

So how do we make this perfect oven brown rice? Here we go.

First we preheat our oven to 375°F and position our rack in the middle.

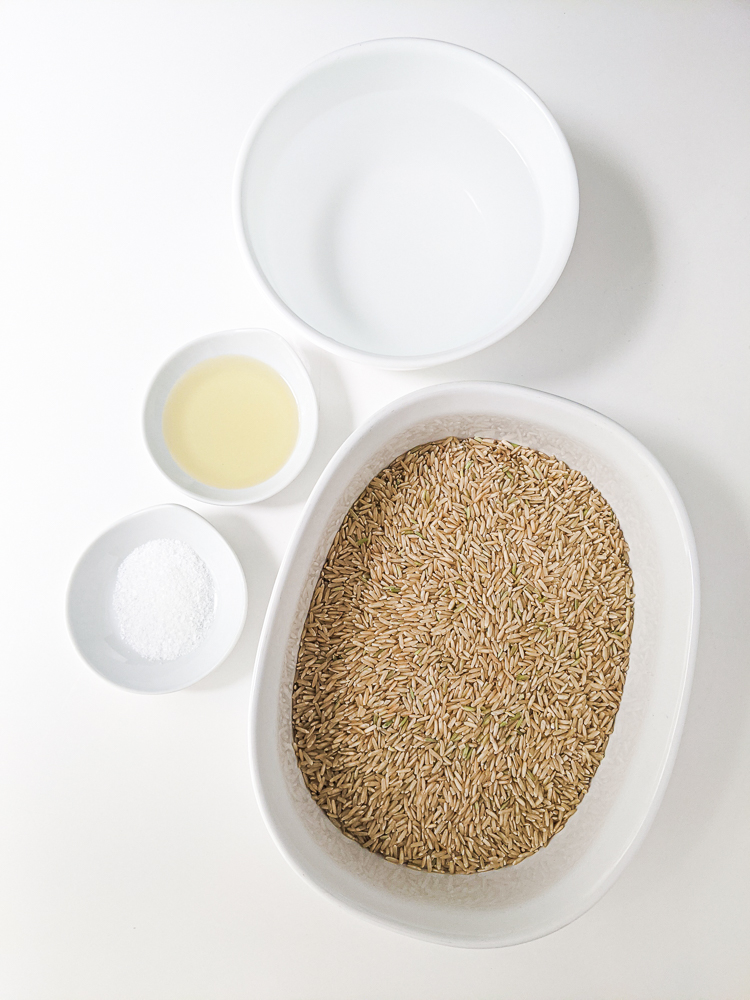
We then gather our four ingredients: long grain brown rice, water, avocado oil and kosher salt.

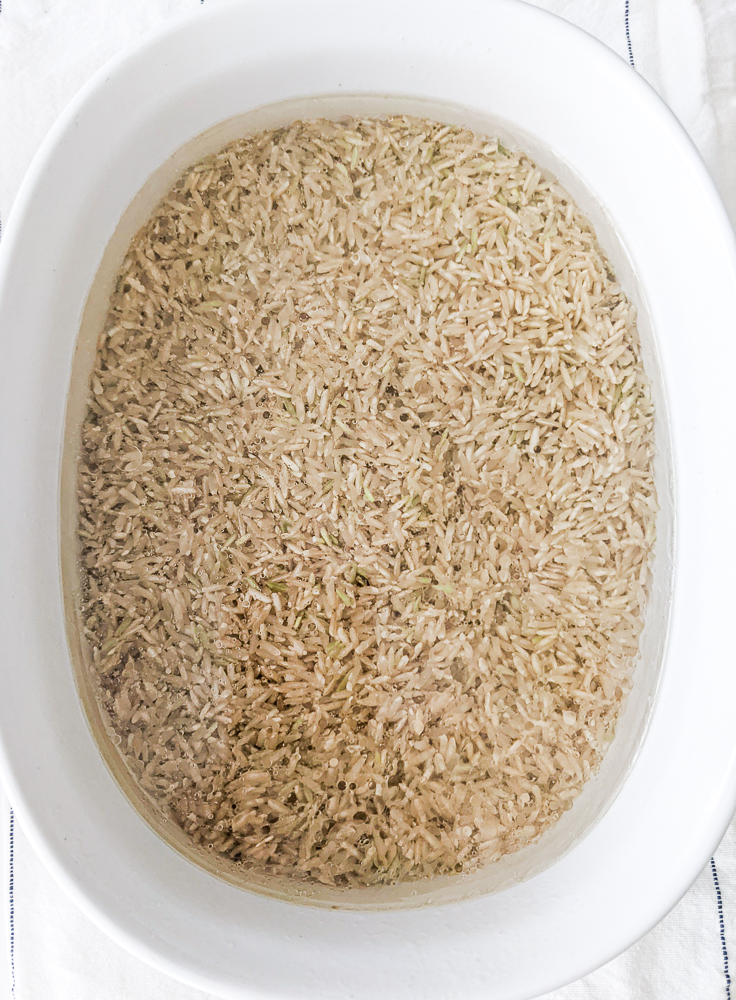
Woohoo! See how easy it is so far? I just put the brown rice in the casserole baking dish to have less dishes to wash. No, we don’t have to rinse the rice.

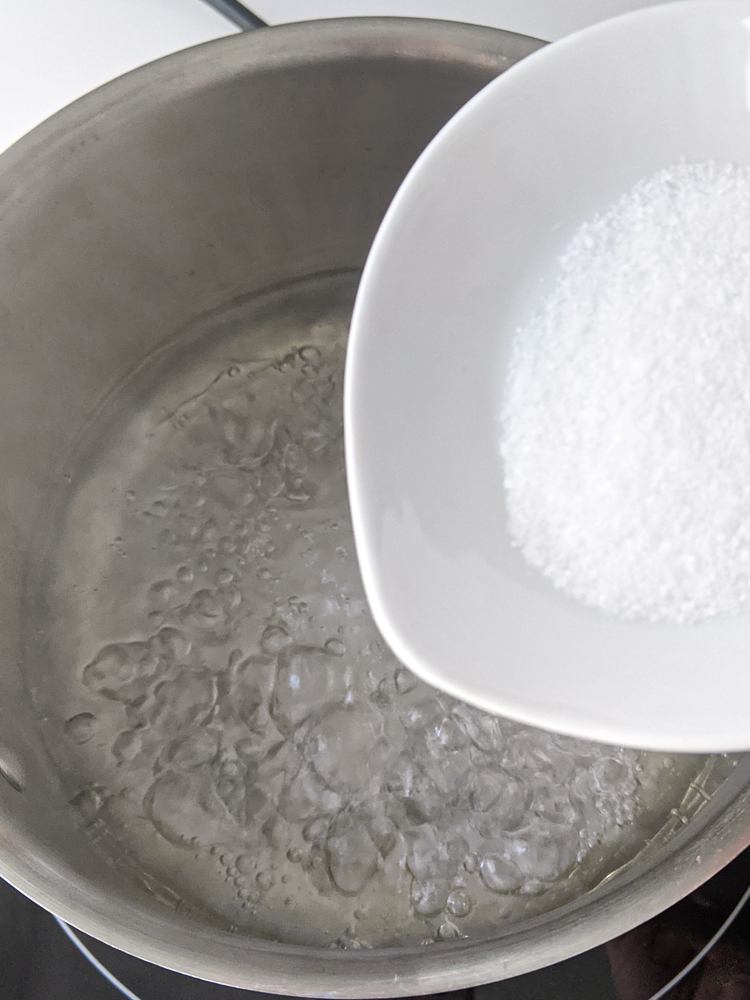
We bring the water and avocado oil to a boil in a medium saucepan and once it hits the boiling point, we add the salt, stir and turn off the heat. We immediately pour the water, salt and oil mix into the casserole dish.

That’s the reflection of my phone. I know.

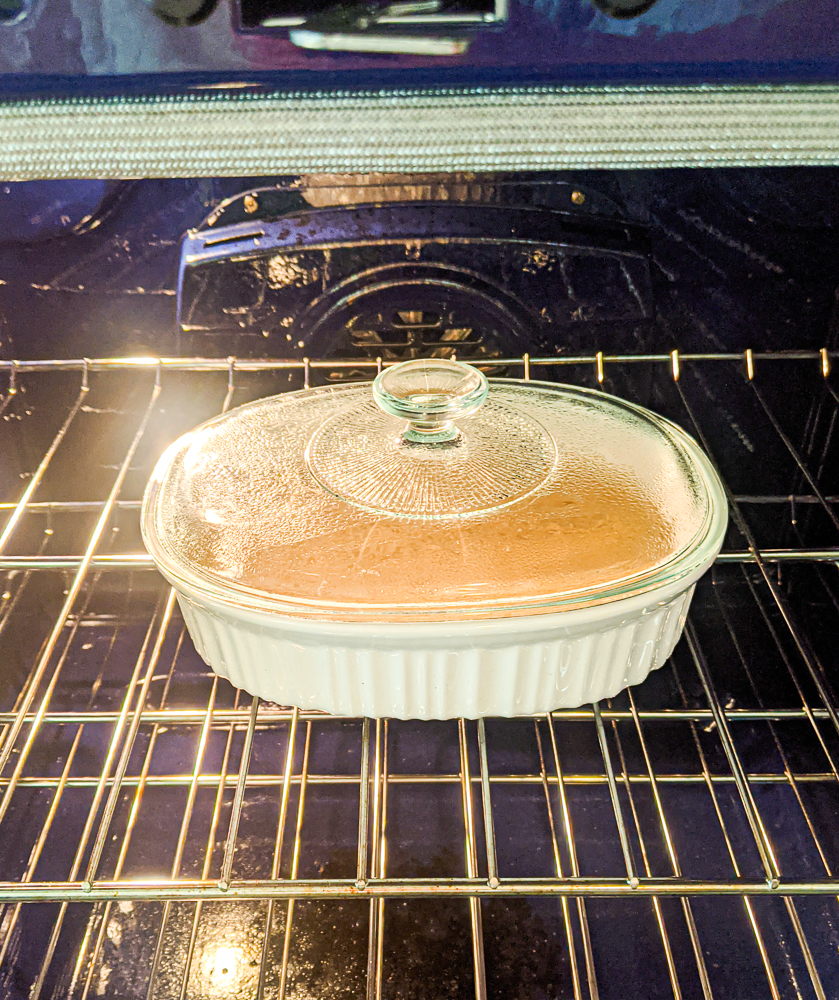
We then cover the casserole dish with its non-melting, glass lid (you can use foil but make sure it’s tight so it actually steams) and set it in the oven on the middle rack.

Bake for one hour or until the rice is nice and perfectly steamed. There should be slight crusting at the sides which is how I personally prefer but it shouldn’t be too dark.

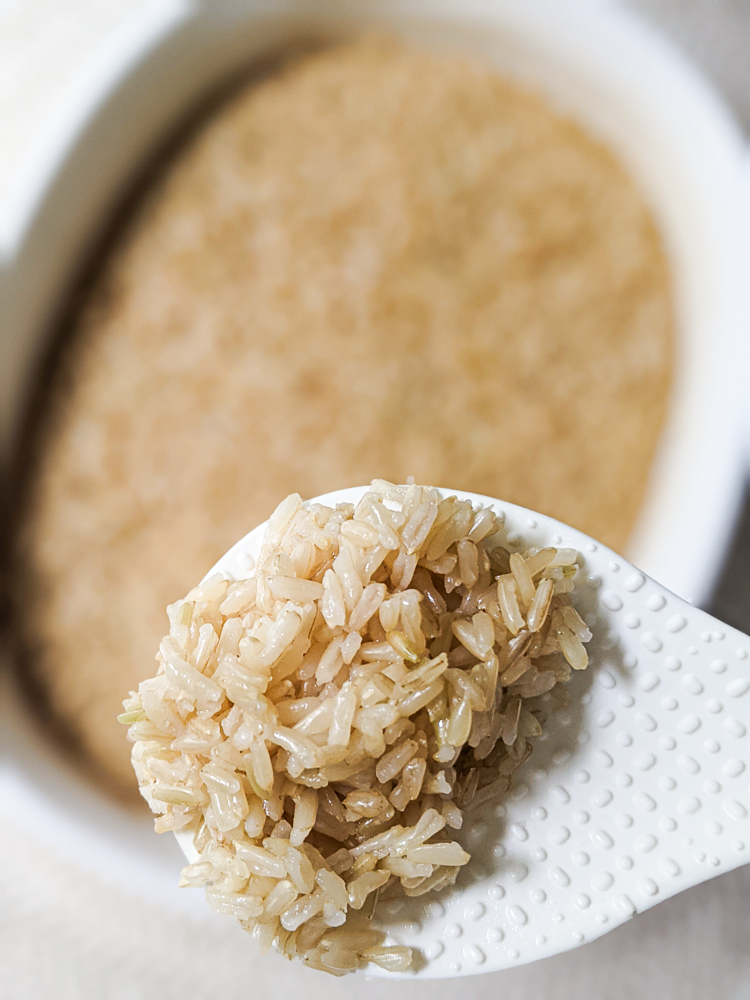
Make sure to fluff that rice!

Print

Perfect Oven Brown Rice

Print Recipe

How to make the best brown rice in practically half the time in the oven and without a rice cooker.

Modified and adapted from Cooks Illustrated

  • Author: Jan Carlisle @ Bakeroise
  • Prep Time: 5
  • Cook Time: 65
  • Total Time: 70 minutes

Ingredients

Scale
  • 1 ½ cups long-grain brown rice
  • 2 ⅓ cups water
  • 2 tablespoons avocado oil
  • 1 teaspoon kosher salt

Instructions

  1. Preheat the oven to 375°F and position oven rack in the middle.
  2. Evenly spread the long-grain brown rice in a casserole dish and set aside but within reach of the stove.
  3. Bring water and avocado oil to a boil in a medium saucepan. Once it gets to a boil, add the salt and mix with a wooden spoon.
  4. Turn off heat and pour the water mixture into the casserole dish and immediately cover.
  5. Place in oven and bake for one hour or until rice is perfectly cooked. It should be very slightly firm but mostly soft.
  6. When done, remove from oven and let sit for two minutes. Remove lid and fluff with a rice paddle. Then let sit for another two minutes before serving.

Notes

  1. The rice doesn’t have to be rinsed. Don’t do it.
  2. If your casserole dish doesn’t have a glass lid, use foil but make sure it’s tight enough so that it actually seals.
  3. The edges should have a slight crust which is how I prefer. I love crunchy rice edges.
  4. Best eaten fresh but store leftovers in an airtight container in the fridge. 
  5. To reheat, microwave with a tiny bit of water to steam in the microwave. Or heat in a pan on the stove with a little bit of water (maybe half a teaspoon and add at your discretion) until it’s warm/hot and at your desired texture.

Did you make this recipe?

Share a photo and tag us — we can’t wait to see what you’ve made!

How to Revive Green Onions

May 14, 2021

So we’ve all been there. We get some amazing green onions that we plan to use in some cooking but for one reason or the other, we end up not using them for a few days and because we didn’t initially store them properly, we find them where we last left them in the crisper looking sad and weak.

Yes I am human and sometimes I forget to store leafy herbs properly.

Green onions are so easy to store but coincidentally I receive a delivery while I’m already in the middle of another chore (ie. gardening while it’s still not too sunny out or doing some food photography while the natural light is still there). It happens often enough because I do about five hours of physical labor throughout the day

So I’m human and I can forget to do things correctly sometimes!

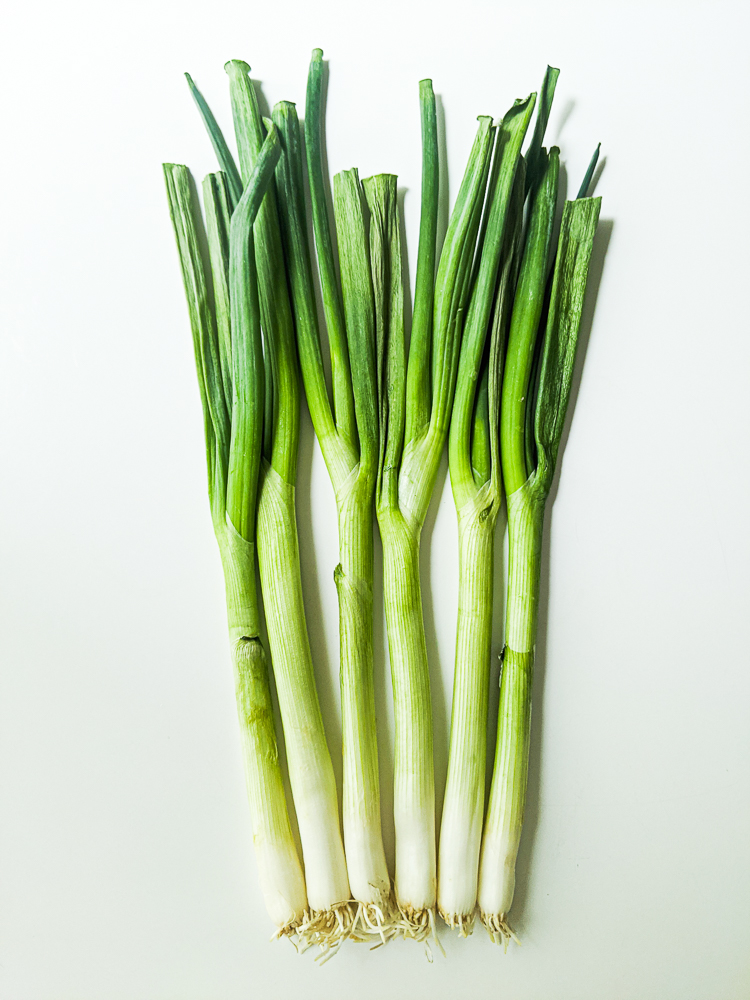
But when I forget to store green onions properly, they end up looking like this:

Sad, wilty limp green onions! Aw!

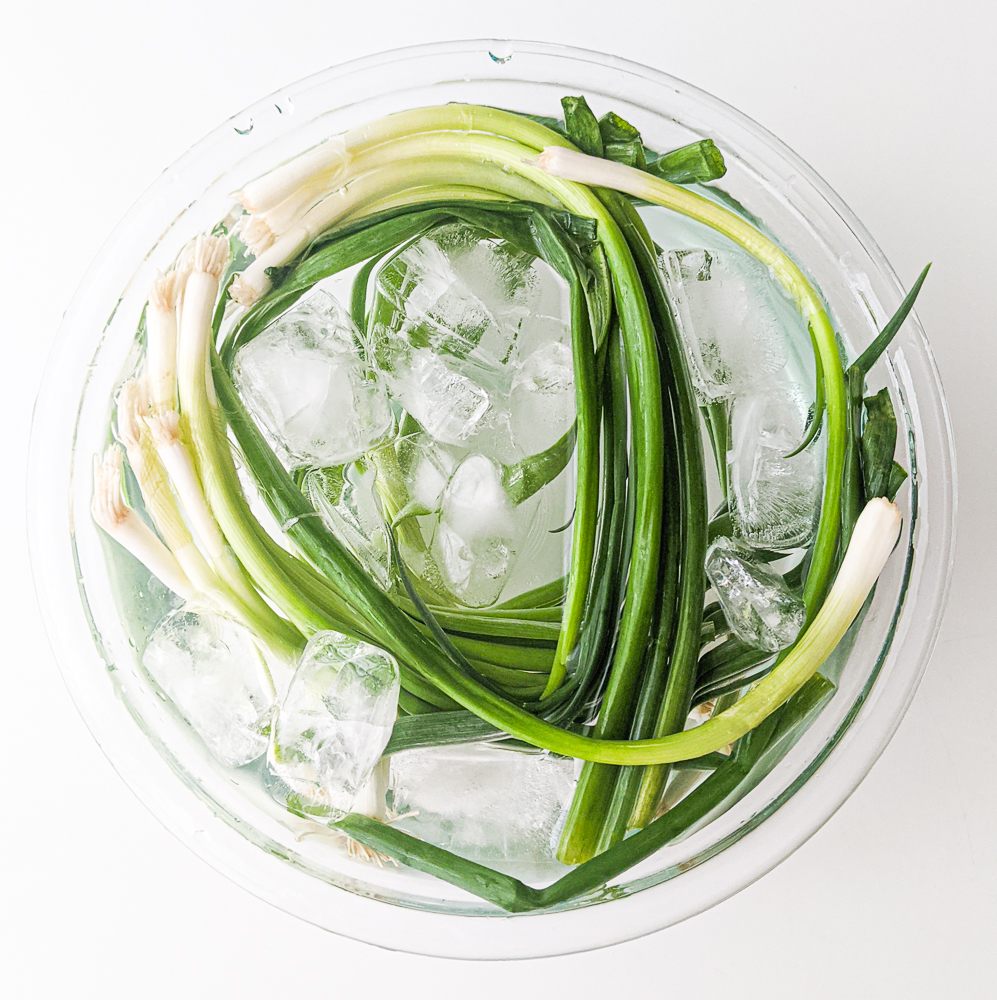
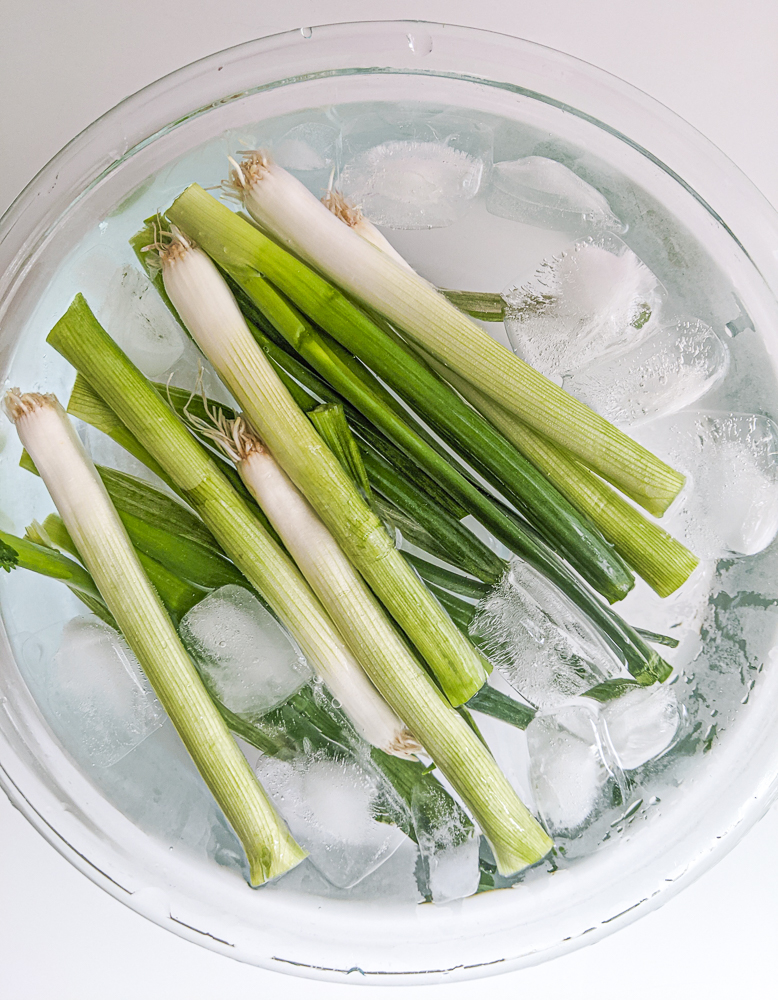
But have no fear. We simply take a bowl, place the onions in there and fill it to the top with ice water. And, no, I didn’t invent this. While most people I know already do this, I’m sharing with those who haven’t heard of this technique yet.

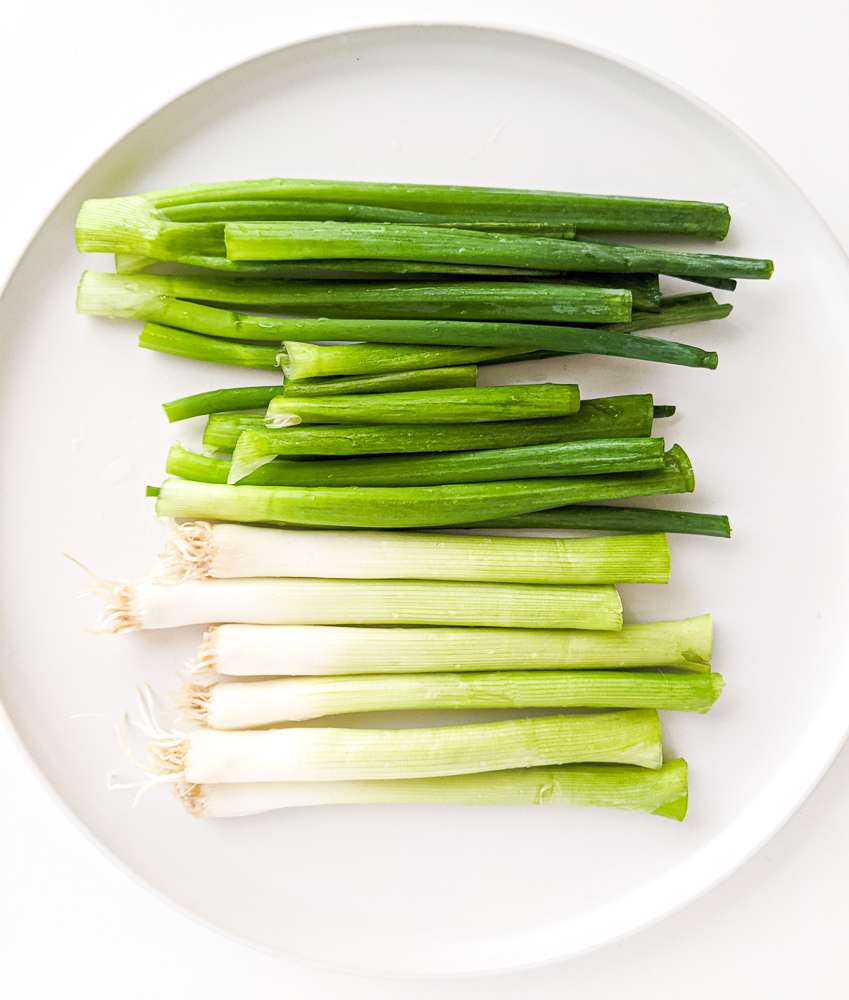
I usually try to leave the green onions in tact for their ice bath but sometimes I cut the green onions if they’re not limp enough to fold.

After about half an hour, they’re almost good as new! I remove any of the weird looking ends and remove anything that feels gummy. But everything else, I keep and use it as a topping on the many Asian dishes I make!

  • « Go to Previous Page
  • Page 1
  • Interim pages omitted …
  • Page 8
  • Page 9
  • Page 10
  • Page 11
  • Page 12
  • Interim pages omitted …
  • Page 16
  • Go to Next Page »

Primary Sidebar

Categories

Recent Recipes

  • Vegan Filipino Afritada Inspired Tomato Stew
  • Mulled Pear and Apple Cider
  • Bakery Style Chocolate Chip Cookies
  • Shortcut Vegan Bolognese
  • Kimchi Chickpea Bowl
  • Facebook
  • Twitter
  • Instagram
  • Pinterest

Calendar

June 2025
M T W T F S S
 1
2345678
9101112131415
16171819202122
23242526272829
30  
« Dec    

Archives

  • December 2023
  • November 2023
  • September 2023
  • September 2022
  • March 2022
  • February 2022
  • January 2022
  • December 2021
  • November 2021
  • October 2021
  • September 2021
  • August 2021
  • July 2021
  • June 2021
  • May 2021
  • April 2021
  • March 2021
  • February 2021
  • January 2021

Recent Comments

  • Jan on Vegan Longevity Noodles – Yī Miàn
  • Kim on Vegan Longevity Noodles – Yī Miàn
  • Jan on Vegan Mongolian Beef Inspired Soy Curls
  • Jenn P on Vegan Mongolian Beef Inspired Soy Curls
  • Jan on 10 Ingredient Vegan Siomai

Footer

↑ back to top

About

  • Privacy Policy
  • Disclaimer
  • Terms & Conditions

Newsletter

  • Sign Up! for emails and updates

Contact

  • Contact
  • FAQ

As an Amazon Associate I earn from qualifying purchases.

Copyright © 2020 Brunch Pro on the Brunch Pro Theme