• Skip to primary navigation
  • Skip to main content
  • Skip to primary sidebar
  • About
    • Contact
    • Disclaimer
    • Privacy Policy
    • Terms & Conditions
  • FAQ
  • Vegan Recipes
    • Free Fridge Food
    • Special Diets
      • Anti-Inflammatory
      • Gluten-Free
    • Type of Meal
      • Breakfast
      • Lunch
      • Dinner
      • Snacks
    • Culturally-Inspired
      • Argentinean-Inspired
      • Chinese-Inspired
        • Dim Sum
          • 12 Months of Dim Sum
        • Noodles
      • Filipino Food
      • Italian-Inspired
      • Japanese-Inspired
      • Korean-Inspired
      • Malaysian-Inspired
      • Mexican-Inspired
      • Neapolitan-Inspired
      • Pacific Northwest
      • Russian-Inspired
    • Baking
      • Bars
      • Breads
      • Cakes
      • Cookies
    • Holiday Recipes
      • Christmas
      • Friendsgiving
    • Season
      • Autumn
      • Winter
    • Condiments
  • SHOP
    • My Pantry Favorites
  • 12 Months of Dim Sum

Bakeroise

Vegan Filipino Afritada Inspired Tomato Stew

Mulled Pear and Apple Cider

Bakery Style Chocolate Chip Cookies

Shortcut Vegan Bolognese

Kimchi Chickpea Bowl

Hearty Kale and Chickpea Tomato Soup

Vegan Upside Down Pear Cake with Crushed Candy Caps

Golden Beets and Brown Rice Bowl

Vegan Longevity Noodles – Yī Miàn

Farewell, 2021. Hello, 2022!

12 Months of Dim Sum Project 2021

Fennel Cake with Lingonberry Sauce

How to Freeze Banana Slices

April 24, 2021

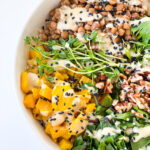
Today I am sharing a tutorial for something super simple and familiar: How to Freeze Bananas. Since berry season is coming up, there will be many smoothies and smoothie bowls around here. One thing we always rely on to sweeten up our smoothies are bananas.

This is my first “non-recipe” post that’s still related to recipes. Since I started to rely on my own blog to look up recipes when cooking or baking, I’ve noticed that I don’t really have a bank of internal references I can rely on.

For example, I’m constantly looking up how much flour weighs and I’ve started conversions on jars and bags to help me out. It’s kind of a pain so I’d rather have my own page instead of having to search for it each time. There are also specific topics I want to cover like: why I use soy so much, the racism behind MSG’s reputation, food storage guidelines, different types of food preservation, why a kitchen scale is a must, different types of coconut oil, etc.

I’m starting to learn as well that within the recipes I write, there might be parts of each recipe that aren’t clear to everyone. For example, not everyone knows what it means to brine or blanch something. I didn’t for the longest time because it just wasn’t a cooking method my family used growing up.

So I’d like to more mindful and inclusive about the recipes I put up by being able to link to internal reference pages.

I used to be awful about freezing produce for future use. I usually would just cut up whatever it was into a few pieces and stick them in a food storage bag and throw them in the freezer. Then I’d be annoyed that I’d take the bag out of frozen whatever and there’d be a huge chunk of whatever. That meant I’d have to cut again or even, gasp, thaw!

Obviously that method of freezing bananas was pointless. What was the point of cutting them up if I’d have to cut them up again?

So I had to learn how to freeze bananas. Once we got our first powerful blender ages ago, I knew I had to figure it out or else I’d tear my hear out. There are loads and loads of tutorials out there with different methods, but below is the best method for me!

To freeze bananas, I start off with ripe, spotty bananas.

I then slice the bananas and place them on a parchment paper-lined tray in rows like this.

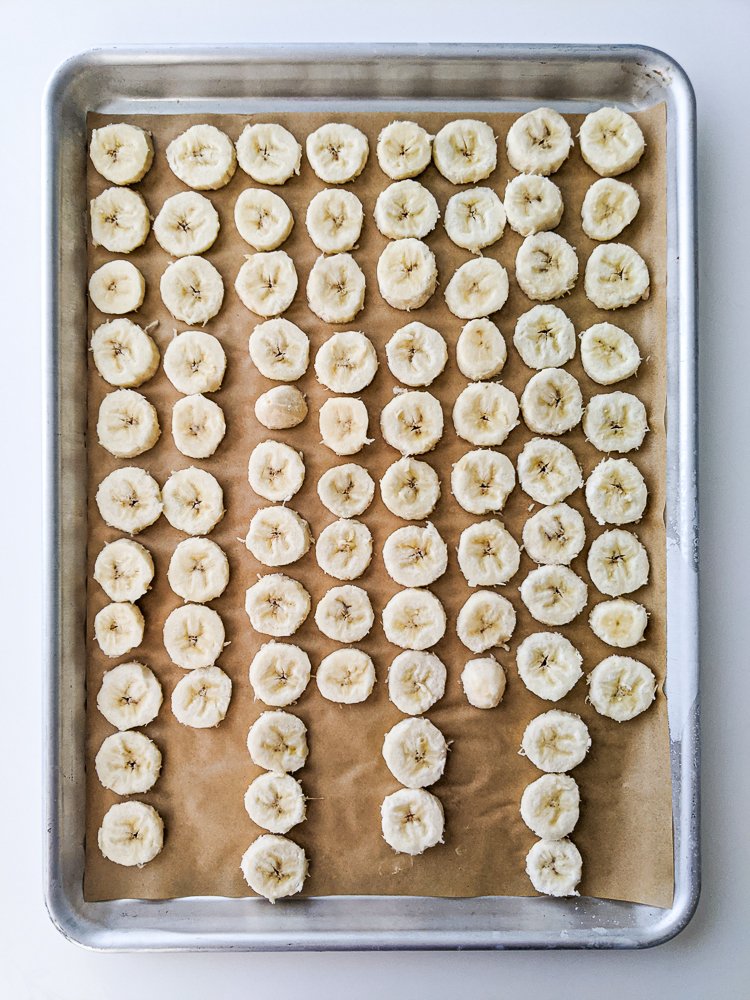
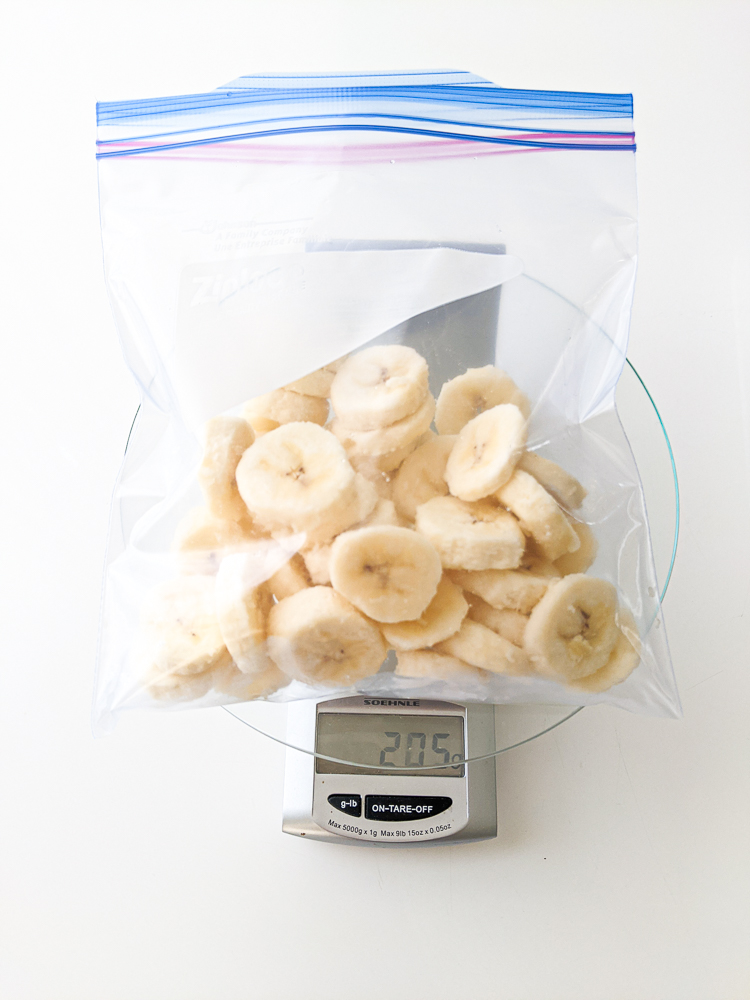
The first two rows (well columns based on the orientation of the photo) are one banana. So there are four bananas of about 20-24 slices each. I stick these in the freezer for at least a couple of hours and when I’m done, I bag them and then weigh them so I know how much one banana weighs.

You can also just weigh them in a bowl for more accuracy, before putting them in the bags, but the bag doesn’t weigh enough to make a difference, in my experience.

I place them in a freezer-friendly food storage bag and label them.

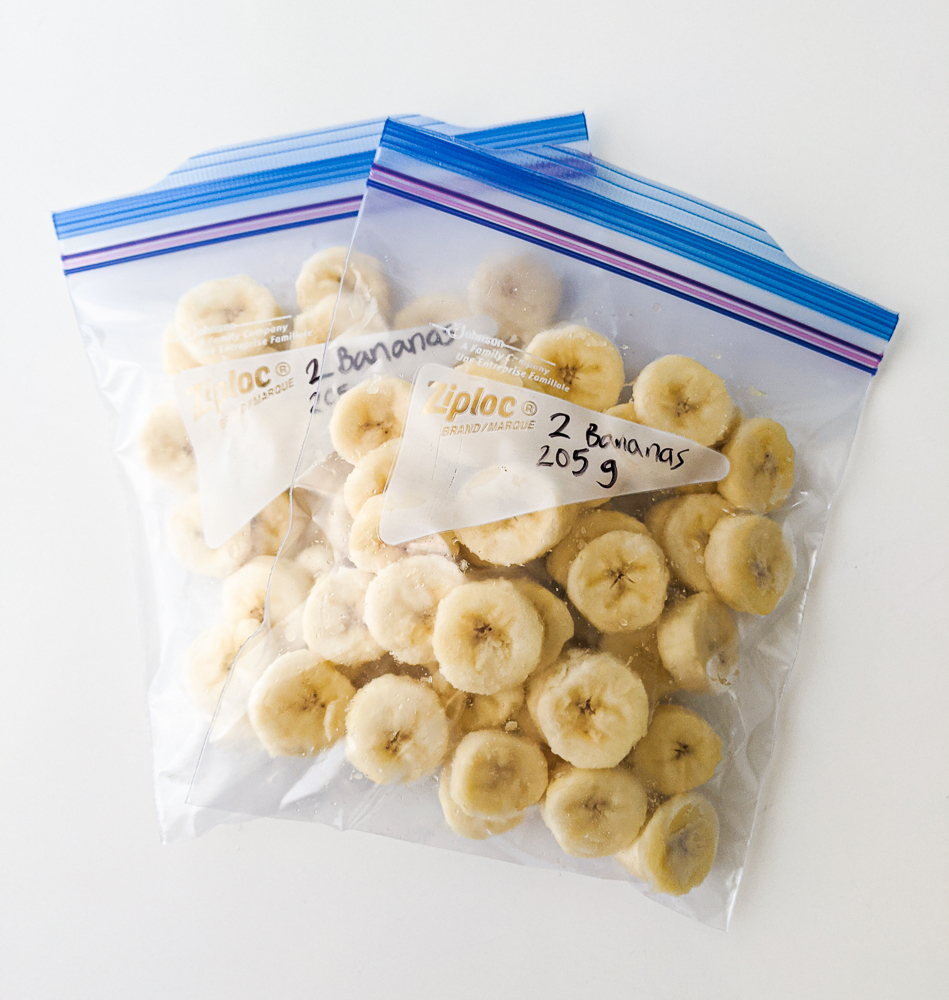
Below is what the sliced bananas look like after they’re frozen overnight.

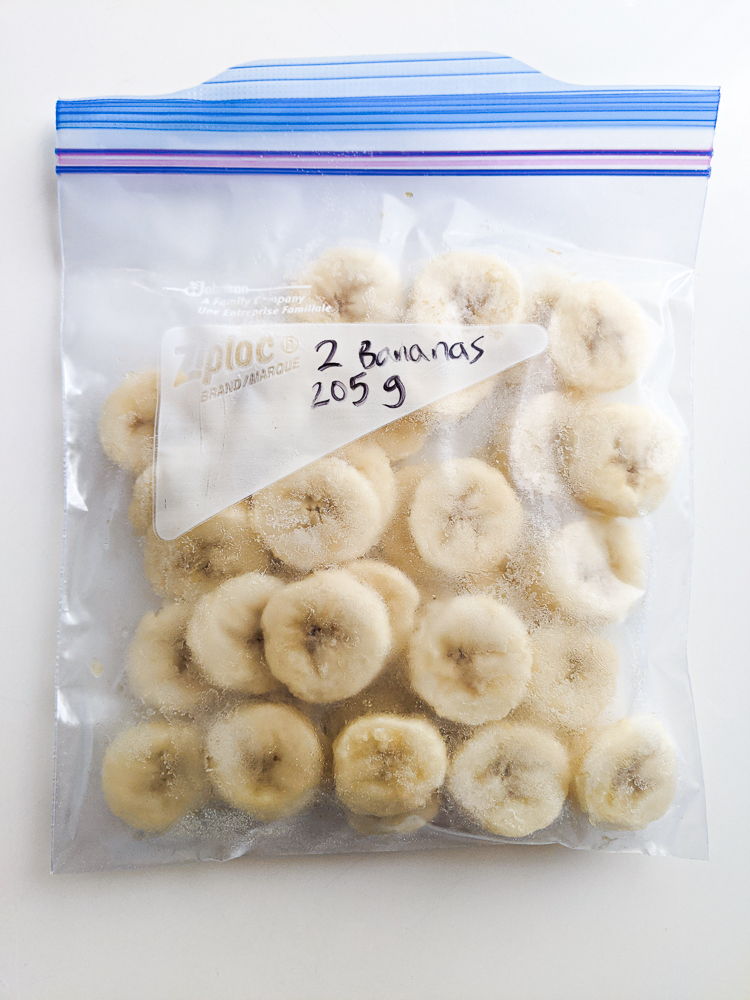
As you can see, I shook the bag around to show that the slices aren’t sticking to one another which means that removing them from the bag is easy peasy.

If I wanted to take out only one banana I would just take out the correct amount by weighing it and it should be around 102 grams. Simply pouring the banana slices into a small bowl on the kitchen scale can help with that.

Happy smoothie making!

Lentil and Spinach Empanadas Recipe

April 15, 2021

Affiliate Disclosure: As an Amazon Associate, I earn from qualifying purchases. Thank you for supporting Bakeroise.

Hi! I’m back with a simple, straightforward recipe for some amazing Lentil and Spinach Empanadas. They are crunchy on the outside and packed with garlicky flavor on the inside. I eat mine with homemade chimichurri sauce.

Empanadas are a type of dumpling that supposedly originated from Spain, when the Moors invaded. Apparently empanadas comes from the Spanish word “empanar” which means to wrap or coat in bread. They were supposedly a spin on the Arabic samosa. And don’t look at this as a form of laziness but there are so many spellings I’ve come across for what it’s called in Arabic from sambusak to samboosek to sambousek to Sambusa. If anyone knows, please clarify because there is a lot of conflicting information out there. I’m still trying to figure it out and I haven’t given up.

This lentil and spinach empanadas recipe is inspired by the Argentinian empanadas I ate regularly in Buenos Aires. Like I mentioned a few posts ago in my chimichurri recipe post, my partner and I spent a month there, eating our way through the city. I’ve tried different, regional variations of empanadas before but, hands down, the Argentinian ones are my favorite. I wasn’t vegan then, mind you. But even now, I can admit that those empanadas are hella good! From cheese and onion filling to ham and cheese or even beef, I could never get enough.

Obviously, I no longer can have the exact same fillings. But I can still have something nutritious and tasty by choosing my own plant-based fillings for my own empanadas. While I came up with the filling myself, I adapted the dough recipe from At The Immigrant’s Table. Thank you, Ksenia, for your awesome recipe and helpful tips!

So how do we make our lentil and spinach empanadas? Here we go!

We make our filling first and these are the ingredients we need (salt not pictured).

We’re going to roughly chop the yellow onion, roughly mince the onions, drain the lentils (reserving the liquid brine from the can to use as an egg wash substitute!). We rinse the lentils and set aside. That brown stuff on the upper left in the picture below is the lentil brine from the can. Don’t throw it out as you’re going to brush that over the empanadas later.

You cook the garlic and onions until translucent and, not quite caramelized, but a little golden. Obviously it takes 45 minutes to caramelize onions and I’m not going to lie about that. So the onions and garlic are cooked for maybe 5-10 minutes at medium heat since olive oil has a high smoke point. Then we add the frozen spinach and cover the pan to steam for 6-8 minutes. For some people it might take 8-10 minutes. The goal is to just cook the spinach so that it’s not all icy and to actually get flavored with the garlic and onion. Throughout this whole process we are salting to taste. This is not a bland dish.

We add the drained and rinsed lentils last. Since these are canned lentils, they’re already cooked so we’re pretty much just mixing it at medium heat for a minute.

The above is how it should look. Again, salt to taste. I can’t emphasize this enough. Add fresh ground peppercorn if you’d like but salting to taste is mandatory.

Once the filling is done, we store it in the fridge, covered, until we need it to assemble. Yes, you can make it in advance but like most foods, this is only good 3-4 days in the fridge so if you want to make it way in advance, then you will have to freeze it after making it. It’s good in the freezer for 2-3 months. You’d remove and thaw in the fridge the day before and/or warm on the stove (not necessarily cooking it) but just having it on low in a pan or pot on low until it’s at room temperature. We wouldn’t want it hot since we’re going to be handling it.

We start working on our dough. We take the flour, salt, cold water and vegetable oil and mix it until we get a nice, springy dough. I use my mixer for this as it takes maybe 6-8 minutes on medium to get it to all come together as it’s a little oily (not too oily). Then we take a ping pong or golf ball-sized piece of dough and roll it into a ball, then flatten it to start rolling. Then I do quarter turns the same way I do with my jiaozi wrappers and roll until I get wannabe discs that are 4-5 inches long in diameter.

Here’s my wonderful wannabe circular wrapper. Hahaha.

Then we take a heaping tablespoon of filling and add it to the dough and shape it slightly so that it’s a log.

Then we fold over one side to another and seal. The easy way for me sometimes is to just take a fork and flatten the edges with the tines to seal.

However I personally prefer folding over the flaps and taking the ends of each flap and joining them together like this:

They’re just so cute and pudgy! We then assemble everything we can and bake in batches.

We place as much as we can on the tray and then use the lentil brine to brush over all of them with a pastry brush like this:

They don’t expand so no worries about space. They just need to not be touching. Bake at 400°F for 30-40 minutes or until it is a beautiful golden color.

They are pretty much done at this point and you can serve them right away. And, of course, serve with chimichurri.

Print

Lentil and Spinach Empanadas

Print Recipe

Vegan empanadas with lentil and spinach recipe – Argentinian Inspired

  • Author: Jan Carlisle @ Bakeroise
  • Prep Time: 45
  • Cook Time: 60 + 15 minutes rest time
  • Total Time: 1 hour, 25 minutes
  • Yield: 22–24 empanadas 1x

Ingredients

Scale

Filling

  • One yellow onion, roughly diced
  • One head of garlic, roughly minced
  • 10 ounces of frozen chopped spinach
  • 1 14 oz can of cooked lentils
  • Kosher salt to taste
  • Fresh ground black peppercorn to taste (optional but I love it!)

Dough:

  • 6 cups or 720 grams of  all-purpose flour
  • 1 teaspoon kosher salt
  • 1 ¼  cups or 9 ounces vegetable oil (see notes when scaling up)
  • 1 cup or 8 ounces cold water – I use tap water since our tap water is good

Instructions

  1. Open the can of cooked lentils and drain the liquid into a small bowl. This lentil brine will be used to brush onto the empanadas for shine. Set aside.
  2. Rinse the lentils and set aside.
  3. Heat a large frying pan over medium heat and cover with olive oil when hot. When the oil is hot, add the garlic and onions. Cook at this heat for 10-15 minutes or until lightly golden and the edges of the garlic bits start turning brown.
  4. Add the spinach and cover the pan to steam for 6-8 minutes. Uncover the pan and cook on medium for another 3-4 minutes or until all the spinach is no longer solid from fridge. Salt to taste.
  5. Add lentils and cook for just one more minute since the canned lentils are already cooked. We’re just mixing it at this point. Salt to taste.
  6. Turn off heat and let sit to cool and then store, covered, in fridge until needed.
  7. To make dough, combine flour, salt, vegetable oil and cold water in a bowl and mix thoroughly until you get a springy and smooth dough. I use a mixer and have it on medium for about 6-8 minutes.
  8. When done, cover the mixing bowl with cling wrap and refrigerate the dough for 15 minutes.
  9. Preheat oven to 400°F.
  10. Remove both the dough and filling from the fridge. The dough will be slightly greasy but you will not need to flour your surface because of this.
  11. Start rolling out your dough by taking ping pong ball or golf ball-sized dough from the bowl and shaping it into a round ball ball. Flatten it with the side of your fist and roll it out to make a wrapper. It should be about 5 inches diameter and doesn’t need to be a perfect circle. The dough should not be super thin or thick but it should be slightly thicker in the middle.
  12. When you have your empanada wrapper ready, take a tablespoon of the filling and put in the center. Shape it slightly into a log. Fold over one size of the empanada over the other side so you have somewhat of a half moon. Seal by pressing down on the edges of the flaps where there is no filling. Then fold the flap over to and take the ends of the now combined flaps and combine them to fully secure.
  13. When done, put on a silicone mat or parchment paper-lined tray. Continue assembling empanadas until they can all go on the tray without touching.
  14. When the tray is full of empanadas, brush each empanada on the tops and sides with the lentil brine. Bake for 30-40 minutes or until a golden brown.
  15. Serve with chimichurri sauce.

Equipment

Image of 1 tablespoon cookie scoop

1 tablespoon cookie scoop

Buy Now →

stand mixer

Buy Now →

Notes

  • When scaling up: The empanada dough portion of the recipe scales differently due to the oil. If you scale up, reduce the scaled adjustment of the oil by 25%.
  • Make sure to salt to taste.
  • Assembled but raw empanadas are good in the freezer for 2-3 months.
  • I don’t have any advice on reheating because I don’t eat leftover empanadas. But this looks like a good guide.

Did you make this recipe?

Share a photo and tag us — we can’t wait to see what you’ve made!

Crispy Golden Fried Tofu

April 7, 2021

Affiliate Disclosure: As an Amazon Associate, I earn from qualifying purchases. Thank you for supporting Bakeroise.

Hello! Can’t believe it’s April already. My first entry for this month of April is my Crispy Golden Fried Tofu Recipe for my 12 Months of Dim Sum Project, the project where I learn about and how to make a specific dim sum dish each month! So far we have Vegan Siomai for January, Instant Pot Congee for February and Vegan Potstickers for March.

I love crispy golden fried tofu! It’s easy to make and you can season it however you want. I like mine relatively plain with just salt and ground black pepper after frying because I enjoy it with dipping sauce that tends to be acidic and spicy so it comes out to a perfect balance.

I started really getting into fried tofu when I adopted my vegan diet. I used to always order pepper salted fish from a local Chinese restaurant here that I mentioned in my Instant Pot Congee post. When we weren’t ordering from the secret menu, we would order pepper salted fish all the time.

The pepper salted fish had a perfectly seasoned golden coating that was just right with the hot, steaming white rice. When I became a vegan, I switched to ordering the pepper salted eggplant instead which was actually quite similar. While I still like the pepper salted eggplant today, I have started to favor the tofu version because I rely on it for protein.

Fried tofu is called zhà dòufu in Mandarin. Say it with me: ja! – dough! – foo

This crispy golden fried tofu recipe I am sharing today was adapted from Kirbie’s Cravings. I’m grateful she had her recipe up because she had some wonderful tips!

So this is how we make our crispy golden fried tofu:

We start off with two blocks of tofu and drain the heck out of them by placing them in between two plates with a heavy object on top.

While that sits for half an hour, we’re going to combine the cornstarch, white pepper and teaspoon of salt in a bowl and mix.

We then add that cornstarch mix to a large freezer bag and set it aside. When it’s been 20 minutes of draining, we discard the rest of the water in the sink again and then use paper towels to wrap snugly around the tofu blocks like this:

It should be dry like this and we start cutting at this point from left to right (or right to left depending on your dominant hand) so that there’s a top half and bottom half for each block.

Then we continue cutting until we get smaller blocks like below. I pretty much just cut each section in half until the blocks are of the desired size. No worries if it isn’t perfect.

Once we have our 1-inch-ish blocks, we add them to the food storage bag that has the cornstarch mix waiting.

So this next part is important: We are not going to shake roughly or even really shake much at all. Tofu is still tofu – it’s delicate even if it’s firm. Or maybe I’m just a wuss.

To evenly coat the tofu we are going to spread the tofu inside by gently moving the tofu back and forth until we create only one layer of it within the bag. Then we carefully flip the bag over a few times in different directions until all the pieces are evenly coated.

Once we have our evenly coated pieces, we just fry them up until all the sides are a light golden brown. We try to not overcrowd the pan.

Tip: Use a flipper to scrape any sticky, crispy bottoms. To actually flip the tofu though to cook all sides, use chopsticks as they allow for more control than tongs do.

When the tofu is done, drain on paper towels for about a minute before moving to a serving plate.

Season to taste with kosher salt and freshly ground black pepper. Serve with a dipping sauce with a 3:2:1 ratio of light soy sauce, distilled white vinegar and chili oil.

Enjoy!

12 Months of Dim Sum Recipes:

January 2021: Vegan Siomai

February 2021: Instant Pot Congee

March 2021: Vegan Potstickers with Ginger Scallion Tofu

April 2021: Crispy Golden Fried Tofu

May 2021: Toasted Cumin Scallion Pancakes

June 2021: Gluten-Free Asian Dipping Sauce

July 2021: Sweet Red Bean Paste and Perfectly Golden Sesame Balls

Print

Crispy Golden Fried Tofu

Print Recipe

This is an easy recipe for crispy, golden fried tofu that requires only 7 ingredients. Naturally vegan.

  • Author: Jan Carlisle @ Bakeroise
  • Prep Time: 30
  • Cook Time: 10
  • Total Time: 40
  • Yield: 4 servings 1x
  • Category: Dim Sum
  • Method: Pan-fry
  • Cuisine: Chinese
  • Diet: Vegan

Ingredients

Scale
  • Vegetable oil for frying
  • 24 ounces firm tofu (or two 12 oz tofu blocks)
  • ¾  cup cornstarch
  • 1 ½  tsp ground white pepper
  • 1 tsp kosher salt
  • kosher salt for seasoning
  • fresh ground black peppercorn for seasoning

Instructions

  1. Drain the tofu by placing both blocks on top of a large plate with another large plate on top. With one hand under the bottom plate and the other hand over the top, secure the tofu in place and tilt the plates with the tofu in between to drain the excess water into the sink. Set the plates and tofu down with the second plate still on top.
  2. Place a heavy object such as a cast iron pan or a heavy pot on top to squeeze out more water. Let sit for half an hour.
  3. While the tofu is draining, add the cornstarch, salt and white pepper to the bowl and mix thoroughly with a whisk. Add to a large, sealable food storage bag.
  4. When the tofu has reached 20 minutes of draining in the plate, discard the newly extracted water in the sink again. Then use a paper towel to snugly wrap around each block of tofu to remove the even more water. This takes less than a minute. When removing the paper towels, the tofu should be significantly drier than before.
  5. Cut each block of tofu into squares, one at a time. Start by slicing through the middle sideways so that you have a top half and bottom half. Then cut down in the middle lengthwise and then again in the middle crosswise. Then keep cutting the bigger pieces into halves until you get about 1” almost-cubes. It won’t be perfect but that’s all right. Close to perfect is just right!
  6. Add the tofu pieces to the food storage bag with the cornstarch mix. Spread out the tofu by gently shaking the bag so that there is only one layer inside. Then flip the bag carefully a few times until all the pieces are coated with the tofu.
  7. Heat a large frying pan to medium high heat and when hot, add vegetable oil.
  8. When oil is hot, add tofu pieces to the pan in one layer. Make sure to not crowd the pan. You will fry in batches.
  9. Let sit for 2-3 minutes until the bottom is golden. It might stick so use a spatula to remove it. But to flip over, use chopsticks. Tongs tend to be too big for these pieces and chopsticks allow for more control. Fry the pieces until all the sides are a light golden color.
  10. Drain the tofu on a paper towel on a plate for a minute before moving to a serving plate. Season with salt and fresh ground black pepper to taste.
  11. Serve with a simple dipping sauce such as a 3:2:1 mix of light soy sauce, white vinegar and chili oil!

Notes

  1. Do not save because fried leftovers are gross. Sorry.

Did you make this recipe?

Share a photo and tag us — we can’t wait to see what you’ve made!

Protect Asian lives. Black lives matter. Free Palestine.

Some other tofu recipes:

Vegan Lemon Bars with Silken Tofu

Vegan Potstickers with Ginger Scallion Tofu

Vegan Potstickers Inspired – Dumplings with Ginger Scallion Tofu

March 31, 2021

Affiliate Disclosure: As an Amazon Associate, I earn from qualifying purchases. Thank you for supporting Bakeroise.

Hi, friends! It’s been an incredible hectic and emotionally draining month. Please remember to read my call-to-action for this month. I should really be doing this for every entry. My goodness.

Hi! It’s the last day of March and I’m finally getting my March post out for my 12 Months of Dim Sum Project. Today I bring you an inspired recipe for vegan potstickers with ginger scallion tofu. Jiaozi means dumplings and it’s the word our family uses for dumplings so I will refer to dumplings as Jiaozi throughout this post.

The actual Chinese term though for potstickers is “guōtiē” which I am still working on perfecting my pronunciation. For SEO purposes, I’m using the term “potstickers” throughout this post instead of the real term instead (boo, I know) in hopes that people see this post and learn what the real term is. If anything on here is inaccurate, please don’t hesitate to let me know. I appreciate honest and constructive feedback.

I’ve been eating jiaozi (say it with me: ji-yaw-zuh) in Oakland’s Chinatown since I was a little kid and it is a comfort food for me – also it’s just darn good.

As I practiced learning how to roll out the dough for the vegan potstickers (from this tutorial from Hsiao-Ching Chou, the author of Chinese Soul Food), I remembered that the process of making proper jiaozi is something that can’t be rushed. I was intimidated in my vegan siomai post to make the dumpling dough and show it off on this blog but I finally got over my fear of being judged because it’s really not about me but instead being transparent and letting it be known that this truly does take a lot of work.

Making vegan potstickers, or any kind of jiaozi really, from scratch is a labor intensive and time consuming project. Unlike the less complicated, more hands-off Instant Pot congee recipe I have on my site, this recipe way more involved. Honor our elders extra who labor to make these good meals for us – from homemade noodles to homemade tortillas to homemade injera bread to, well, homemade everything. It just takes hella work to put good food on the table and honestly this stuff is way too inexpensive and the people who make this food need to be paid more as it’s hard work. Hard is subjective but I think most people don’t cook from scratch for that very reason regardless of their own reasoning (lack of time, lack of priorities, lack of confidence, lack of knowledge – all reasons of mine at one point or another).

So like I mentioned above, dumplings in Chinese are known as “jiaozi”. However, they apparently used to be referred to as “jiao’er” which means “tender ears” because legend has it that the dumplings were apparently used to treat frostbitten ears. If you’ve heard of the word “gyoza” in Japanese cooking for virtually the same dish, it’s because it was taken from the word “jiaozi”. Japanese soldiers brought recipes back to Japan after World War II and adapted it. The difference tends to be that Chinese dumplings are made with handmade dough whereas Japanese gyoza tends to be made with thinner, machine-made wrappers.

Even though I like both, I favor the Chinese jiaozi over the Japanese gyoza! There’s just nothing better than thicker homemade dough that fries up nicely! You’ll notice it in my dough below.

So here is how we make it! The dough recipe is adapted (and thickened) from Red House Spice. Thank you, Wei!

We start off with the flour and the dough and mix it with chopsticks until there is no more loose flour.

When it’s shaggy like the picture below start kneading.

Knead until we get this consistency:

We cover it up with a damp cloth and let it sit for an hour while we get our filling together.

To get our filling together, here is what what we need (soy sauce and tapioca flour not pictured):

We are going to roughly chop the ginger, slice the scallions, crush the tofu with our hands and roughly chop the spinach. We also need to measure out one teaspoon of the shaoxing wine and ¼ cup of the oil. We will thicken everything with a tablespoon of tapioca flour.

We’re going to cook the scallions, baby spinach and ginger with the half a tablespoon of the soy sauce and the shaoxing wine. Then after the ginger’s aroma is intense and scallions are wilted and limp, we add the crumbled tofu and tapioca flour, mix and cook for another several minutes. When it’s done it should look like this:

We will let the filling sit in the fridge to cool down until the dough is done resting. When the dough is done resting, we start working on our wrappers.

We take our big ball of dough and cut it in half. Then we roll it out into a log and then make a loop so that even the ends are even. Then we cut it again, then slice pieces off that look like this:

I like my pieces bigger, like almost the size of a ping pong ball, because of the way it fries and makes for bigger dumplings. We shape each piece into a ball and roll it out by turning it quarter of the way clockwise (or counterclockwise) with one hand, and rolling the dough from almost the back all the way to the front. We are going to do 2-3 revolutions which is about 8-12 quarter rotations. So it’s quarter turn, roll, quarter turn, roll, and so on. My wrappers here are slightly thick but I personally like them that way. You can make yours thinner so long as you can still wrap the dough without it tearing.

It takes a lot to get the perfect circle for the vegan pot stickers and I haven’t even gotten there yet. It will be a long time before I do but I will practice, practice and practice more. Also, try not to get too much flour on your wrappers like I did! I had them there so they wouldn’t stick and got excited.

Thick wrappers! We start assembling by taking each wrapper and adding filling to it using a tablespoon size cookie scoop. I love cookie scoops because it releases the filling easily. No need to take another spoon to get it all out.

Now, there are different ways to fold it but I did the simple turnover fold where you take one half of the wrapper, fold it over the filling so that the top edges are aligned with the bottom edges. Press down on the edges so that it’s sealed so that filling doesn’t leak when it is frying. If you want to take it a step further and have it look even color, take each end of the dumpling and stick them together so it looks like this:

There are different ways to fold and I learned many ways from Red House Spice, a blog by Wei with amazing Chinese recipes, including many vegan ones.

I had a harder time with some methods of folding but here are the jiaozi, soon-to-be vegan potstickers, that I made that aren’t totally embarrassing:

We take these and fry them up until they are golden and once they’re done, we drain any excess oil on paper towels. Then we move onto a plate to serve:

These vegan can be served with any kind of dipping sauce. I like to make a simple dipping sauce with a 3:2:1 ratio of light soy sauce, white distilled vinegar and chili oil. I add in some sliced scallions and/or sesame seeds depending on the mood. But you can eat it with whatever dipping sauce you like.

Enjoy!

12 Months of Dim Sum Recipes:

January 2021: Vegan Siomai

February 2021: Instant Pot Congee

March 2021: Vegan Potstickers with Ginger Scallion Tofu

April 2021: Crispy Golden Fried Tofu

May 2021: Toasted Cumin Scallion Pancakes

June 2021: Gluten-Free Asian Dipping Sauce

July 2021: Sweet Red Bean Paste and Perfectly Golden Sesame Balls

Print

Vegan Potstickers with Ginger Scallion Tofu

Print Recipe

This is a recipe for crispy, vegan potstickers with ginger scallion tofu. 

  • Author: Jan Carlisle @ Bakeroise
  • Prep Time: 45
  • Cook Time: 15 + 1 hour of dough rest time
  • Total Time: 1 hour, 45 minutes
  • Yield: 16–18 dumplings 1x
  • Category: Dim Sum
  • Method: Pan-fry
  • Cuisine: Chinese
  • Diet: Vegan

Ingredients

Scale

Dough:

  • 2 cups or 250g all-purpose flour
  • ⅓ cup 

Filling:

  • ¼ cup of sesame oil
  • 2 ½ cups loosely packed or one huge handful of baby spinach, roughly chopped
  • 1 bunch scallion, both green and white parts sliced and divided
  • 20 grams of rinsed and unpeeled ginger, roughly chopped
  • 1 teaspoon of organic shaoxing wine
  • 1 ½ tablespoon of soy sauce, divided plus more to taste
  • 1 tablespoon of tapioca flour
  • 12 oz of tofu, crumbled

Instructions

  1. Mix the flour and water in a large bowl and mix until there is no more loose flour. Knead into a ball until soft and smooth “like an earlobe” like some Chinese cooks say. If it’s too sticky, add a little bit more flour. If it’s too dry, add a tiny bit of water. Do it little by little.  When you get a nice dough, cover the dough ball with a damp towel in the bowl and let rest for an hour.
  2. While the dough is resting, bring a large pan to medium-heat and cover the bottom of pan with sesame oil.
  3. When the oil is hot, add the scallions, chopped ginger, baby spinach, half a tablespoon of soy sauce and shaoxing wine to the pan and cook for 3-5 or until the ginger is lightly browned and very aromatic.
  4. Add the tofu, remaining soy sauce and tapioca flour to the pan and cook everything for 3-5 minutes until the tofu’s water cooks down a little bit and the crumbles can just barely stick together.
  5. Let sit in the fridge until the dough is ready.
  6. When the dough is ready, cut the ball in half. Keep the other half under the damp towel and roll the other one out into a log and turn into a loop to evenly distribute the dough evenly (so that the ends aren’t super thin and have the same thickness as the middle). When done, turn cut the loop using a dough cutter so that it’s a log again. Then cut out pieces the size of a ping pong ball.
  7. Shape each piece one at a time into a ball. Keep the other pieces covered until you use them so they don’t dry out.
  8. Roll out each piece of dough using a small rolling pin from ¾ the way back of the dough to front so that the middle of the dough is slightly thicker. Use the dominant hand to roll once and non-dominant hand to quarter turn the dough. Do 2-3 revolutions (so 8-12 quarter rotations) until you get a nice flat dough. The circle should be 4-5 inches in diameter. You assemble each dumpling one at a time.
  9. Take a tablespoon of the filling and place on top of the dough. I like to use a cookie scoop to release the filling easily. Shape it so that it’s slightly more of a log shape.
  10. Wrap the dumping by folding one side over so that you have a half circle…looks like a half moon. Seal the dumpling by pinching down on the edges so that there are no holes anywhere. If you are using store-bought wrappers, you will want to wet the edges with water to help make them be more adhesive. Repeat until you assemble all of the dumplings. You will have a little bit of filling left over.
  11. Bring a large frying pan so medium-high heat and fill the bottom with vegetable oil up to half an inch. When hot, add six dumplings and fry until a light golden brown. Usually a few minutes on all sides. Caution against going too brown as it still continues to took a little as it’s removed from the oil.
  12. When done, place on a paper towel lined plate to catch any excess oil.
  13. Serve with your favorite dumpling dipping sauce (I like soy sauce with a splash of white vinegar and chili oil) and enjoy!

Equipment

Image of small rolling pin

small rolling pin

Buy Now →
Image of 1 tablespoon cookie scoop

1 tablespoon cookie scoop

Buy Now →

Notes

  1. Homemade dough is better than store-bought dough. But if you’re in a pinch, try to get gyoza or wonton wrappers at the store. Make sure they are vegan.
  2. If making in advance: Freeze uncooked potstickers for 2-3 months. To freeze, spread out on a silicone or parchment paper-lined sheet pan and stick in the freezer for 1 hour. Then move to a proper storage container. I generally like to use an old yogurt tub or a ziplock bag where I can get the air out even more. Don’t forget to label with the food and date made. 

Did you make this recipe?

Share a photo and tag us — we can’t wait to see what you’ve made!

Call to Action:

Protect Asian lives. If you see something, do something! Say something! Just make moves. Y’all already know to support Asian businesses and donate to orgs that combat anti-hate violence. But, for the love of all that is good, if you see something – say something. Do something. Never close the door on a person who was victimized.

Here is a five-hour film series on Asian Americans on PBS. If you don’t know anything about oppression of Asian-Americans, please take the time to watch these films. Also, we’re not a monolithic group. Keep that in mind.

And also: Start learning how to say people’s names right so we don’t have to accommodate anyone. Especially Chinese names. I’m Filipina-American and my name is hella plain but I have a Hispanic maiden name. Growing up, people butchered my last name because they were hella basic and monolingual white people who just thought everyone should speak English.

HAHAHAHA as someone who speaks multiple Asian and European languages I have so many thoughts on that. I’m not even close to fluent at most of the languages I know but at least I make the effort to learn a little more than the basics. I may be rusty as my retention is poor because of lack of practice but I at least TRY to understand how names should be pronounced.

We shouldn’t have to change our names to accommodate others. It’s one thing for me to call someone “Dah-veed” even though their name is “Day-vid”. I don’t feel that bad about that but I do try to correct myself if the person makes it known it’s a problem. But I would never try to anglicize someone else’s name to make it easier on myself. That’s just downright disrespectful.

  • « Go to Previous Page
  • Page 1
  • Interim pages omitted …
  • Page 10
  • Page 11
  • Page 12
  • Page 13
  • Page 14
  • Interim pages omitted …
  • Page 16
  • Go to Next Page »

Primary Sidebar

Categories

Recent Recipes

  • Vegan Filipino Afritada Inspired Tomato Stew
  • Mulled Pear and Apple Cider
  • Bakery Style Chocolate Chip Cookies
  • Shortcut Vegan Bolognese
  • Kimchi Chickpea Bowl
  • Facebook
  • Twitter
  • Instagram
  • Pinterest

Calendar

June 2025
M T W T F S S
 1
2345678
9101112131415
16171819202122
23242526272829
30  
« Dec    

Archives

  • December 2023
  • November 2023
  • September 2023
  • September 2022
  • March 2022
  • February 2022
  • January 2022
  • December 2021
  • November 2021
  • October 2021
  • September 2021
  • August 2021
  • July 2021
  • June 2021
  • May 2021
  • April 2021
  • March 2021
  • February 2021
  • January 2021

Recent Comments

  • Jan on Vegan Longevity Noodles – Yī Miàn
  • Kim on Vegan Longevity Noodles – Yī Miàn
  • Jan on Vegan Mongolian Beef Inspired Soy Curls
  • Jenn P on Vegan Mongolian Beef Inspired Soy Curls
  • Jan on 10 Ingredient Vegan Siomai

Footer

↑ back to top

About

  • Privacy Policy
  • Disclaimer
  • Terms & Conditions

Newsletter

  • Sign Up! for emails and updates

Contact

  • Contact
  • FAQ

As an Amazon Associate I earn from qualifying purchases.

Copyright © 2020 Brunch Pro on the Brunch Pro Theme