• Skip to primary navigation
  • Skip to main content
  • Skip to primary sidebar
  • About
    • Contact
    • Disclaimer
    • Privacy Policy
    • Terms & Conditions
  • FAQ
  • Vegan Recipes
    • Free Fridge Food
    • Special Diets
      • Anti-Inflammatory
      • Gluten-Free
    • Type of Meal
      • Breakfast
      • Lunch
      • Dinner
      • Snacks
    • Culturally-Inspired
      • Argentinean-Inspired
      • Chinese-Inspired
        • Dim Sum
          • 12 Months of Dim Sum
        • Noodles
      • Filipino Food
      • Italian-Inspired
      • Japanese-Inspired
      • Korean-Inspired
      • Malaysian-Inspired
      • Mexican-Inspired
      • Neapolitan-Inspired
      • Pacific Northwest
      • Russian-Inspired
    • Baking
      • Bars
      • Breads
      • Cakes
      • Cookies
    • Holiday Recipes
      • Christmas
      • Friendsgiving
    • Season
      • Autumn
      • Winter
    • Condiments
  • SHOP
    • My Pantry Favorites
  • 12 Months of Dim Sum

Bakeroise

Vegan Filipino Afritada Inspired Tomato Stew

Mulled Pear and Apple Cider

Bakery Style Chocolate Chip Cookies

Shortcut Vegan Bolognese

Kimchi Chickpea Bowl

Hearty Kale and Chickpea Tomato Soup

Vegan Upside Down Pear Cake with Crushed Candy Caps

Golden Beets and Brown Rice Bowl

Vegan Longevity Noodles – Yī Miàn

Farewell, 2021. Hello, 2022!

12 Months of Dim Sum Project 2021

Fennel Cake with Lingonberry Sauce

Purple Winter Soup with Kale and Chickpeas

February 20, 2021

Affiliate Disclosure: As an Amazon Associate, I earn from qualifying purchases. Thank you for supporting Bakeroise.

Hi! I’m back! And today I bring you my Vegan Purple Winter Soup with Kale and Chickpeas. It’s super easy to make and honestly all you have to do is make sure to follow the instructions and salt to taste throughout the whole process. The purple color comes from the rainbow carrots. So don’t substitute or else you’ll lose that beautiful purple color!

But before we get into it, I had to share with y’all my past week. It was…really freaking awful. Aside from moments of fun with friends in the snow, it was pretty stressful. I was actually pretty lucky to get my last blog post up because after our first power outage, there was no going back.

I know my blog is still in its infancy but it’s been the longest I’ve been away. I went for a while without electricity this past week and when I did have electricity, the blog was obviously the last thing on my mind. I mean…we don’t have a gas stove (and have no intention of getting one) and we had absolutely no heat when the power was out. Stuff needed to be addressed.

Now we’re actually looking into some major home repairs to beef up our home but without incurring any extra debt. Ever since the pandemic, we’ve had stuff go wrong and we’ve been so hesitant to have people in our home. The only time we had people come in was when our range finally gave out at the beginning and after months of using a tabletop induction stove, we finally gave in and ordered an induction range. And one of the delivery workers had their mask falling off, nostrils exposed. Yikes!

I digress.

I had multiple drafts of this post, with a more detailed, personal experience of the past week in Portland, Oregon but I think it’s best left for my own private journal. But I do write a little about it below. I had what I think was a sugar-induced migraine yesterday so today I’m still somewhat recovering. So apologies for any errors in this post or the recipe itself…since I’m still somewhat out of it!

Oregon went through an awful winter storm. Not as bad as Texas obviously but it was beyond crappy. What started out as fun in the snow became increasingly stressful as our area experienced multiple power outages which left people without heat and food. We even had a live power line incident in our immediate neighborhood that could’ve really hurt people and I’m immensely grateful that everyone is still alive.

Fortunately, everyone had water (from what I know) and our hardships were only a fraction as to what people in Texas are still reeling from. I ended up donating to multiple Texas nonprofits and a mutual aid fund before anything in Oregon because it was clear that they were suffering way more than we were.

Without giving into toxic positivity, I gotta say that I’m incredibly thankful to all my neighbors who came out for one another this past week. From offering their front porches with electricity hookups to gas camping stoves to straight up food. Not only that but donating to people’s Venmo accounts so they could look out for houseless people and animals. I did that too but honestly I did it kind of late for the reason I stated above. I’ve had neighbors give me 5 propane gas canisters and my next door neighbors offer to heat up water for us. I can’t even list how many people helped us the past week and with how many things because it’s just going to overwhelm me (with gratitude too of course). And yes, I did help neighbors with stuff but I don’t feel the need to list everything I did because, well, I’m honestly just physically and mentally exhausted.

I have a good community. All in all, I’m okay. My family is okay. My community is okay.

So…onto the recipe.

This Vegan Purple Winter Soup with Kale and Chickpeas is perfect for winter. It’s hearty, easy to make and has complex flavors. It’s super easy though so I’m not writing an incredibly detailed, step-by-step narrative since we have our recipe card at the bottom. As usual, it’s important to salt to taste throughout the whole process.

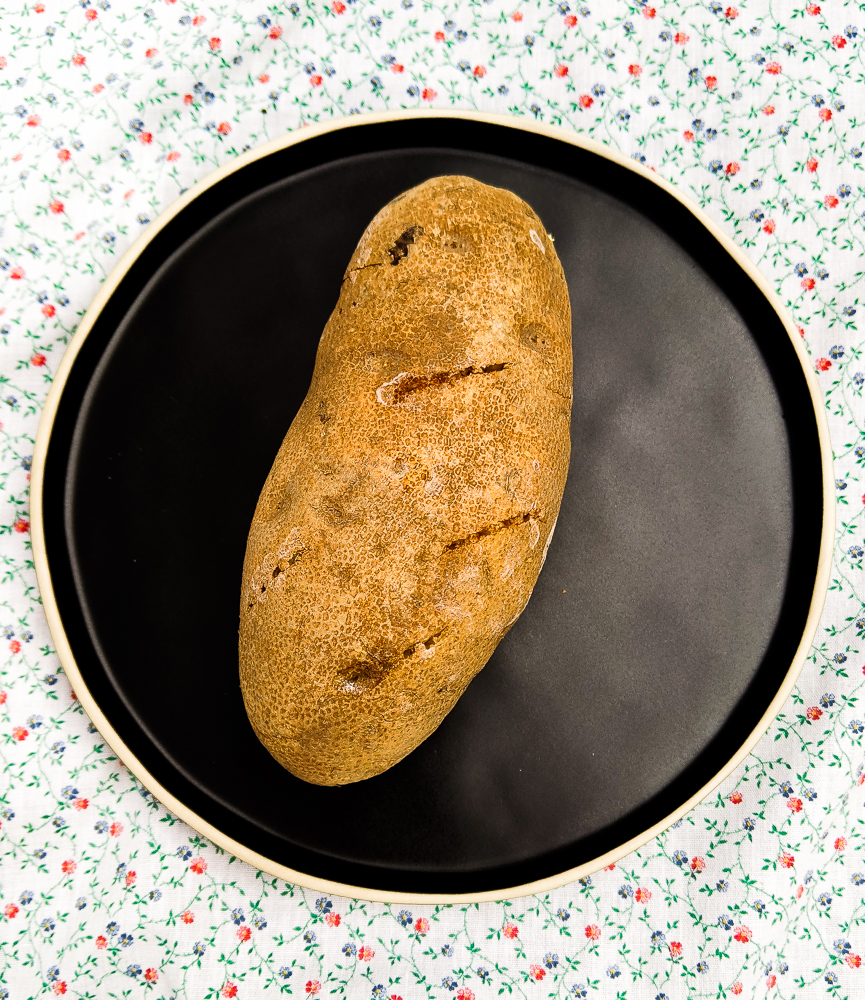
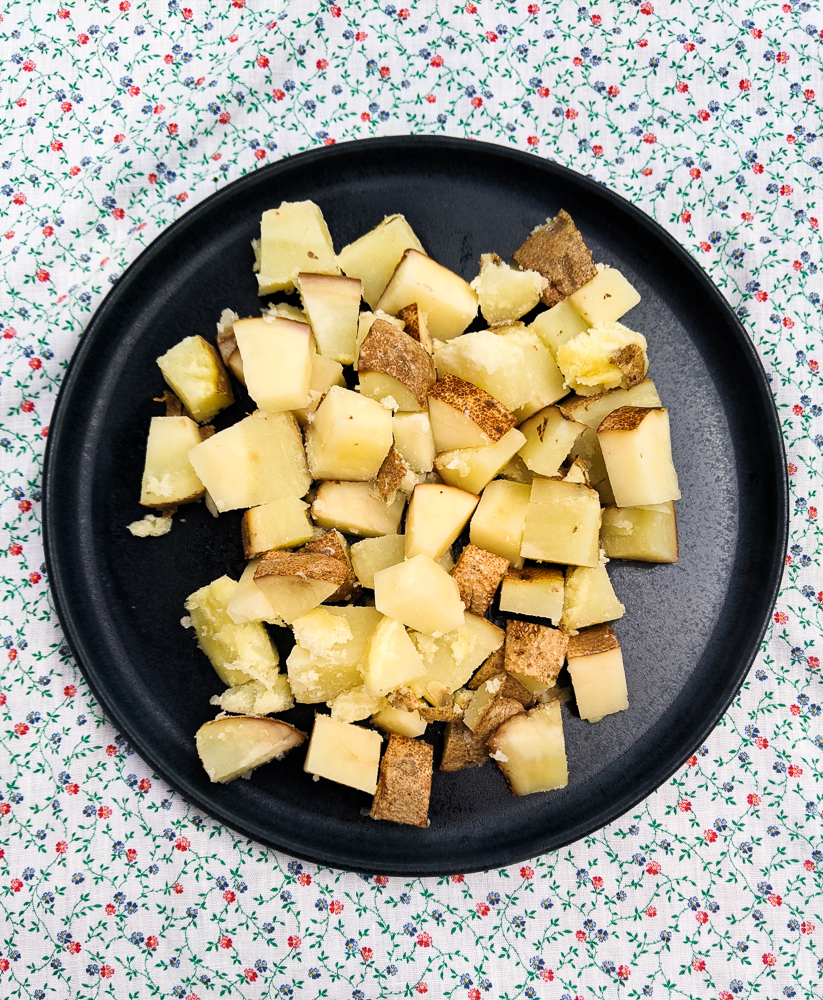
We start off by parcooking our single russet potato by poking holes around the potato and microwaving it for 3-4 minutes. Peeling is optional and I generally don’t peel because I’m a busy mom and I have stuff to do.

While the potato is cooking, we prep our other vegetables by rinsing anything that needs to be rinsed and then peeling and cutting accordingly.

When we’re done prepping the other vegetables, the potato should have cooled down in the microwave by then. We roughly chop the potato in one inch cubes.

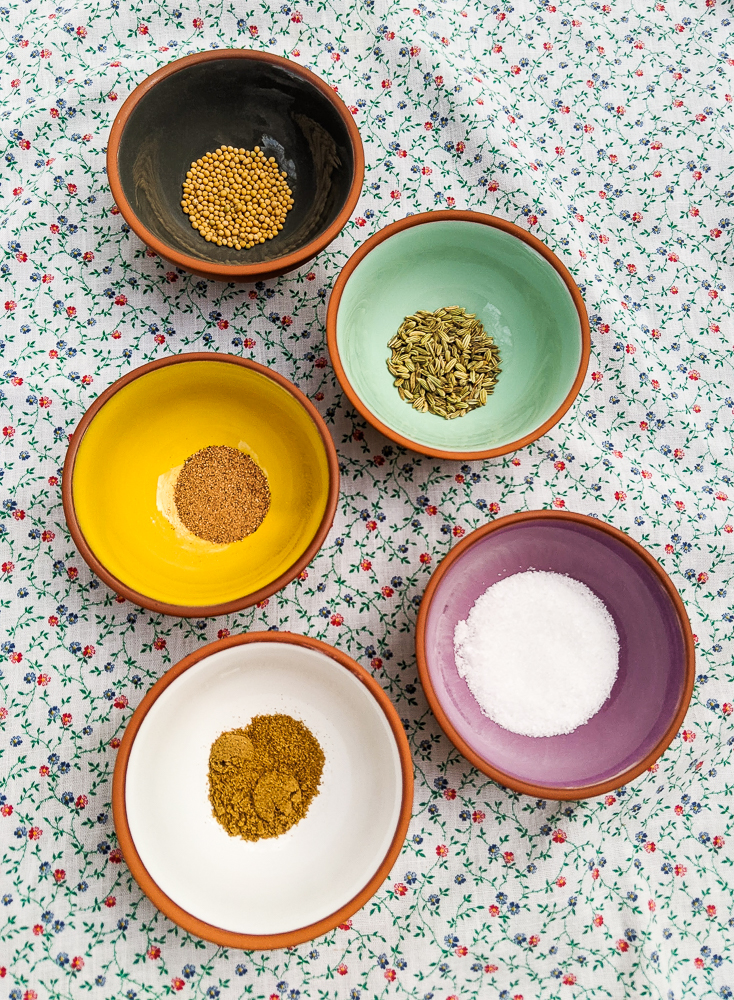
We start to cook the whole spices first and then the aromatics and ground spices at separate times. Then everything else is added gradually.

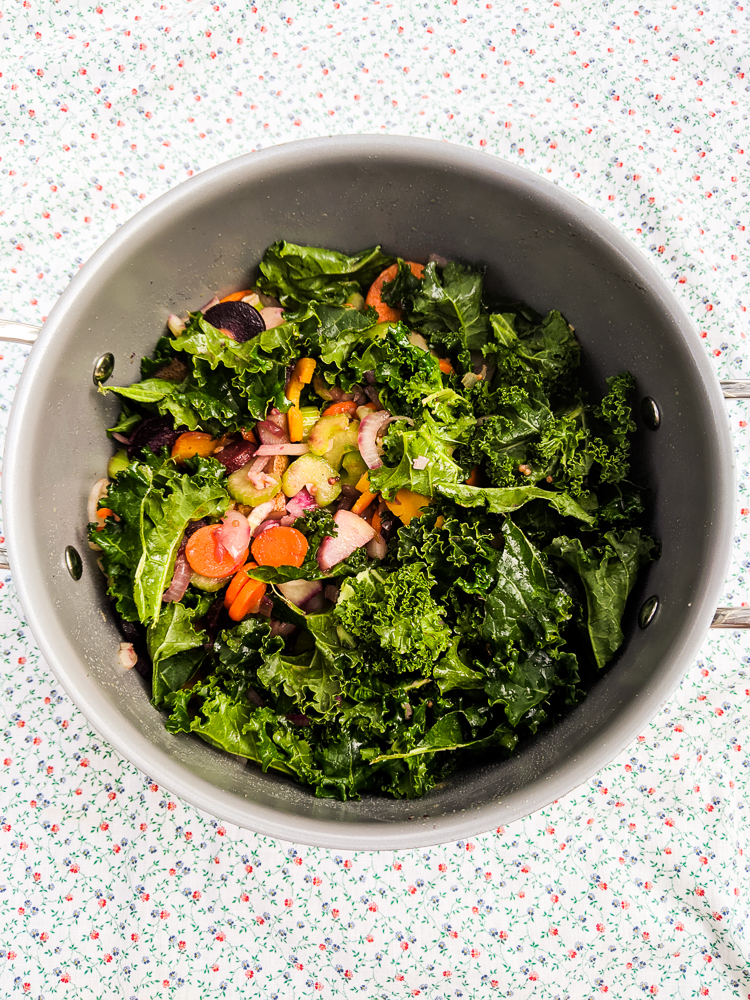
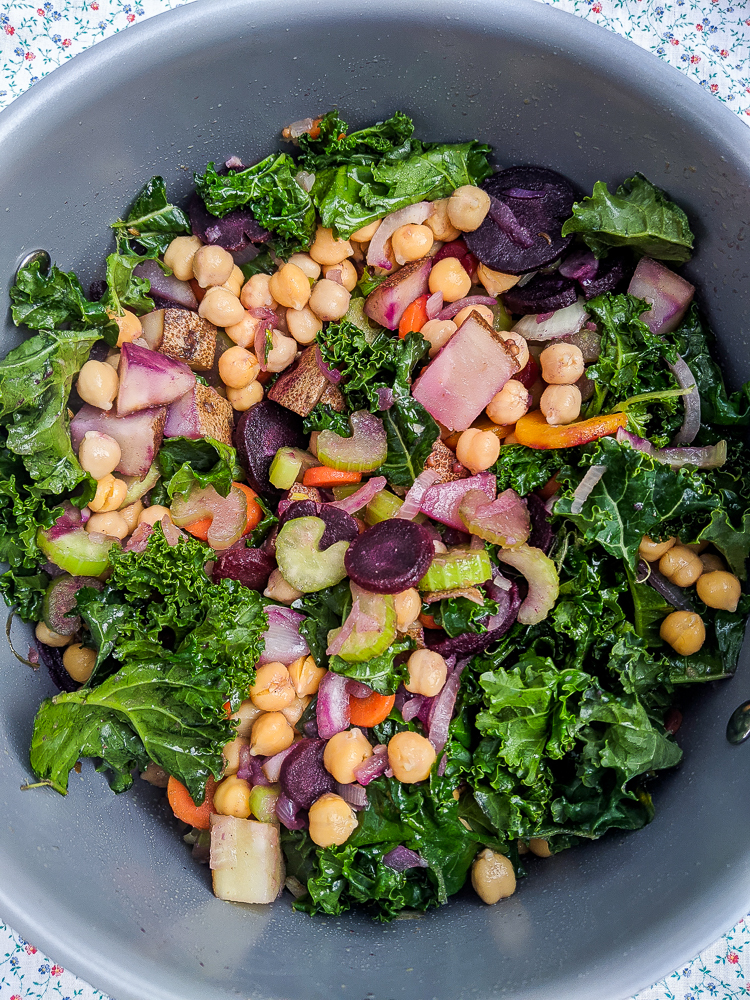
We add the carrots, potatoes and the kale gradually and it should look like this:

Next part is adding the legumes. For our legumes we use good ol’ canned, organic chickpeas.

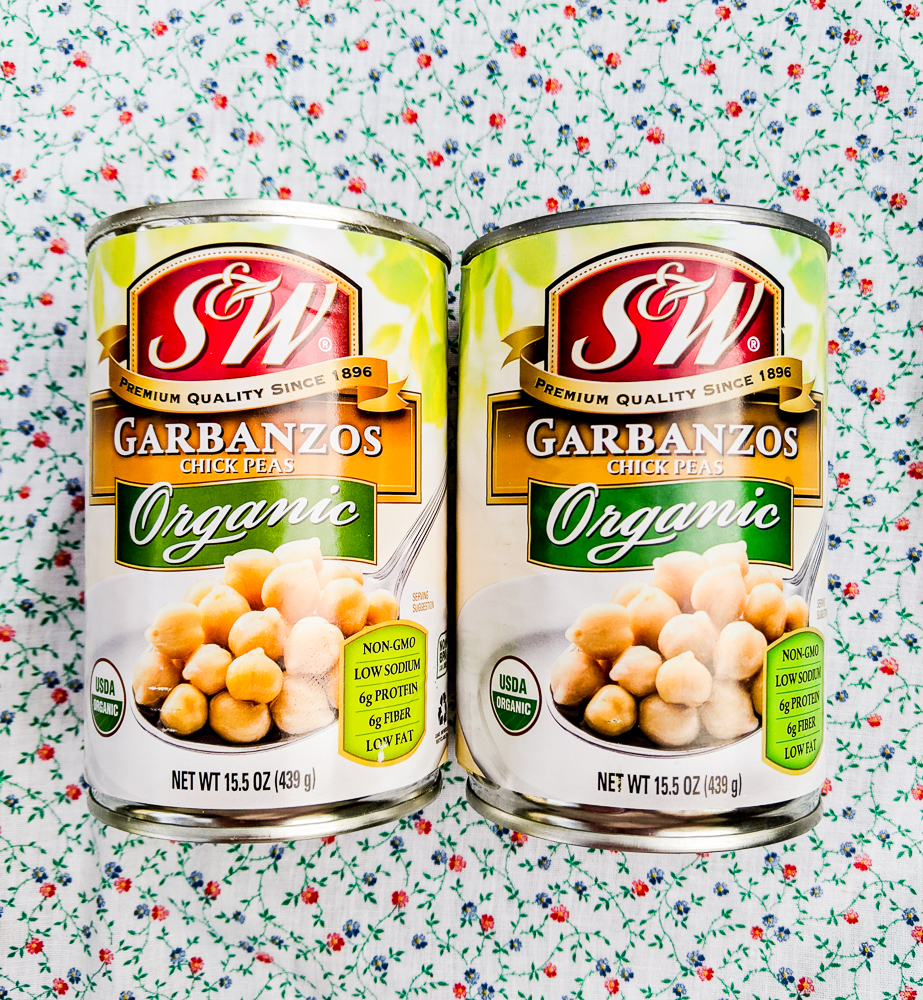
Make sure to save the aquafaba for future baking by putting it in an airtight container and storing it in the fridge.

After the chickpeas have been added, this is what it should look like:

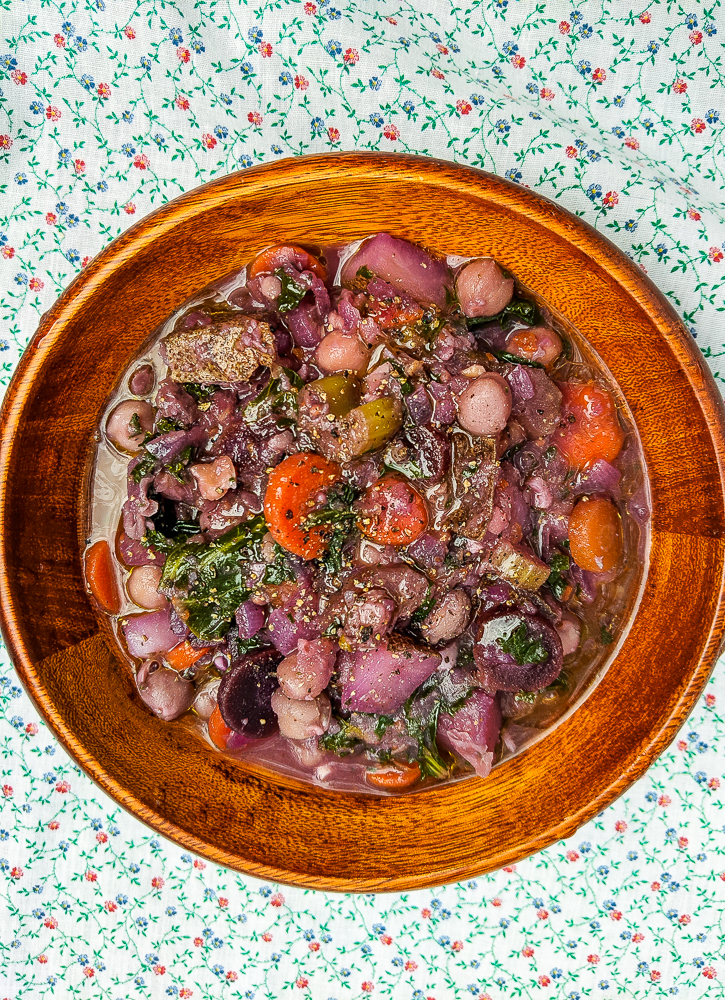
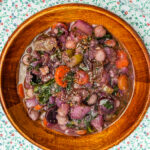
So freaking colorful! But we’re not done yet. We are going to add four cups of water then bring it to a boil so that we can simmer it for 10 minutes. And after we’re done simmering it, we add the baby spinach which we let wilt as the soup cooks on low for the last 5 minutes. When done, we get the following:

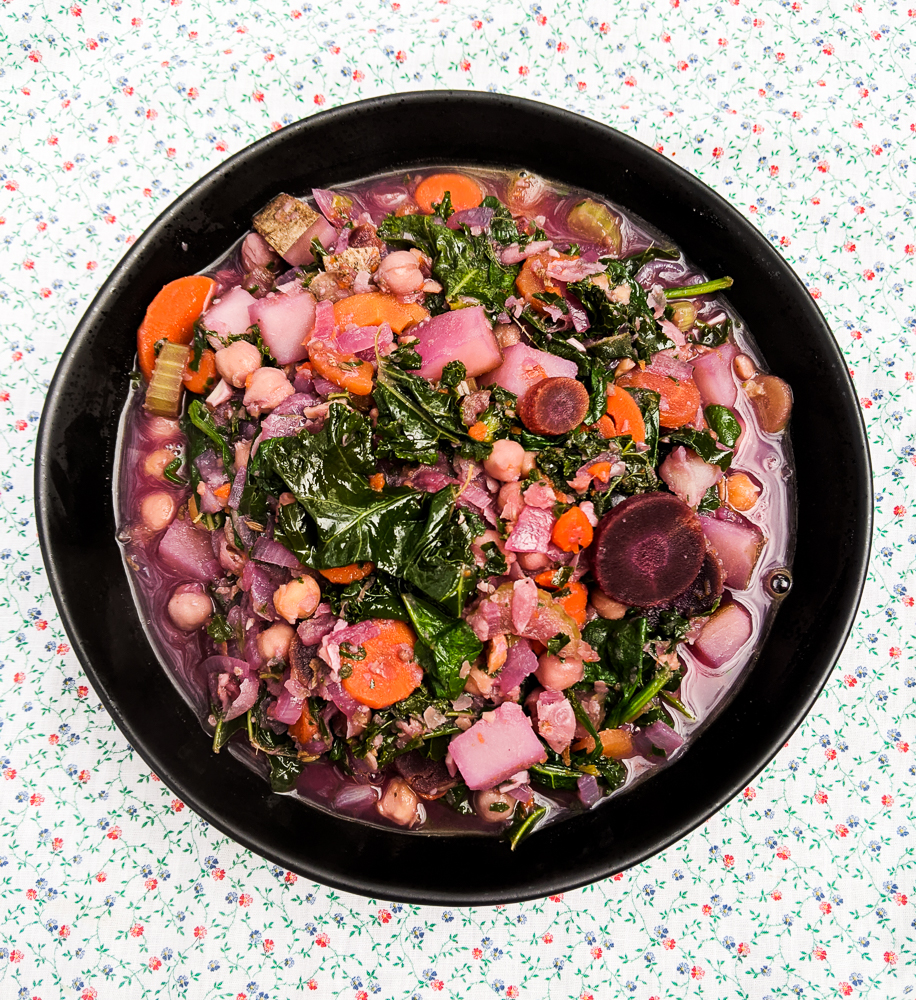
I like to add good olive oil and fresh cracked peppercorn on top.

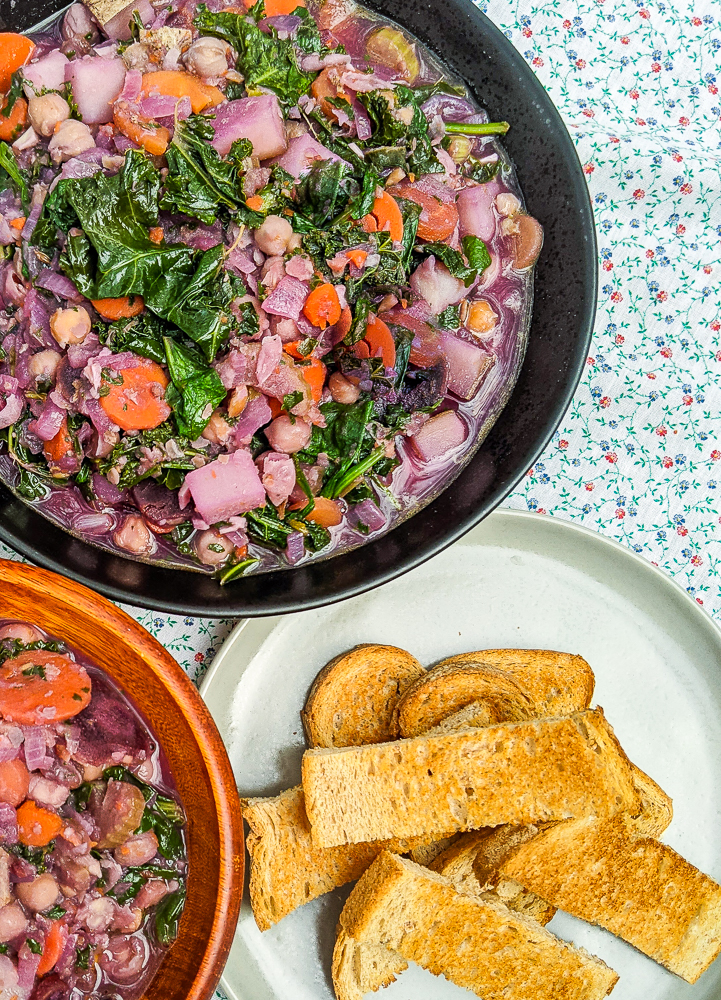
I also like to eat this soup with toasted bread. My husband prefers ciabatta or sourdough whereas my kiddo prefers croissants.

So that’s it! Just make sure to salt to taste because this is not a bland soup. It has way too many spices and aromatics to be so. Hope you enjoy this recipe!

Print

Vegan Purple Winter Soup with Kale and Chickpeas

Print Recipe

Easy and comforting vegan purple winter soup with kale, chickpeas, rainbow carrots and russet potato. Cooked in both ground and whole spices and aromatics such as garlic, red onion and fresh ginger.

  • Author: Jan Carlisle @ Bakeroise
  • Prep Time: 10
  • Cook Time: 30
  • Total Time: 40
  • Yield: 4 servings 1x

Ingredients

Scale
  • Olive oil
  • 1 whole russet potato
  • 5 cloves of garlic
  • 1 large yellow onion
  • 55g of ginger (about an inch long)
  • 3 ribs of celery
  • 1 bunch of curly kale
  • 3 teaspoons of salt, divided
  • ½ teaspoon of ground cumin
  • 1 teaspoon of fennel seeds
  • 1 teaspoon of yellow mustard seeds
  • ½ teaspoon of nutmeg
  • 10 oz bag of sliced, frozen rainbow carrots
  • Big handful of baby spinach – about 2.5 cups packed
  • Apple cider vinegar to taste (for me, it was 3 teaspoons)
  • 4 cups of water
  • Toasted bread for serving (see notes)
  • Good olive oil for serving
  • Fresh cracked black peppercorns for serving

Instructions

  1. Brush, rinse and dry the russet potato well. Poke holes all around using a fork and microwave for 3-4 minutes.
  2. While the potato is par cooking in the microwave, rinse the rest of the vegetables that need rinsing like the kale and celery. Then dry.
  3. Peel and roughly chop the ginger root, garlic and yellow onion.
  4. Slice the celery into roughly ¼” half moon slices.
  5. Tear the kale away from the stems and tear them into pieces that are roughly an inch or two all around.
  6. Take the unpeeled potato, if cool enough, out of the microwave and roughly chop into 1-1.5 inch cubes. If any skin comes off, no big deal.
  7. Bring a large pot to medium heat. Add olive oil.
  8. When olive oil is hot, cook the fennel seeds and mustard seeds until they start to crackle at about 2 minutes.
  9. Add garlic, nutmeg, ginger and cook for another 1-2 minutes until aromatic.
  10. Add the onions and celery along with a teaspoon of the salt and cook for 1 minute again.
  11. Add the potatoes and another teaspoon of salt and cook for roughly 2 minutes.
  12. Add the frozen carrots and toss ingredients around in the pot to roughly coat with the oil. Then add a few tablespoons of water (you can use a dinner spoon, this part isn’t complicated) and cover to steam for about 2-3 minutes.
  13. Add the kale and a couple of spoonfuls of water again and let steam for another 2-3 minutes
  14. Add the chickpeas, 4 cups of water , apple cider vinegar and a teaspoon of salt again. Bring to a boil and immediately simmer with lid on the pot, almost fully covered, allowing for steam to escape, for 10 minutes. Stir periodically.
  15. Add a huge handful (about 2.5 cups packed) of the baby spinach and let cook on low for another 5 minutes, steaming the spinach.
  16. Take an immersion blender and blend for a few seconds to thicken the soup.
  17. Salt to taste.
  18. Serve in bowls and top with a good olive oil.
  19. Cut some bread of any kind into thick strips for dipping and toast.


Equipment

Image of Shun 8-inch Chef's Knife

Shun 8-inch Chef’s Knife

Buy Now →
Image of 6 Quart Pot

6 Quart Pot

Buy Now →

Notes

  1. To keep it easy, I just toast whatever bread we have around. I prefer a more tame bread or as someone would say, “basic” or “boring” or “bland” so that I can taste more of the soup. When it comes to store-bought bread, I prefer Dave’s Killer Bread. My husband prefers fresh sourdough or ciabatta. My little lady prefers fluffier breads like croissants.
  2. If you want to make this even more soupy, just add more water until you get the desired consistency you want. Just remember to salt to taste as it will dilute the other flavors a bit. This should not a bland soup.

Did you make this recipe?

Share a photo and tag us — we can’t wait to see what you’ve made!

8-Ingredient Chinese Chili Oil

February 8, 2021

8-Ingredient, 10-Minute Chinese Chili Oil

Affiliate Disclosure: As an Amazon Associate, I earn from qualifying purchases. Thank you for supporting Bakeroise.

Today I am sharing a naturally vegan Chinese chili oil recipe. Since we’re not going out to eat at our favorite restaurants, even with outdoor seating, I wanted to learn how to make dan dan noodles (dan dan mian) at home. After looking at many different recipes for them, I found what looks to be an amazing vegan one from Maggie at Omnivore’s Cookbook. A vegan recipe from an omnivore? Jackpot! Plus, her stuff looks amazing!

You’re probably wondering why I’m looking at an omnivore’s blog in the first place or why I am inspired by other people’s non-vegan cooking/baking! Well, there are various reasons for this. One of the biggest ones being that I simply want to try and make them as close as I can to the real thing while keeping it in line with my own requirements.

I’ve been vegan for 5 years and I’ve slowly but surely have become quite confident in the kitchen while still being open to learning because that’s really the only way to grow as a cook. So while there are plenty of other vegan recipes around that I use and appreciate, I quite enjoy the process of taking an original recipe and finding a way to make it vegan in my own way. It’s a great way to put what I’ve learned so far to use.

Maggie’s dan dan noodle recipe called for her homemade Chinese chili oil which is naturally vegan. I already had store-bought Chinese chili oil in my kitchen but I thought it’d be fun to make a more “authentic” one from scratch with a specific set of Chinese ingredients.

My dad and favorite aunt love spicy food. They always had different sauces available in our kitchen. I remember how much they loved using so many different types of Asian oils and vinegar in their food and they would also make their own using different types of peppers and garlic.

I’ve made different types of chili oil numerous times in the past with various types of both dried and fresh Asian (and non-Asian) chilis and numerous oils along with just about any kind of onion I could get my hands on. But I’ve never really taken the time to create one from a recipe using specific Chinese ingredients. Since I needed Chinese chili oil for the dan dan mian recipe, why not take the time to learn now?

8-Ingredient, 10-Minute Chinese Chili Oil Ingredients

Maggie made her Chinese chili oil recipe so easy to follow and was generous with the optional ingredients. I wanted to do everything she suggested though so I did not substitute any of the ingredients except for switching out a couple of the conventional ingredients with organic versions which obviously isn’t a big change.

I used whole Sichuan peppercorns while her Chinese chili oil recipe called for ground peppercorns. I was unsure at first because her recipe’s photo showed what looked to be like whole Sichuan peppercorns as opposed to ground peppercorn powder which does exist.

To make the Chinese chili oil, Maggie instructs that the dry ingredients go in a heat-proof ceramic bowl.

I sort of did that. I put it in the ceramic bowl above but worried it wasn’t actually heat proof so I moved them to one of my more reliable Corelle bowls that I know can handle heat. In retrospect I should’ve just used a small pot for ease of handling and certainty.

While the dry ingredients sat in their bowl, I took the piece of ginger and cooked it in vegetable oil in a small pot until it started to shrivel up a little and turn a light brown. I used my cooking thermometer to make sure the heat was at 375°F. So for my own induction stove, that was at medium high heat.

Per Maggie’s instructions, I immediately turned off the heat at that point and carefully poured the hot oil and ginger into the bowl with the dry ingredients and let them cook as I stirred to evenly distribute the oil and flavors. Our Chinese chili oil was starting to come together!

The cooking process was very…pretty. I couldn’t tear my eyes away from the colors brightening as different size bubbles started to appear on the surface. The high contrast of the myriad shades of red, black and orange reminded me of fire which kept me staring so close that I had to remind myself to back up since I’m quite sensitive to the aroma of peppers. They smell so good but if I accidentally inhale them, I just start sneezing. Eek!

Once it stopped bubbling, I continued following the instructions and I removed the star anise, bay leaves and ginger. I let it sit overnight and tried it the next day.

It was heavenly. I love the smoky flavor and slight heat. I’m all about spicy food sometimes but this oil is good in the way that would contribute flavor to a dish without over empowering.

I am happy I took the time to learn how to make this chili oil. This is totally going to be a pantry staple that I won’t mind making over and over again. It’s really that easy and so worth it. Thank you to Maggie for sharing her chili oil recipe on her blog!

Print

8-Ingredient Chinese Chili Oil

8-Ingredient, 10-Minute Chinese Chili Oil
Print Recipe

Perfectly spiced Chinese Chili Oil that has only 8 ingredients  – adapted from Omnivore’s Cookbook

  • Author: Jan Carlisle @ Bakeroise
  • Prep Time: 5
  • Cook Time: 5
  • Total Time: 10
  • Yield: 1 cup 1x
  • Method: Frying
  • Cuisine: Chinese
  • Diet: Vegan

Ingredients

Scale
  • 4 tablespoons of Chinese chili flakes (not regular ol’ red pepper chili flakes you put on your pizza)
  • 2 teaspoons of organic five spice powder
  • 3 tablespoons of organic toasted sesame seeds 
  • 1 teaspoon whole Sichuan peppercorn 
  • 1 whole star anise
  • 2 dried bay leaves
  • 1 cup vegetable oil (you may substitute with another neutral oil with high smoke point)
  • 1g of fresh, peeled ginger

Instructions

  1. Combine all the dry ingredients in another small pot that is at least one quart in size. 
  2. In another pot, add the one cup of vegetable oil and the piece of ginger. Adjust heat according to your stove and make sure the oil is about 375°F only. 
  3. Cook only until the ginger starts to wrinkle and turn brown, which is when you turn the heat off immediately. 
  4. Carefully pour the oil and ginger into the pot with the dry ingredients and start to let it cook.
  5. Gently stir the ingredients with a wooden spoon so they evenly cook in the oil.
  6. When the chili oil is done bubbling, remove the star anise, ginger and dried bay leaves. 
  7. Let sit in an airtight container overnight so the flavors can marry. 

Equipment

Image of cooking thermometer

cooking thermometer

Buy Now →

Notes

  • This recipe is adapted from Omnivore’s Cookbook. 
  • Store using an airtight container. I like to use a mason jar with a tight lid. According to Maggie, this can be stored for two weeks in room temperature and six months in the fridge. 

Did you make this recipe?

Share a photo and tag us — we can’t wait to see what you’ve made!

Filipino Tocino-Inspired Soy Curls

February 7, 2021

Affiliate Disclosure: As an Amazon Associate, I earn from qualifying purchases. Thank you for supporting Bakeroise.

Today, I am sharing with you my vegan tocino recipe. As I write these posts and recipes, I’m starting to realize just how many Filipino breakfast dishes I love. If you want something that’s more savory for breakfast than vegan champorado or more of a “meal” the fluffy, pillowy vegan Spanish bread, then vegan tocino is a great option. This recipe is ridiculously easy and perfect for weekend mornings where you just want to keep it chill.

Tocino means bacon in Spanish. In the Philippines. While Filipino tocino is a cured and very sweet pork dish, this vegan tocino recipe does not require any curing (yay!) and obviously does not require pork (double yay!). Instead it’s simply dehydrating our gloriously vegan soy curls, massaging them with the tocino marinade for 5 minutes and cooking them for 15-20 minutes.

So yes, it is originally labor-intensive and a whole lot of work would go into it but I had to figure out a way to make it fit into my vegan diet and, well, my time. I just wanted to acknowledge that because I don’t want to undermine any of the hard work other people have done in the past. This is simply my own version of the recipe of a food that I truly loved growing up.

Tocino is typically served with garlic fried rice and an egg. I personally enjoy it with plain steamed rice and for obvious reasons, I can do without the egg.

Sometimes I even just make my own sandwiches or wraps with whatever bread/tortilla I have in the house.

I just lightly spread vegan mayonnaise on both slices or on the surface of the tortilla and stick some adobo in there to get an instant meal. I make sure to have a small green smoothie or some kind of vegetable on the side to balance it out though. Man, I should really start publishing some of our healthier recipes. Ha! They exist I promise.

Speaking of which, if you know you’ll want to make garlic fried rice or even just steamed rice to go with this sweet, vegan tocino dish, feel free to make that right before you start working on this recipe.

I grew up eating this dish and it reminds me of my favorite aunt who made it for us on the weekends. It also reminds me of when my husband and I first fell in love. He was eating a plate of tocino when he told me he could see a future with me.

I had to make some significant revisions just to get this vegan tocino recipe right for him. After all, I wasn’t vegan when we got married. He’s very honest so it was a little frustrating trying to get it right. But the constructive criticism was helpful. And with additional feedback from some friends, one who is also Filipina and her tocino enthusiast partner, I was able to perfect my vegan tocino dish.

First you have take your soy curls and soak them. I used cranberry and pomegranate juice and water to cover the soy curls in a large 14 cup food storage container. Then I let them sit for 10 minutes.

While the soy curls are soaking for ten minutes, I put all our ingredients together to make a marinade. The more important ingredient is the annatto, which helps give the dish the color and a peppery but sweet taste. Paired with the sweet paprika, it gives the dish the color and smokiness it needs. Which is interesting because neither is smoked.

Pictured above is actually Mama Sita’s annatto powder. Mama Sita’s already carries a tocino mix but I prefer organic sugar so I couldn’t use that mix for this recipe.

By the way, I originally wanted to keep it organic so I ridiculously bought some annatto seeds and thought I could just easily grind them up. Spoiler: NO. JUST NO.

I gave myself a complete arm, neck and shoulder cramp trying to get this done right using the pestle and mortar pictured above. I even had it set at the perfect level so that my body mechanics weren’t all messed up. My gosh, man. And I couldn’t use my grain mill attachment because it’s not a dry grain. I tried using both my food processors and my high powdered Vitamix blender and nothing worked. Oh well. I’m glad I made that mistake otherwise I wouldn’t be using Mama Sita’s stuff! It does make me feel better to use something from a Filipino company.

We mix in other dry ingredients that include: cornstarch, garlic powder, tapioca flour, salt, organic dark brown sugar and sweet paprika.

The cornstarch and tapioca flour look the same and I probably shouldn’t have put next to each other in the picture ike that. Ha! I used the dark brown sugar instead of light because I wanted it to have a richer, sweeter taste. Kind of like molasses. And the sweet paprika to help with the color.

When we’re done mixing the dry ingredients for the marinade, we mix it with ¼ cup of water and ¼ cup of organic teriyaki sauce. It should have the same appearance and consistency of red enchilada sauce.

Making the marinade doesn’t take long at all. When the soy curls are done, you just drain them and mix the two. Then you massage the marinade into the soy curls.

There are two ways to cook this:

1) Throwing all of marinated soy curls in a huge pot and just letting the vegan tocino cook on medium high heat for 15-20 minutes, stirring every few minutes. It takes a while but for a busy mom like me, it kind of allows me to breathe a little bit. I know it’s done when it’s slightly brown and sticky. Some browned spots.

or

2) Frying the vegan tocino in batches so that it is charred a little bit. Many people like it like this.

Not necessary but I like to garnish my stuff with green onions and/or everything but the bagel seasoning. I just like to add those small touches.

I prefer the first option when it comes to my vegan tocino so that’s how the recipe is written out. Since I have a kid, I get a little weary about the charred parts. If you want to fry it the way you would regular bacon, please do so at your own discretion.

Print

Vegan Tocino

Print Recipe

This is an easy vegan recipe for the famous sweet and savory Philippine breakfast dish, tocino. It is made with soy curls and takes only a little over half an hour to make. Best served with rice.

  • Author: Jan Carlisle @ Bakeroise
  • Prep Time: 10
  • Cook Time: 20
  • Total Time: 30
  • Yield: 6 servings 1x
  • Category: Main
  • Cuisine: Philippine
  • Diet: Vegan

Ingredients

Scale

Rehydrating soy curls:

  • 16 oz or 454g dried soy curls
  • 32 fl oz of Cranberry Pomegranate juice
  • Tap water for soaking (If not tap, 48 fl oz to cover the soy curls)

Tocino marinade:

  • 1 tablespoon of salt
  • 1 tablespoon of garlic powder
  • 1 tablespoon tapioca flour
  • 1 tablespoon of paprika
  • 1 tablespoon of cornstarch
  • 6 tablespoons of annatto powder
  • 1 cup of organic dark brown sugar
  • ¼ cup of organic teriyaki sauce
  • ¼ cup water

For cooking the soy curls:

  • 1 cup of vegetable oil

For optional garnish:

  • Sliced green onions
  • Everything but the bagel seasoning

Instructions

  1. In a large bowl or food storage container (at least 14 cups), add the soy curls, cranberry juice and water to cover. Soak for 10 minutes to rehydrate the curls.
  2. While the soy curls are rehydrating, gather all the marinade ingredients and combine in a medium bowl. The consistency and appearance should be that of red enchilada sauce.
  3. When soy curls are done soaking, drain using a fine mesh sieve. Return to the now-empty bowl or container they were soaking in.
  4. Combine the marinade and soy curls together and massage soy curls for five minutes with a clean hand. Your hand might get red so you do what you need to do if this is a problem.
  5. Bring a large pot or pan to medium heat and add 1 cup of vegetable oil. You will have to adjust the heat based on your pan. My intense induction stove was way too hot at medium high heat so I had to have it on medium.
  6. When oil is hot enough, carefully add the soy curls and cook for 15-20 minutes until slightly brown and sticky, stirring every few minutes
  7. Serve with rice. 

Equipment

Image of Rubbermaid 14 Cup Food Storage Container

Rubbermaid 14 Cup Food Storage Container

Buy Now →

Notes

  • To get a more charred or blackened appearance like traditional Filipino tocino, cook in one-layer batches and simply pan-fry at your discretion.

Did you make this recipe?

Share a photo and tag us — we can’t wait to see what you’ve made!

Vegan Filipino Champorado

February 1, 2021

Affiliate Disclosure: As an Amazon Associate, I earn from qualifying purchases. Thank you for supporting Bakeroise.

Vegan Filipino Champorado

I originally published this on January 11, 2021 but updated it on February 1, 2021 to include more history about the dish among other personal thoughts on the dish itself.

Hello! Today I bring you a tasty vegan Filipino champorado recipe without glutinous rice. This chocolate rice porridge dish was one of my favorite breakfast dishes as a kid in the Philippines and even in the states!

Filipino champorado is different than champurrado, the incredibly delicious hot Mexican chocolate drink. However, Filipino champorado was indeed influenced by the Mexicans when their chocolate (Tagalog: tsokolate) was introduced to the Philippines during the Manila galleon.

Filipino champorado is a sweet chocolate rice porridge breakfast dish in the Philippines that is usually eaten with a side of dried fish (tuyo). It is traditionally made with a glutinous rice, sugar, condensed milk and topped with evaporated milk. Unfortunately for me, that’s a sugar coma waiting to happen. It is unfortunate but true. Believe me, I hate that I have to give up the sweetness of the condensed milk.

So my goal was to make a vegan Filipino champorado recipe that wasn’t too sweet that I could also make with Jasmine rice. Why? Because diabetes does run on both sides of my family and because I don’t make enough glutinous rice dishes consistently to justify keeping it around. It ends up going bad when I inadvertently forget about it and that’s just wasteful. I did want to test the recipe with glutinous rice to have a modification under the notes but I will just make a separate recipe for it when I can. It deserves its own.

Vegan Filipino Champorado

I made multiple batches of vegan Filipino champorado to try and get it right. My biggest takeaways are that:

  1. Not rinsing the Jasmine rice helps it stay starchy and it becomes gummy as it cooks. Which is what I need!
  2. Using semi-sweet vegan chocolate chips and maple syrup is enough for sweetness and that there’s no need to add granulated sugar or any kind of vegan condensed milk.

I made multiple batches off the vegan Filipino champorado with unsweetened almond milk and one solo batch with oat milk (which has an additional 7g of added sugar per serving!) and that one batch with the oat milk was way too sweet for me and honestly just didn’t go with the seaweed.

For the tuyo, I substituted with seaweed and it’s perfect! Many Filipinos eat the tuyo separately while others mix in the champorado for a combination of sweet and salty flavors.

Vegan Filipino Champorado

I do both for my seaweed depending on what I’m feeling that day. So easy to just crush it up into tiny pieces and sprinkle over my bowl of vegan Filipino champorado.

I can imagine some people who get scared of foreign food cringing right now. It’s all good! Try it or not. I don’t care. HAHA! I’m just glad I finally got a vegan Filipino champorado recipe that’s right for me.

Anyway, for all the people who like good food and aren’t haters, I hope you enjoy this vegan Filipino champorado recipe as this dish is very dear to me! Just like the other recipes on this blog, this is the version of this traditional dish that works for my family. Please let me know if you try this dish!

Print

Perfect 6-Ingredient Vegan Filipino Champorado

Print Recipe

★★★★★

5 from 2 reviews

Quick and easy vegan Filipino champorado recipe. A rice porridge dish from the Philippines. This recipe allows you to make it using Jasmine rice instead of glutinous rice. 

  • Author: Jan Carlisle @ Bakeroise
  • Prep Time: 5
  • Cook Time: 30
  • Total Time: 35
  • Yield: 12 small servings or 6 big servings 1x

Ingredients

Scale
  • 1 cup unrinsed Jasmine rice
  • 4 cups water
  • 2 cups unsweetened vegan milk – I use almond milk for this one!
  • 1 cup semi-sweet vegan chocolate chips
  • ½ cup maple syrup
  • Seaweed strips (for serving on the side or as a topping…I personally like loads but I’m hella Filipina)

Instructions

  1. Except for the seaweed, put all of the ingredients into a 3 qt saucepan and bring to a boil.
  2. Once it’s boiling, immediately bring down to a simmer and stir a few times to avoid sticky bottom.
  3. Let simmer for 30 minutes and remember to stir regularly (for me that’s 3-4 minutes) to avoid sticky bottom. Keep an eye on the pot because sometimes you’ll end up having to adjust the heat depending on where you are in the process. Just make sure it stays at an actual simmer.
  4. It should be thick at 30 minutes without any sticky bottom if you stirred it regularly and had it at an actual simmer.
  5. Use a ladle to scoop into bowls. Top with a splash of unsweetened vegan milk to balance out chocolate.
  6. Enjoy with a generous serving of seaweed strips on the side or even on top if you’re down!


Notes

  • Don’t rinse your Jasmine rice as as we want it gummy. 
  • Make sure your pot is simmering and that it’s not at a rolling boil.
  • You have to absolutely stir regularly. Don’t try to multitask away from the pot when you make this. I like to dance around to fun, old school music like Biz Markie’s “Just a Friend” when I’m at the stove. If I’m feeling sassy, I’ll listen and get down to some Saweetie or Kreayshawn. If my feet hurt (plantar fasciitis ouch!), I’ll grab a chair or stool and bring it to the stove or even just straight up cook at the table using a tabletop induction burner.
  • The seaweed can be eaten separately or it can be a topper for the champorado. Many Filipinos stir their tuyo into the champorado.
  • Keep covered to avoid skin at the top. If you end up with any skin, just remove it with a fork or chopsticks and discard.
  • Reheat with unsweetened vegan milk. I prefer reheating on the stovetop but microwave is fine too. It’s “okay”.
  • Like my other recipes, please adjust to your own preferences in terms of sweetness. This varies from person to person. 

Did you make this recipe?

Share a photo and tag us — we can’t wait to see what you’ve made!

  • « Go to Previous Page
  • Page 1
  • Interim pages omitted …
  • Page 12
  • Page 13
  • Page 14
  • Page 15
  • Page 16
  • Go to Next Page »

Primary Sidebar

Categories

Recent Recipes

  • Vegan Filipino Afritada Inspired Tomato Stew
  • Mulled Pear and Apple Cider
  • Bakery Style Chocolate Chip Cookies
  • Shortcut Vegan Bolognese
  • Kimchi Chickpea Bowl
  • Facebook
  • Twitter
  • Instagram
  • Pinterest

Calendar

June 2025
M T W T F S S
 1
2345678
9101112131415
16171819202122
23242526272829
30  
« Dec    

Archives

  • December 2023
  • November 2023
  • September 2023
  • September 2022
  • March 2022
  • February 2022
  • January 2022
  • December 2021
  • November 2021
  • October 2021
  • September 2021
  • August 2021
  • July 2021
  • June 2021
  • May 2021
  • April 2021
  • March 2021
  • February 2021
  • January 2021

Recent Comments

  • Jan on Vegan Longevity Noodles – Yī Miàn
  • Kim on Vegan Longevity Noodles – Yī Miàn
  • Jan on Vegan Mongolian Beef Inspired Soy Curls
  • Jenn P on Vegan Mongolian Beef Inspired Soy Curls
  • Jan on 10 Ingredient Vegan Siomai

Footer

↑ back to top

About

  • Privacy Policy
  • Disclaimer
  • Terms & Conditions

Newsletter

  • Sign Up! for emails and updates

Contact

  • Contact
  • FAQ

As an Amazon Associate I earn from qualifying purchases.

Copyright © 2020 Brunch Pro on the Brunch Pro Theme