• Skip to primary navigation
  • Skip to main content
  • Skip to primary sidebar
  • About
    • Contact
    • Disclaimer
    • Privacy Policy
    • Terms & Conditions
  • FAQ
  • Vegan Recipes
    • Free Fridge Food
    • Special Diets
      • Anti-Inflammatory
      • Gluten-Free
    • Type of Meal
      • Breakfast
      • Lunch
      • Dinner
      • Snacks
    • Culturally-Inspired
      • Argentinean-Inspired
      • Chinese-Inspired
        • Dim Sum
          • 12 Months of Dim Sum
        • Noodles
      • Filipino Food
      • Italian-Inspired
      • Japanese-Inspired
      • Korean-Inspired
      • Malaysian-Inspired
      • Mexican-Inspired
      • Neapolitan-Inspired
      • Pacific Northwest
      • Russian-Inspired
    • Baking
      • Bars
      • Breads
      • Cakes
      • Cookies
    • Holiday Recipes
      • Christmas
      • Friendsgiving
    • Season
      • Autumn
      • Winter
    • Condiments
  • SHOP
    • My Pantry Favorites
  • 12 Months of Dim Sum

Bakeroise

Vegan Filipino Afritada Inspired Tomato Stew

Mulled Pear and Apple Cider

Bakery Style Chocolate Chip Cookies

Shortcut Vegan Bolognese

Kimchi Chickpea Bowl

Hearty Kale and Chickpea Tomato Soup

Vegan Upside Down Pear Cake with Crushed Candy Caps

Golden Beets and Brown Rice Bowl

Vegan Longevity Noodles – Yī Miàn

Farewell, 2021. Hello, 2022!

12 Months of Dim Sum Project 2021

Fennel Cake with Lingonberry Sauce

Vegan Compost Cookies Recipe

January 26, 2021

Affiliate Disclosure: As an Amazon Associate, I earn from qualifying purchases. Thank you for supporting Bakeroise.

New and improved vegan compost cookies

Yo. I’m glad to say that I have some new content for you today. This post was originally published on January 11 but because it’s a practically a brand new post, it’s republished at a later date.

As I mentioned on Instagram or Facebook, I’ve decided to slow down and focus more on increasing the quality of my posts.

My original vegan compost cookies recipe (adapted from Christina Tosi’s original recipe) post was not super great. I think I was riding high from having finally published a first post so I immediately dove into it without any real planning. It was the kind of recipe I’d be annoyed with while cooking due to mistakes in it that I would’ve called “disrespectful of my time” because of the errors in the actual recipe, not because of the narrative that precedes it. By the way, I happen to like reading a lot of the personal narratives food bloggers have.

Oh but I didn’t realize I was human. I thought I was a robot!

Ha.

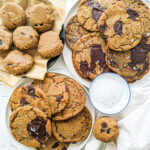
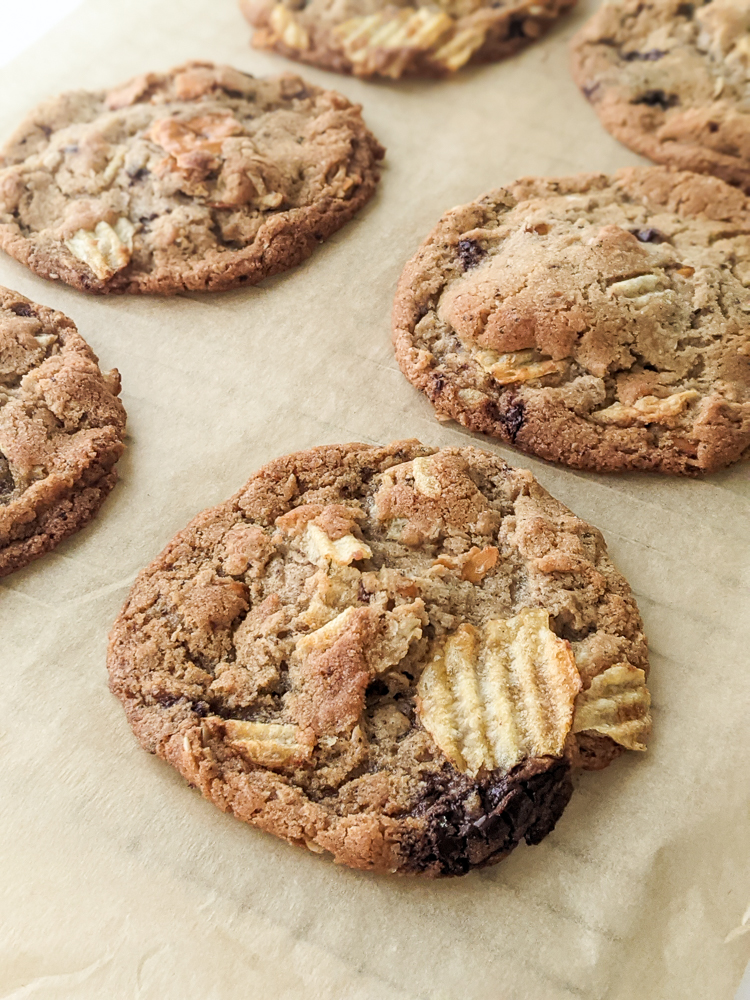
I thought my original vegan compost cookies were pretty decent and my husband actually liked those more than my current ones. Here are some photos of cookies from the older recipe:

I, on the other hand, wasn’t 100% satisfied with it. If I’m publishing recipes on my own blog, I think it’s only fair that they hold up to my own standards. Cookies, especially ones that are similar to chocolate chip, are indeed tricky because we all have different preferences. Some like them chewy. Others like them crispy. I like a little of both. And yes, taste is obviously subjective.

When I first made the compost cookies a couple of weeks ago, I made it using pantry ingredients that I already had, specifically a huge bag of thin pretzels and even a massive bag of kettle cooked potato chips that we never got around to opening. I got mostly good feedback on the cookies themselves but I knew deep down that I could do better.

And I did.

I would’ve conducted an actual science experiment out of this but I’m a busy mom and I just wanted to recklessly try to fix this recipe in one go. I do hope to conduct some experiments with my kid.

I want to clarify some things about myself and my intention to live a relatively vegan lifestyle. Most of my family and friends are not vegan so I want to talk about some things based on questions they have asked me throughout the years and even as recently as today.

While I do have a vegan diet, it’s not all cruelty-free. Nor is my lifestyle. There is no way for anyone to exist on this planet while living a 100% cruelty-free life. That’s a fact. During this pandemic, I haven’t been leaving the house to do anything so I don’t drive or take the bus. I don’t ride my bike or even walk. We’re just at home. But then we order our groceries and have someone else use their car so that we can put food on the table. Every option we have will lead to someone or something else being destroyed.

But aside from all that, at least I’m trying.

I don’t eat anything that is a byproduct of an animal. I also try not to eat “accidentally vegan” products if the listed sugar isn’t organic. I used to eat Oreos even as a vegan but only because it was a total oversight. While I already had that vegan common sense of knowing white sugar was filtered through bone char, I didn’t even stop to look at the ingredients for Oreos. It was just never on my radar. And yes I get that it’s better to consume those products as opposed to products that have other animal-derived ingredients. That’s obvious. I just mentally don’t feel comfortable with consuming said products myself.

When referring to vegan products, “vegan” does not automatically mean “cruelty-free” and they are not interchangeable terms. There are companies who make this mistake all the time when marketing their products. I can’t get into all of that right now.

The layers of complexity are never ending to this and removing each layer for everyone to actually understand the nuance of This Dilemma is going to take more than a blog post.

In addition, something is only 100% cruelty-free to me only if it doesn’t use animal or human slave labor. While people can be annoying and destructive to the earth, human beings are still living and breathing creatures and, well, I care about them too. My personal veganism doesn’t center only on the welfare of animals – although animal welfare is indeed a big motivation for it. I actually care about the greater good – so everyone and everything.

In the world we live in, however, the best we can do is try. Don’t even get me started on how messed up it is to rely on each individual consumer to change their ways and not even try to hold big corporations accountable for their own harmful practices that negatively affect the animals, humans and the earth. That’s just not realistic or fair.

If you have any questions about anything, you can leave a comment or email me. Just try to be civil. There are a lot of rude people out there and posts like these are a magnet for those kind of people. But before anyone leaves a rude comment, just remember that people in glass houses shouldn’t throw stones.

Over the past several days, I’ve been reading quite a bit about both conventional and vegan baking. I made the following changes below based on what I learned.

The Vegan Butter

In Recipe 1.0, I used room temperature vegan spreadable Earth Balance that wasn’t even unsalted. Yikes. To be fair, it’s just what this overwhelmed mama had in the fridge! And no, it doesn’t feel good to use palm oil even if only sometimes. While it’s vegan, it’s not cruelty-free.

The salted Earth Balance made the cookie thicker than I wanted. I don’t like thick, almost cake-like cookies.

In Recipe 2.0, I used a whole pack of Miyoko’s unsalted vegan butter. My hot mess self didn’t even prepare. I just happened to have this block from a recent grocery haul. I didn’t even know it was meant for baking! So it was like I struck gold when I went through my fridge. Instead of bringing it to room temperature though, I let it slowly melt halfway in my butter warmer and then used my spoon to gently cut up rest into smaller little pieces resulting in the whole thing resembling cottage cheese in a tiny pot.

This caused the cookie to spread out nicely like I wanted. It was ¼” thick across the cookie whereas the other recipe was almost an inch thick in the center.

The Chocolate

In Recipe 1.0, I used half a cup of chocolate chips. The amount of chocolate chips ended up overpowering the saltiness that was supposed to come from the potato chips and pretzels which resulted in it tasting more like chocolate chip cookies to me than it did compost cookies.

In Recipe 2.0, I unexpectedly ran out of vegan chocolate chips so I chopped up a bar of organic 85% dark chocolate I luckily had in my dusty chocolate bar stash. It’s nothing fancy but it’s the chocolate I eat daily “for health reasons”. I always forget to eat it though so I’ve set a timer to remind myself to eat a specific amount of it before bed. It’s not fancy but it works.

The Baking Sheets

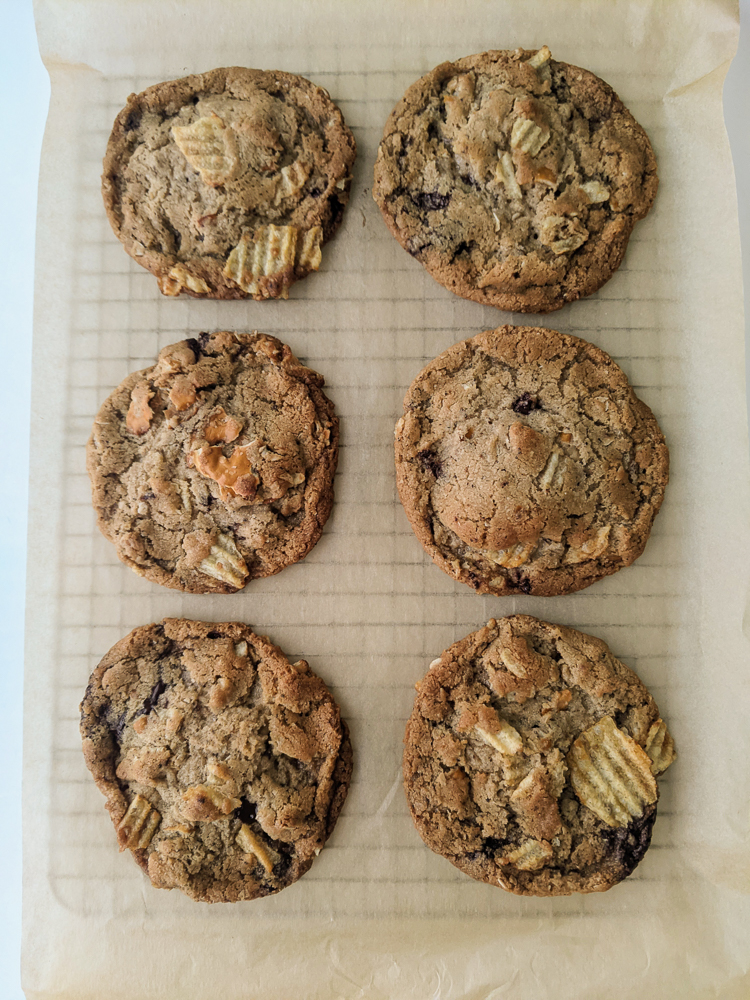
In Recipe 1.0, I baked the cookies on a dark, parchment lined, nonstick baking sheet. I think it was one of the bigger reasons as to why my cookies were harder than I’d intended.

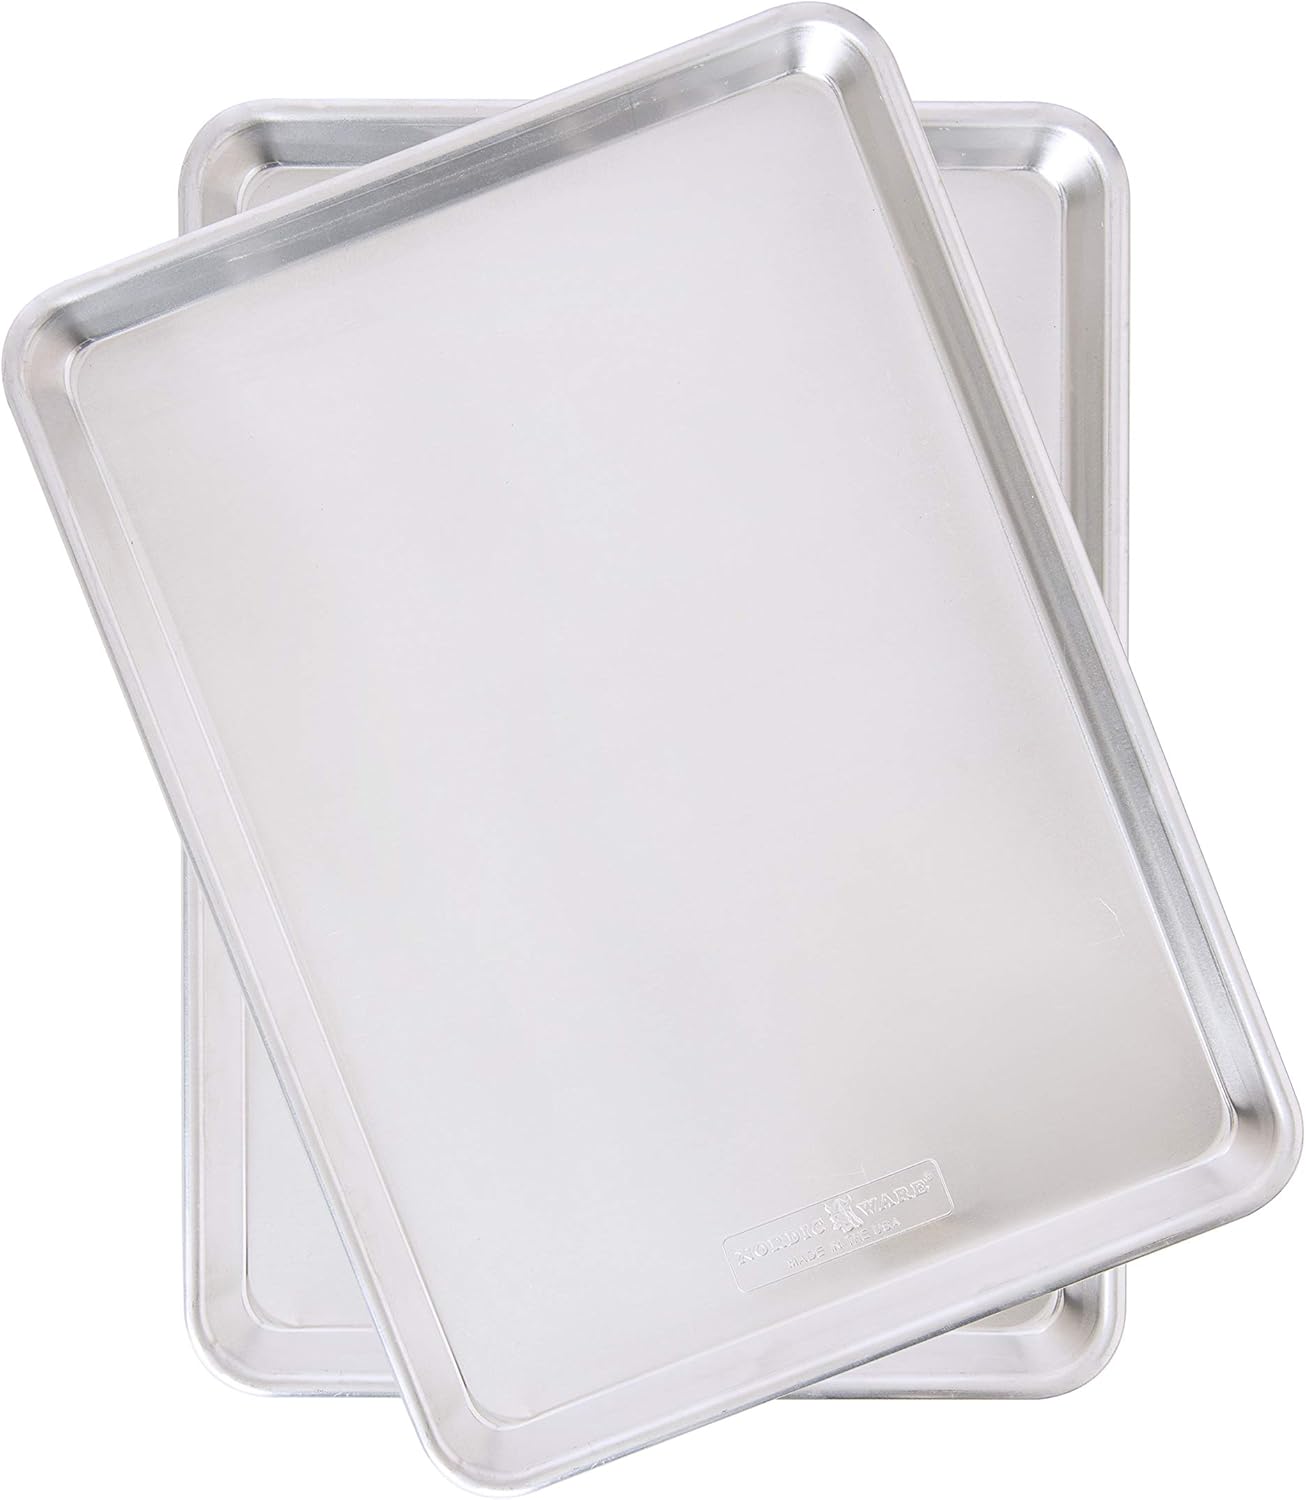
In recipe 2.0, I baked the cookies on a light, parchment lined, aluminum baking sheet instead. These baking pans were less harsh in terms of the heat…which is perfect for my ridiculously intense induction range.

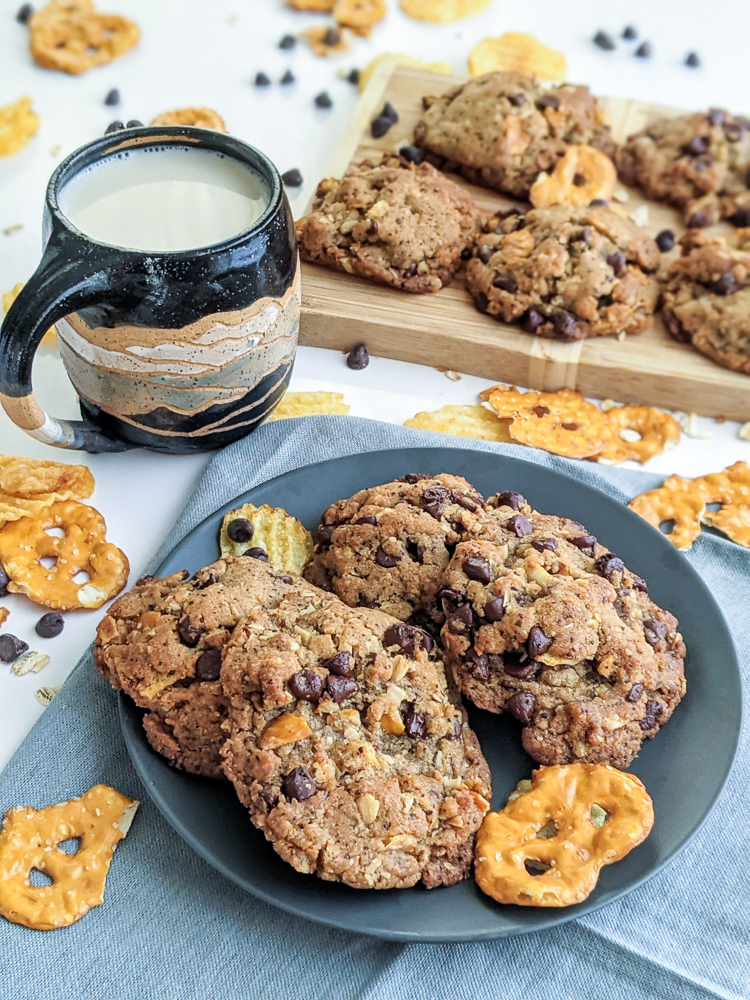
Overall, my second recipe is new and improved. I think these new cookies are pretty awesome. One friend and neighbor with very similar taste to my own, who wasn’t in love with the first batch of cookies, thought that these were fantastic. And I am inclined to agree.

With that, here is my new and improved recipe for Vegan Compost Cookies.

Oh and by the way, I’m not a robot. So if I missed anything in this post or recipe despite trying my best to clean it up, please don’t hesitate to let me know. I’m not making errors on purpose. I only want to share good stuff with y’all.

Print

Vegan Compost Cookies Recipe

Print Recipe

★★★★★

5 from 1 reviews

These are my new and improved compost cookies adapted from Christina Tosi’s own compost cookies recipe. 

  • Author: Jan Carlisle @ Bakeroise
  • Prep Time: 20 minutes
  • Cook Time: 15 minutes
  • Total Time: 35 minutes + 1 hour chill time
  • Yield: 12–15 cookies 1x
  • Category: Baking
  • Method: Baking
  • Diet: Vegan

Ingredients

Scale
  • 16 tablespoons (2 sticks or 227 g) unsalted vegan butter – I used Miyoko’s
  • ⅔ cup tightly packed organic light brown sugar
  • 1 cup organic cane sugar
  • 2 tablespoons organic light corn syrup
  • 1 vegan egg replacer – I used Bob’s Red Mill
  • ½ teaspoon vanilla extract
  • 1 ⅓ cups organic all-purpose flour
  • ½ teaspoon baking powder
  • ¼ teaspoon baking soda
  • 1 teaspoon kosher salt
  • ⅓ cup vegan chocolate 
  • ⅓ cup rolled oats
  • 2 ½ teaspoons ground coffee
  • 2 cups salted kettle chips
  • 1 cup thin pretzels

Instructions

  1. Turn a small saucepan or butter warmer on low and start melting your butter until half is melted. If you have an induction stove like me and have a warmer, turn your warmer onto medium and let your butter melt halfway slowly. This will give you time to gather your ingredients. Go for it.
  2. Chop up ⅓ a cup of your vegan chocolate bar if that’s what you’re using instead of chocolate chips.
  3. When you’ve gotten all your ingredients, the butter should be done warming up halfway. Use a spoon and gently crumble up the butter.
  4. Use the paddle attachment of your mixer and, at medium speed, cream the vegan butter, cane sugar, brown sugar and light corn syrup for about 2-3 minutes until nice and fluffy but not soupy or water. I use stir mode or level 2 on my Kitchenaid stand mixer. 
  5. Add the vegan egg and vanilla extract and continue mixing on medium (for me it was a 4) for 4-5 minutes. Turn off the mixer. Scrape down the sides of the bowl with a spatula.
  6. Attach your pouring shield to the top of the mixing bowl. Turn the mixer on low. Carefully add the following ingredients to the bowl in this order while mixing: flour, baking powder, baking soda, salt, chocolate chunks, coffee grounds and rolled oats one at a time. Turn off mixer when done.
  7. Add the kettle chips and pretzels at the same time and mix for 5-10 seconds as to not crush of the chips and/or pretzels. We want to keep whatever we can in tact for when we’re shaping the dough.
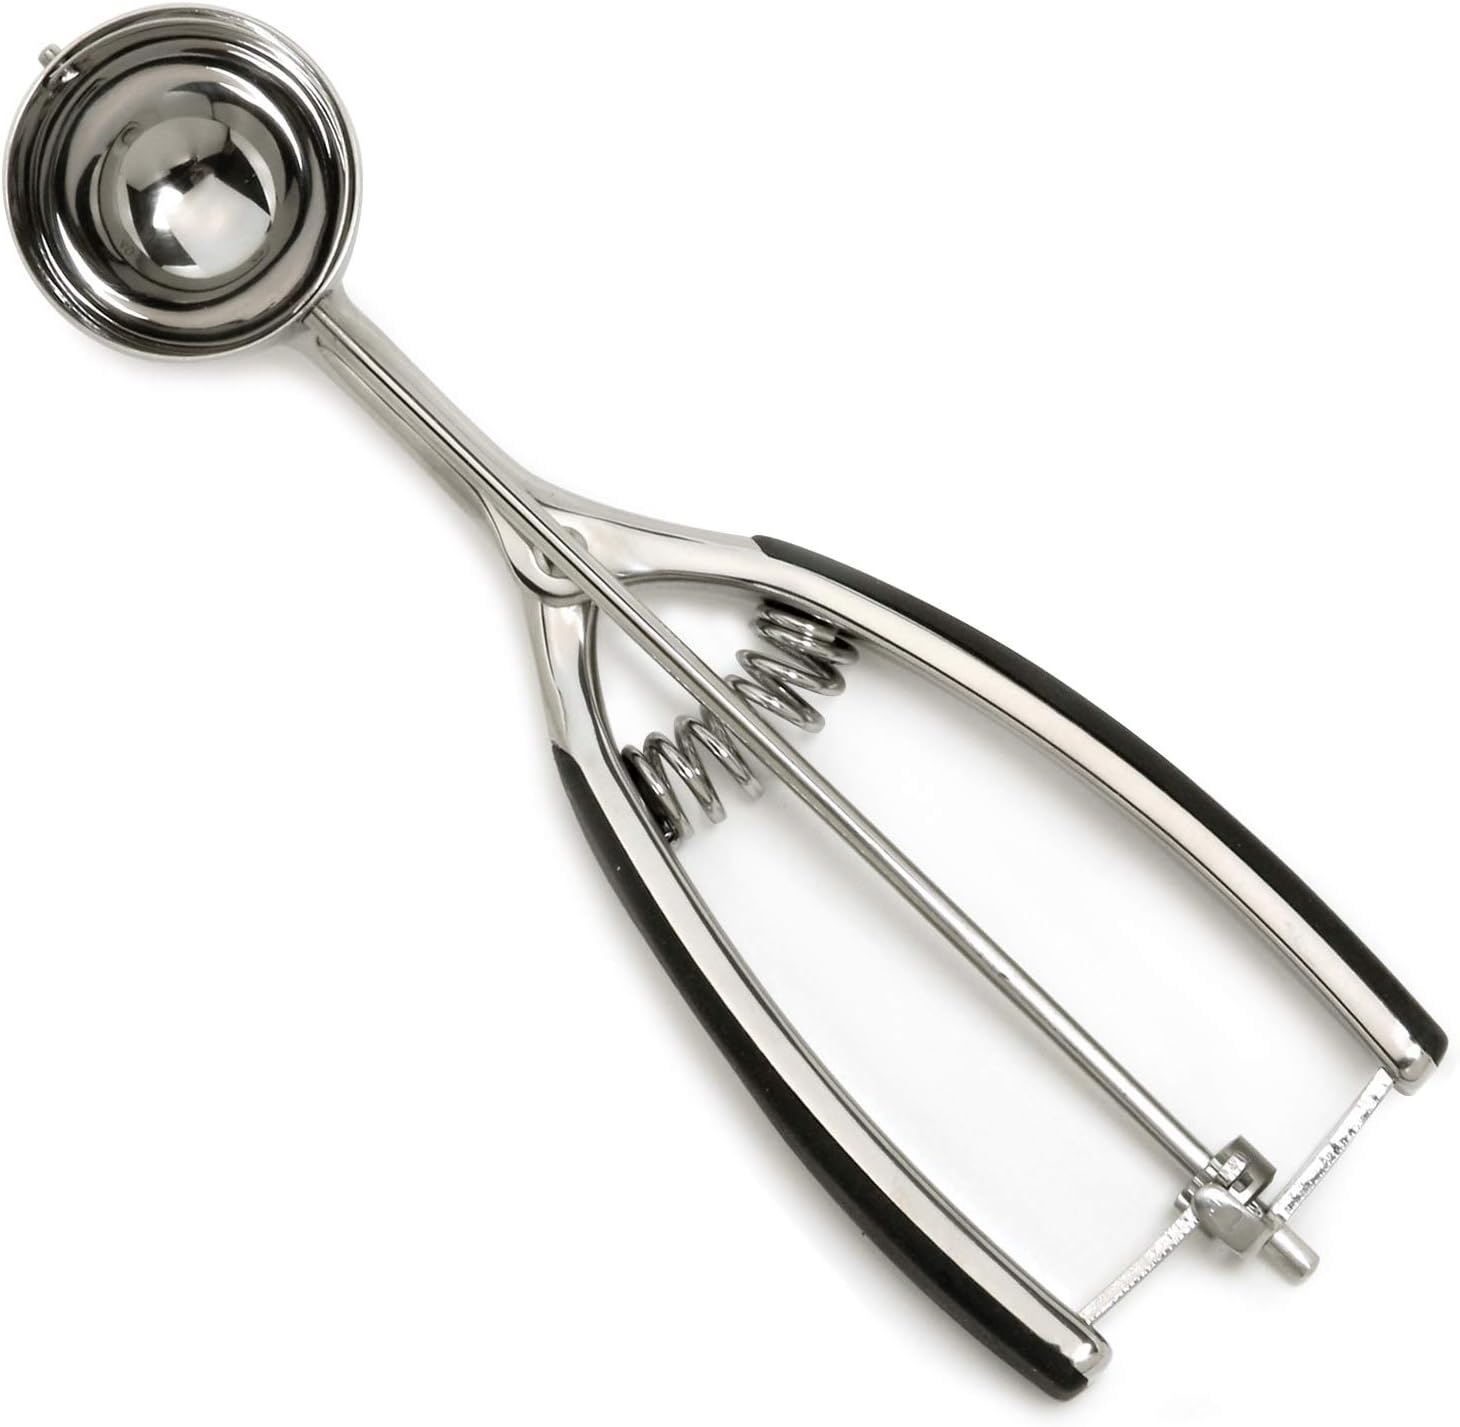
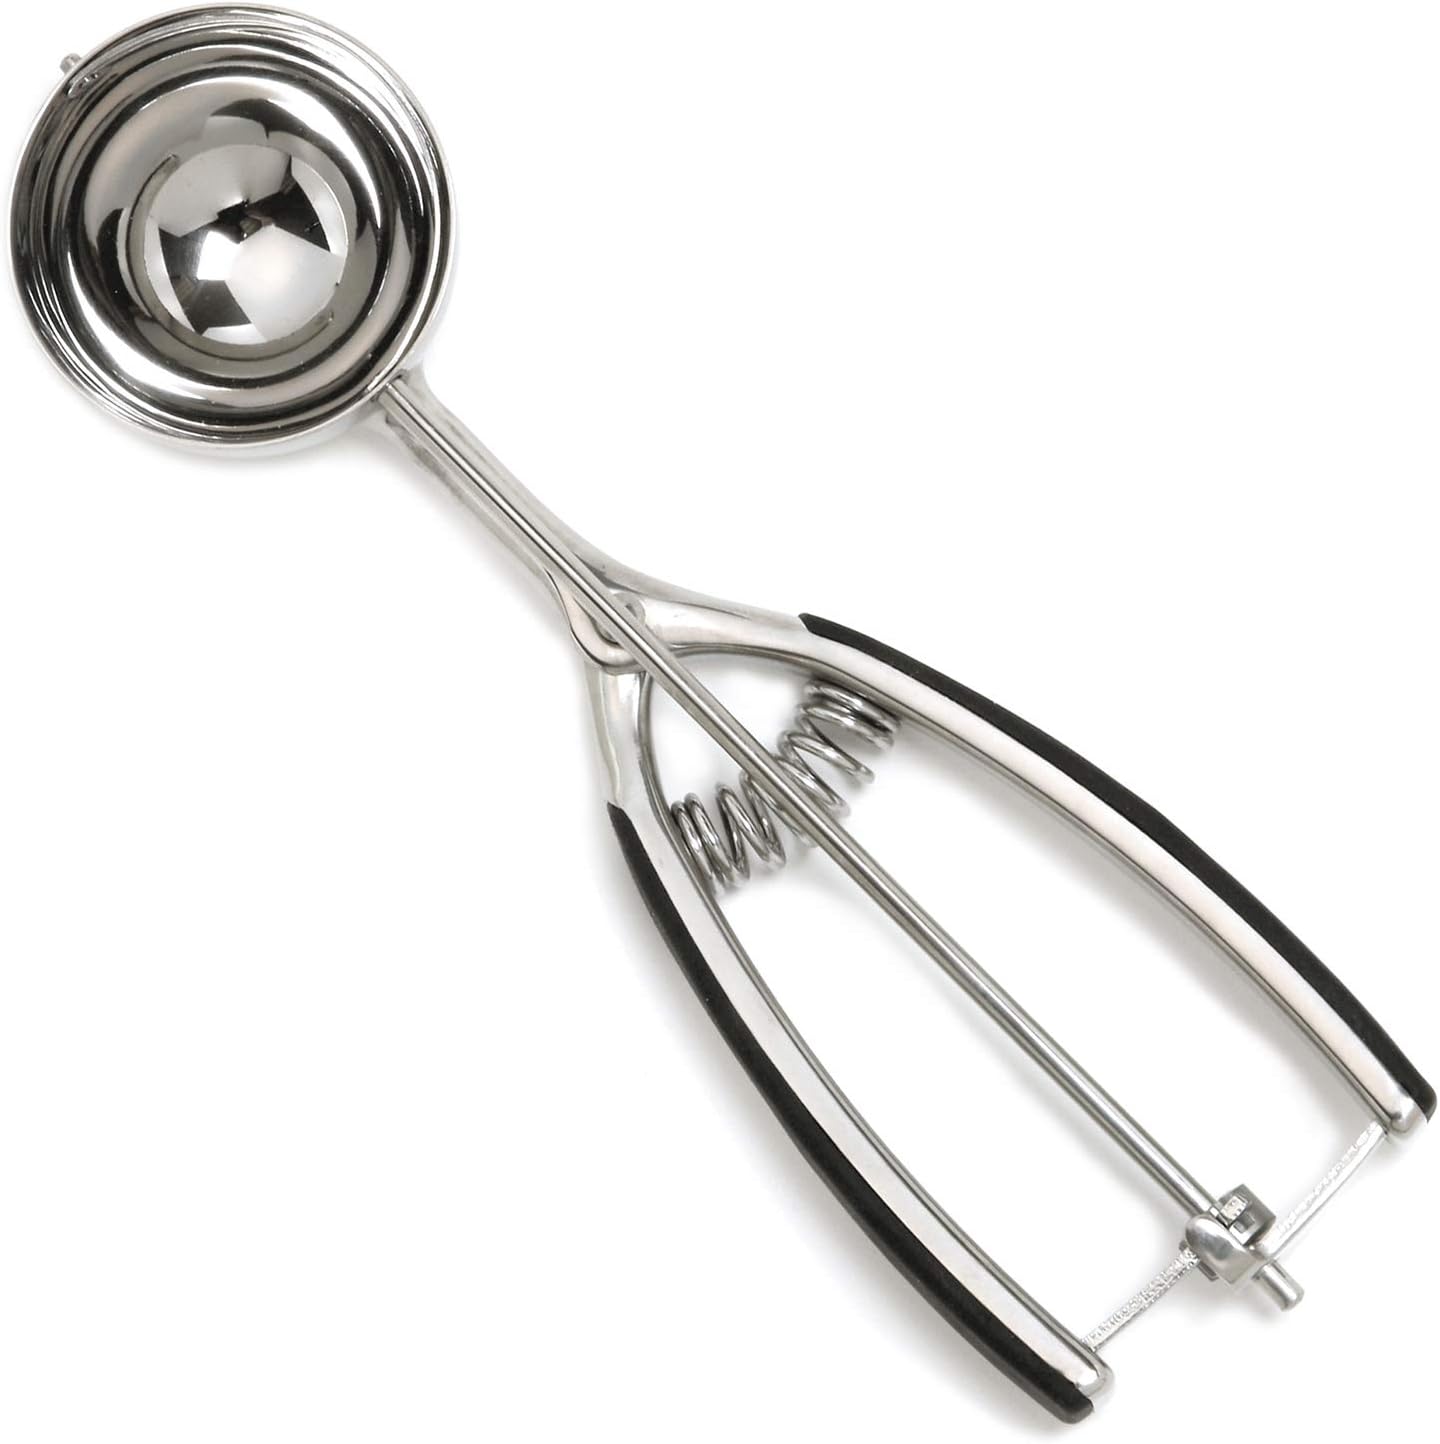
  8. Using a 4 tablespoon cookie scoop, portion the dough into balls and set them on a parchment paper lined baking pan or two smaller pans or plates if you don’t have much fridge space. Push down on the top of each dough ball so that they look like actual cookies instead of balls. The diameter of the dough should be about 3 inches on the bottom and the top.
  9. Wrap the baking pan or plates with plastic cling wrap tightly so it’s properly sealed. Put in fridge and chill dough for at least 1 hour. This step is required.
  10. After 45 minutes of chilling the dough, preheat the oven to 375°F. This should take about 15  minutes. Get your actual baking pan, preferably aluminum, ready by lining it with parchment paper.
  11. Once the oven is at 375°F and the cookies have chilled for at least one hour, take them out of the fridge and remove the plastic cling wrap.
  12. Carefully place six of the dough balls on one pan with 3-4 inches in between each cookie.
  13. Bake for 13 minutes. I have an induction range and it tends to have more intense heat than most ovens. Please make adjustment based on your own stove. They are done at 13 minutes for me when the sides have a light golden color.
  14. When the cookies are done, carefully remove from the oven and set to cool in the baking sheet for two minutes. After 2-3 minutes, carefully move the the parchment paper with the cookies on top to the wire rack and let finish cooling.
  15. When the vegan compost cookies have cooled down enough, enjoy with a big cup of coffee or a big glass of your favorite vegan milk. 

Equipment

Image of aluminum baking sheets

aluminum baking sheets

Buy Now →
Image of Pyrex 6-Ounce Custard Cups

Pyrex 6-Ounce Custard Cups

Buy Now →
Image of 4 tablespoon cookie scoop

4 tablespoon cookie scoop

Buy Now →

parchment paper

Buy Now →

stand mixer

Buy Now →

Notes

  • This is adapted from Christina Tosi’s Milk Bar Compost Cookies recipe (without graham cracker crust) from the Cooking Channel website.
  • Try to stick to the recipe. 
  • Bake only using one tray in the oven at a time as to avoid uneven cooking due to messed up airflow.
  • If you have too many vegan compost cookie dough balls, you can freeze them for up to 3 months.
  • You can store the baked vegan compost cookies in an airtight container at room temperature for 5 days. Although I doubt they will last that long!

Keywords: baking, milk bar, christina tosi, cooking channel, chocolate chips, potato chips, kettle chips, cookies, vegan cookies

Did you make this recipe?

Share a photo and tag us — we can’t wait to see what you’ve made!

10 Ingredient Vegan Siomai

January 21, 2021

vegan siomai recipe

Affiliate Disclosure: As an Amazon Associate, I earn from qualifying purchases. Thank you for supporting Bakeroise.

vegan siomai recipe

Hi! Today I bring you a recipe for vegan siomai, a type of dumpling popular in the dim sum world.

I want to start learning how to make my own dim sum dishes little by little with a deadline of Christmas Day. I am calling it my “Twelve Months of Dim Sum Project” with the goal of having a kickass dim sum breakfast at home on Christmas Day. Yeah. How super original. While I grew up eating dim sum in Oakland and San Francisco, I’ve tried Chinese food in many cities around the world including Seattle, New York and London.

Oh and Hong Kong. Ha. Obviously that was where I had the best dim sum I’d ever had in my life.

vegan siomai recipe

Now in 2021 we’re not really going out for dim sum for obvious reasons. Well that and the fact that our go-to restaurant permanently closed due to the awful pandemic that has left so many people in distress through no fault of their own! Oh and also, there aren’t really any vegan dim sum eateries close by anyway so it’s not like this was solely due to the pandemic.

Since I’m stuck at home, I thought it would be fun to learn how to make these dishes and share my progress along the way. Also, Lunar New Year is coming up next month so it’ll be nice to have at least one of my own dumpling recipes under my belt.

vegan siomai recipe

This is Part 1 of 12 of my Dim Sum Project Series. Siomai can also be spelled “shumai” but I’m going with the Filipino spelling for obvious reasons. Siomai is only one kind of the many different dumplings in the dim sum world. It was relatively easy to make but the testing part to bind the vegan ground beef was more time consuming. Oh that’s right. I used store-bought frozen ground beef, some dried mushrooms, cornstarch for binding and even MSG! And if you’re scared of MSG, please do your homework because I don’t have time to explain it other than the fact that the myth about MSG being awful for you is deeply rooted in xenophobia (like soy).

However, if you are curious and have a genuinely open mind and want to use this recipe, then I hope you enjoy this one! This is an easy vegan siomai recipe that uses less than 10 ingredients. Please remember to read the recipe carefully before giving it a try.

12 Months of Dim Sum Recipes:

January 2021: Vegan Siomai

February 2021: Instant Pot Congee

March 2021: Vegan Potstickers with Ginger Scallion Tofu

April 2021: Crispy Golden Fried Tofu

May 2021: Toasted Cumin Scallion Pancakes

June 2021: Gluten-Free Asian Dipping Sauce

July 2021: Sweet Red Bean Paste and Perfectly Golden Sesame Balls

Print

Vegan Siomai Recipe

vegan siomai recipe
Print Recipe

★★★★★

5 from 1 reviews

Ridiculously easy vegan siomai recipe that uses less than 10 ingredients. 

  • Author: Jan Carlisle @ Bakeroise
  • Prep Time: 25 minues
  • Cook Time: 10 minutes
  • Total Time: 35 minutes
  • Yield: 24 dumplings 1x
  • Category: Dim Sum
  • Method: Steaming
  • Cuisine: Chinese
  • Diet: Vegan

Ingredients

Scale

For the filling:

  • .05 oz dried mushrooms, rehydrated (takes about 20 minutes)
  • 1 cup water
  • 12 oz of frozen ground beef
  • 1 tablespoon vegetable oil
  • 1 green onion
  • 1 tbsp of soy sauce
  • 1 tablespoon of cornstarch
  • ½  tablespoon of MSG

For assembling: 

  • 24 vegan wonton wrappers (optional to cut into rounds but I’m fine with square)

For lining the bamboo steamers:

  • 6 cabbage or lettuce leaves

For topping:

  • Green onions

Instructions

  1. Take the dried mushrooms and the 1 cup water and simmer the mushrooms for 20 minutes in a fully covered, small saucepan.
  2. While mushrooms are simmering, rinse off your green onions and slice into thin discs all the way to the bottom. Discard the bottom.
  3. Gather all of your other ingredients for the filling.
  4. When mushrooms are done, use tongs to pick out the mushrooms and mince. Do not discard the water.
  5. Preheat a skillet to medium heat. When hot enough, add the minced mushrooms, mushroom broth, frozen vegan ground beef, vegetable oil, half of the green onions, soy sauce, cornstarch and msg and cook for 3-5 minutes until everything is mixed together and barely cooked. Just don’t overcook because this stuff isn’t real meat and it will be steamed again once in the siomai.
  6. Let sit for 5 minutes in a large, glass bowl after cooking and do the next step while it cools down.
  7. Bring plated wonton wrappers to the table with a damp towel over it so they don’t dry out.
  8. Bring a small bowl of water to the table to dip fingers in while assembling.
  9. Bring out two bamboo trays and set them on the table.
  10. Take out six fresh lettuce or cabbage leaves, rinse and pat dry.
  11. Line each bamboo tray with three leaves each. Make them as flat as possible even if it means having to tear some of the ribs off. Just try to cover the bottom of the tray.
  12. Go back to the filling and use your hands to mash it together so it’s not as crumbly. This is to ensure that it doesn’t get too crumbly as a filling.

Start assembling in the order below:

  1. While keeping the damp towel over the unused wonton wrappers, take a wonton wrapper and use your finger to wet the perimeter of the surface.
  2. Take your 1 tablespoon cookie scoop and get a heaping scoop of the filling and place in the middle of the wrapper, carefully as to not spread too much.
  3. Start pinching the sides together to make a wall for the filling.
  4. Using a flexing palm to form the dumpling into somewhat of a cup shape, gently push filling down to make it as dense and compact as possible. This is so that it doesn’t fall out of the dumpling.
  5. When the filling is compact and dense, tighten up all the sides with more pinching and feel free to push upper edges over the top so that it helps keep the filling pushed down and dense. Add water when needed to get pinched sides to stick together.
  6. Set the dumpling/siomai in the steamer tray.
  7. Repeat steps 1-5 until all dumplings have been made. Make sure to not have the dumplings touching each other.

Cooking the siomai:

  1. Put about an inch of water in a sauté  pan that can hold up the steamers.
  2. Layer the bamboo steamers and cover with lid. Set on top of the sauté pan’s rim and steam for 10 minutes or until done.
  3. When done, top with green onions and serve with your favorite soy sauce, chili oil, or your favorite vinegar dipping sauce!

Equipment

Image of bamboo steamer basket

bamboo steamer basket

Buy Now →
Image of 1 tablespoon cookie scoop

1 tablespoon cookie scoop

Buy Now →

Notes

  1. I tried to use vegan egg as a binder and it tasted really weird. Seems like the vegan egg I use is better on baked goods. The cornstarch was way better for me in this recipe.
  2. When actually assembling the dumplings, you can’t do it assembly line style due to the drying out of the wonton wrappers (and the water you would have just lined them with). So you have to make each dumpling one at a time.


Keywords: steaming, vegan dim sum, vegan siomai, vegan dumplings, vegan shumai, vegan chinese food, vegan breakfast, vegan brunch, vegan snack

Did you make this recipe?

Share a photo and tag us — we can’t wait to see what you’ve made!

Vegan Quesadillas

January 20, 2021

Affiliate Disclosure: As an Amazon Associate, I earn from qualifying purchases. Thank you for supporting Bakeroise.

Yo. I love quesadillas. And that is why today I’m sharing a recipe for vegan quesadillas. They are so easy to make and the rewards are pretty great. Even as a vegan, I can still get down.

This is obviously not a traditional quesadilla recipe.

I am embarrassed to admit that I generally favor flour tortillas for quesadillas over corn tortillas given that flour was the imposed food.

However, I did grow up eating Mexican food from the taco trucks and taquerias in East Oakland (as well as childhood best friend’s home) and flour tortillas just happened to be in all my favorite dishes with the exception of tacos. Tacos always had corn tortillas and that’s what I prefer as well.

I always reserved fresh corn tortillas for breaking up and using each piece as a vessel for my beans and rice. For those who are not already familiar, the Fruitvale/Foothill area of Oakland, where I grew up, has a high population of Mexicans so the local culture was rich with Mexican influence.

Quesadillas became a true comfort food for me when I had a baby. Being stuck on the couch nursing my new infant for days at a time made it so that I couldn’t use both hands. Exclusive breastfeeding was non-negotiable so I knew I wanted to adapt for my baby as opposed to having my baby adapt for me.

Since my baby was still a newborn who still required to be held, our postpartum doula would prepare me easy cheese and cracker plates which were enough to satisfy me. Sometimes they’d even prepare me two in one day. Eek! After our doula left, our new helper, with a chef background decided to make me something more comforting as the days got colder: quesadillas!

Quesadillas remind me of my early days with my child. But now my kiddo is a little lady and my hands are free (well sort of). So I’mma pack my vegan quesadillas!

To make a decent vegan quesadilla, every single ingredient needs to be good. I’m not going to sit here and pretend like vegan cheese tastes better or even as good dairy cheese. So when making this specific dish, it’s good to aim for things that are flavorful. If I have the extra time, I do try to add things like caramelized onions and roasted peppers. That’s just personal preference.

Having said that, finding decent vegan cheese isn’t so hard for me anymore. My favorite brand is Violife for vegan shredded cheddar cheese. I’ve come to accept the fact that when I eat these things that are supposed to be “substitutes”, I have to appreciate them for what they are because it’s not a fair comparison. And I honestly like Violife cheddar cheese.

Gardein’s ground beef is the “meat” that I chose for this. I use it in other things too like vegan mapo tofu. It’s one of the few meat substitutes my husband will tolerate. Everyone who reads my blog knows I’m a proponent for soybeans and I constantly have to defend it (and MSG) against myths that are lowkey racist.

And the beans are just plain ol’ canned vegetarian beans that are labeled so but are fortunately vegan.

I find this combination for vegan quesadillas to be easy, rich and comforting. Most of all, it’s decent vegan food that I can have regularly.

And I hope you like it too.

Print

Vegan Beef and Cheese Quesadillas

Print Recipe

Ridiculously easy vegan beef and cheese quesadilla recipe!

  • Author: Jan @ Bakeroise
  • Prep Time: 10
  • Cook Time: 25 minutes
  • Total Time: 35
  • Yield: 4 servings 1x
  • Category: Lunch
  • Cuisine: Mexican
  • Diet: Vegan

Ingredients

Scale
  • 2 cup vegan frozen ground beef
  • 1 packet of taco seasoning
  • 4 flour tortillas
  • 1 cup of canned vegan refried beans
  • 2 cups vegan shredded cheddar cheese
  • Avocado oil spray
  • Vegan cilantro lime cream sauce or any legit store-bought salsa for serving

Instructions

  1. Cook ground beef with 1 packet of taco seasoning according to the ground beef package instructions.
  2. On a flat surface, lay out a tortilla.
  3. Spread ¼ cup of the refried beans over half of the tortilla, covering it.
  4. Evenly distribute ½ cup of the ground beef over the refried beans.
  5. Evenly distribute ½ cup of the vegan cheese over vegan beef and cheese.
  6. Preheat a large skillet to medium heat. Lightly spray the bottom of the inside with the avocado oil to prevent sticking. No need to oil if you have a nonstick pan.
  7. When the skillet is hot, carefully place the half covered tortilla, filling side up in the skillet.
  8. Cover the pan with a slight gap to let some steam escape and cook for 2-3 minutes to warm up and very lightly brown the tortilla but not crisp. Adjust as needed according to your stove. My induction stove is intense.
  9. Carefully fold over the unfilled half of the tortilla to cover the fillings on the other half and carefully flip it so that the cheese side is down. We want that side to cook first.
  10. Cook covered with a slight gap between lid and skillet for 1 minutes until cheese is melted.
  11. Flip over and uncover the pan completely.
  12. Cook 1 minute or until the bottom is toasted.
  13. Repeat three more times to make a total of four servings.
  14. Serve with vegan cilantro lime cream sauce and enjoy!

Notes

  • Don’t spray too much oil in the skillet as tortillas are absorbent. 
  • Adding each ingredient in order to create the filling in order is important as we want to be able to spread the beans. 

Did you make this recipe?

Share a photo and tag us — we can’t wait to see what you’ve made!

Vegan Sheet Pan Nachos

January 18, 2021

I decided to make a recipe for sheet pan nachos as I never really ordered them whenever we’d dine out. I’m just a loyal gal to my burritos and chimichangas! But my husband does love corn tortillas so I thought it’d be fun to actually have a go-to recipe for nachos. I know they’re not super authentic but they’re quick, easy and tasty. And that’s what I need.

While traditional nachos have cheese on them, I didn’t want to use vegan cheese for these nachos as my husband isn’t into “fake cheese”. Instead, I rely on the soy chorizo and the various rainbow of ingredients to give these nachos their flavor.

I shared these nachos with several neighbors and I learned that every single person enjoyed it after giving me unsolicited positive feedback. I usually only try to ask for feedback about changes. But I do appreciate the good feedback too! The encouragement is so good for me.

So with that, I would like to share with you my Vegan Sheet Pan Nachos with Soy Chorizo. I hope you like! Please read everything carefully when using this recipe.

Print

Vegan Sheet Pan Nachos

Print Recipe

This is an 8-step super easy and quick vegan sheet pan nachos recipe with soy chorizo.

  • Author: Jan Carlisle @ Bakeroise
  • Prep Time: 10
  • Cook Time: 20
  • Total Time: 30
  • Yield: 6 servings 1x
  • Diet: Vegan

Ingredients

Scale
  • 24 oz of vegan chorizo, the kind that can get crumbly
  • 16 oz of salted tortilla chips (make sure they’re sturdy)
  • 1 15 oz can of salted black beans, drained and rinsed
  • 1 15 oz can of sweet corn, drained and rinsed
  • 1 bell pepper, rinsed and chopped
  • 1 large poblano pepper, rinsed and chopped
  • Juice of one large lime
  • 1 cup of cilantro lime cashew cream or just plain ol’ vegan sour cream for drizzling
  • 2 cups of cilantro leaves, rinsed and loosely packed
  • 3 green onions, rinsed and chopped for sprinkling
  • A jar of your favorite salsa if it isn’t summer and you can’t make your own using actual fresh ingredients

Instructions

  1. Preheat oven to 400°F.
  2. Preheat a large sauté pan to medium heat. When hot enough, spray with avocado oil.
  3. When oil is hot enough, add the soyrizo and cook according to package instructions. Usually for me this takes 8-10 minutes. When done, let cool and start assembling the sheet pan nachos.
  4. Use half of the tortilla chips to create a  single layer on the sheet pan. 
  5. Evenly distribute half of the soy chorizo over the layer of tortilla chips using a half tablespoon cookie scoop (or just a spoon is fine).
  6. Evenly distribute the following ingredients in order across the pan: half of the black beans, half of the sweet corn, half of both the red bell peppers and poblano peppers.
  7. Stick sheet pan in oven and bake for 8-10 minutes.
  8. Remove from oven when everything is cooked.
  9. Sprinkle the top with half of the lime juice as evenly as possible.
  10. Drizzle half of the cilantro lime cashew cream as evenly as possible on top.
  11. Sprinkle half of the cilantro leaves and half of the chopped green onions over the pan.
  12. Repeat steps 1-6 for the second half of ingredients.
  13. Serve with your favorite salsa or cream sauce!

Did you make this recipe?

Share a photo and tag us — we can’t wait to see what you’ve made!

  • « Go to Previous Page
  • Page 1
  • Interim pages omitted …
  • Page 13
  • Page 14
  • Page 15
  • Page 16
  • Go to Next Page »

Primary Sidebar

Categories

Recent Recipes

  • Vegan Filipino Afritada Inspired Tomato Stew
  • Mulled Pear and Apple Cider
  • Bakery Style Chocolate Chip Cookies
  • Shortcut Vegan Bolognese
  • Kimchi Chickpea Bowl
  • Facebook
  • Twitter
  • Instagram
  • Pinterest

Calendar

June 2025
M T W T F S S
 1
2345678
9101112131415
16171819202122
23242526272829
30  
« Dec    

Archives

  • December 2023
  • November 2023
  • September 2023
  • September 2022
  • March 2022
  • February 2022
  • January 2022
  • December 2021
  • November 2021
  • October 2021
  • September 2021
  • August 2021
  • July 2021
  • June 2021
  • May 2021
  • April 2021
  • March 2021
  • February 2021
  • January 2021

Recent Comments

  • Jan on Vegan Longevity Noodles – Yī Miàn
  • Kim on Vegan Longevity Noodles – Yī Miàn
  • Jan on Vegan Mongolian Beef Inspired Soy Curls
  • Jenn P on Vegan Mongolian Beef Inspired Soy Curls
  • Jan on 10 Ingredient Vegan Siomai

Footer

↑ back to top

About

  • Privacy Policy
  • Disclaimer
  • Terms & Conditions

Newsletter

  • Sign Up! for emails and updates

Contact

  • Contact
  • FAQ

As an Amazon Associate I earn from qualifying purchases.

Copyright © 2020 Brunch Pro on the Brunch Pro Theme