• Skip to primary navigation
  • Skip to main content
  • Skip to primary sidebar
  • About
    • Contact
    • Disclaimer
    • Privacy Policy
    • Terms & Conditions
  • FAQ
  • Vegan Recipes
    • Free Fridge Food
    • Special Diets
      • Anti-Inflammatory
      • Gluten-Free
    • Type of Meal
      • Breakfast
      • Lunch
      • Dinner
      • Snacks
    • Culturally-Inspired
      • Argentinean-Inspired
      • Chinese-Inspired
        • Dim Sum
          • 12 Months of Dim Sum
        • Noodles
      • Filipino Food
      • Italian-Inspired
      • Japanese-Inspired
      • Korean-Inspired
      • Malaysian-Inspired
      • Mexican-Inspired
      • Neapolitan-Inspired
      • Pacific Northwest
      • Russian-Inspired
    • Baking
      • Bars
      • Breads
      • Cakes
      • Cookies
    • Holiday Recipes
      • Christmas
      • Friendsgiving
    • Season
      • Autumn
      • Winter
    • Condiments
  • SHOP
    • My Pantry Favorites
  • 12 Months of Dim Sum

Bakeroise

Vegan Filipino Afritada Inspired Tomato Stew

Mulled Pear and Apple Cider

Bakery Style Chocolate Chip Cookies

Shortcut Vegan Bolognese

Kimchi Chickpea Bowl

Hearty Kale and Chickpea Tomato Soup

Vegan Upside Down Pear Cake with Crushed Candy Caps

Golden Beets and Brown Rice Bowl

Vegan Longevity Noodles – Yī Miàn

Farewell, 2021. Hello, 2022!

12 Months of Dim Sum Project 2021

Fennel Cake with Lingonberry Sauce

7-Ingredient Vegan Cilantro Lime Sour Cream Recipe

January 16, 2021

Affiliate Disclosure: As an Amazon Associate, I earn from qualifying purchases. Thank you for supporting Bakeroise.

This one is for all my fellow avocado lovers who can’t seem to come correct when it comes to storing and using avocado in time.

I make vegan creamy sauces from scratch because I don’t have enough fridge space to justify store-bought tubs of vegan sour cream and dressings taking up room in the fridge only to be neglected and left to rot. It’s gross. If I can make a condiment with things I already have on hand, I will almost always opt to do that.

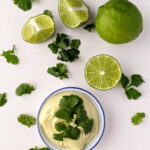
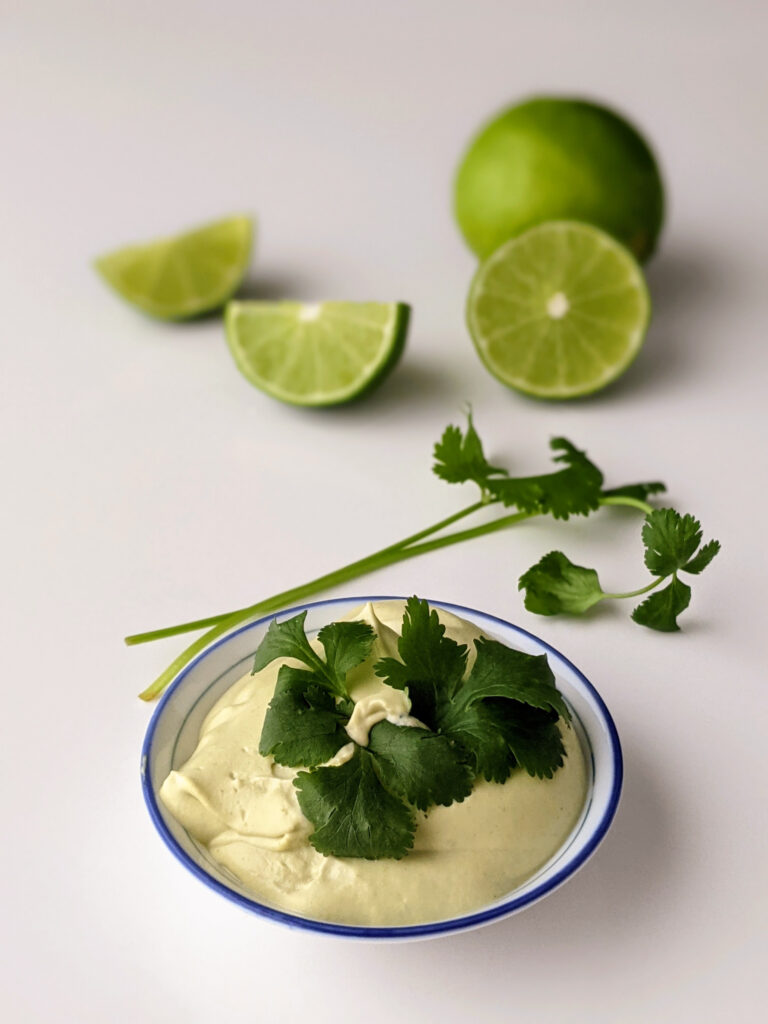
So this particular recipe is for a vegan sour cream sauce that is flavored with fresh cilantro and lime. Most cilantro and lime-centered recipes seem to call for avocado. I think that stuff looks good!

However, I intentionally omitted the avocado from the recipe because I get to actually use them them. You know the story: You buy them but they’re not ripe. So you have to “wait” but instead you “forget about them” and they go bad. Talk about wasting food!

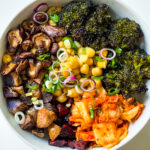
Anyway, I hope you find this recipe useful as it only takes about 5 minutes prep time, 5 minutes boiling time and less than 5 minutes blending time! This is the perfect cilantro lime recipe when you don’t have avocados but still want to have that cilantro lime cream sauce with your flautas or quesadillas.

I present to you my Vegan Cilantro Cream Sauce with No Avocado Required!

Print

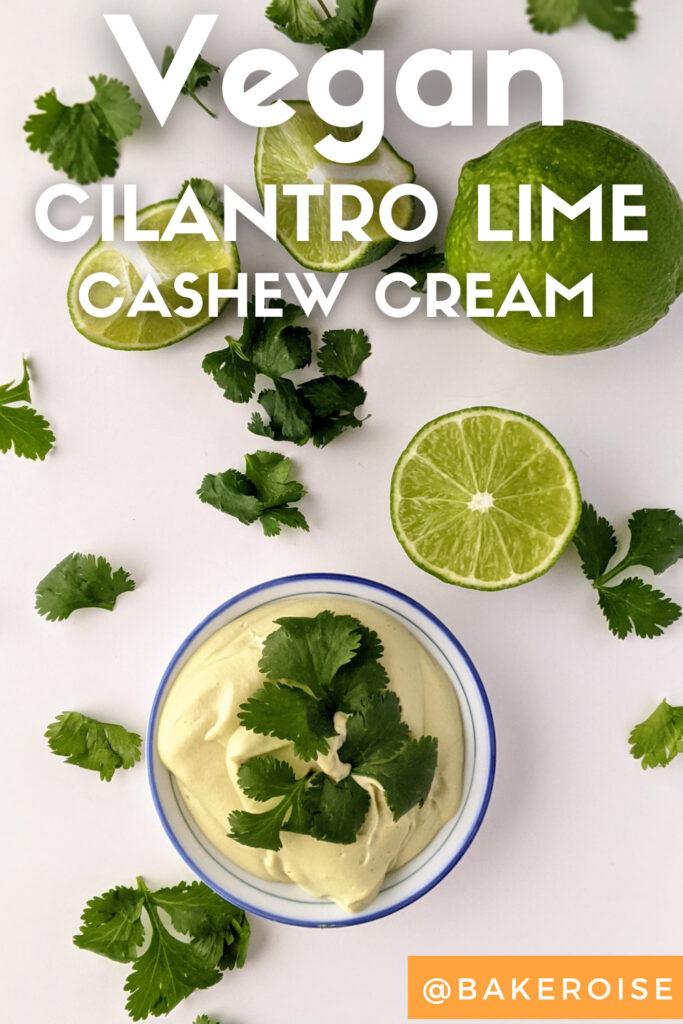
Cilantro Lime Cashew Cream with No Avocado Required

Print Recipe

Tasty, quick and easy  vegan cilantro lime cashew cream recipe that does not require avocados!

  • Author: Jan @ Bakeroise
  • Prep Time: 5
  • Cook Time: 5 minutes boiling and <5 minutes blending
  • Total Time: <15 minutes
  • Yield: 4 servings 1x
  • Category: Sauces
  • Method: Blending
  • Cuisine: Mexican
  • Diet: Vegan

Ingredients

Scale
  • 10 and 1 ½ cups of water, divided into 10 cups and 1 ½ cups
  • 3 cup (or 426 g) of cashews
  • 2 cups (or 31 g) of loosely packed cilantro leaves, rinsed
  • Juice of three limes
  • 1 tsp garlic powder
  • Salt, to taste
  • Water to thin

Instructions

  1. Bring 10 cups of water to a boil in a large saucepan.
  2. Add a palmful of salt once water is boiling.
  3. Add the cashews and boil for 5 minutes.
  4. Drain cashews.
  5. Add cashews, cilantro leaves, lime juice, garlic powder, 1 ½ cup of hot water and blend in a powerful blender.
  6. Blend to smooth consistency. Try to pause intermittently to scrape down the sides with a spatula.
  7. Serve with dishes that go well with citrus flavors like nachos, flautas, chimichangas, tacos etc. It’s pretty good stuff!

Notes

  • If you don’t want to boil the cashews and are able to plan in advance,  soak the cashews overnight for 8 hours instead.
  • Remember to salt to taste. It took me three palmfuls of salt to taste. Adjust as needed. Trust your taste buds.
  • I tested this recipe in a food processor but unfortunately the food processor was not high powered enough. It was still chunky and never got to a smooth consistency the way it did with my high powered blender (a Vitamix).

Did you make this recipe?

Share a photo and tag us — we can’t wait to see what you’ve made!

30-Minute Vegan Filipino Spaghetti without Banana Sauce

January 15, 2021

Affiliate Disclosure: As an Amazon Associate, I earn from qualifying purchases. Thank you for supporting Bakeroise.

Hi, y’all! This vegan Filipino spaghetti recipe is another one from my past. Well, sort of since I veganized it. But it’s still something from my childhood: Filipino Spaghetti.

Filipino Spaghetti isn’t your authentic Italian spaghetti or even your basic American spaghetti. And it’s not trying to be. Filipino Spaghetti is its own sweet thang and I love it so much. 

This vegan Filipino spaghetti is a sweet dish. So please be aware of that. It is *sweet*. Sweet. Sweet. Sweet.

Vegan Filipino spaghetti is another favorite comfort food of mine. It’s what I want when I/m not in the mood for my favorite vegan Filipino Adobo.

Filipino Spaghetti is generally loaded with chopped onions, garlic and carrots, packaged tomato sauce, processed cheese, sliced hot dogs and ground beef. It was especially sweet due to added sugars in the sauce and/or banana sauce (also called banana ketchup). Not gonna lie, the loads of sodium content makes me nervous sometimes! I’m all about salting my food properly but I’m not super excited about the amounts of sodium in packaged foods.

Filipino Spaghetti was a birthday party favorite. Every family had their own recipe for it but the same result was always the same: No one ever turned it down and everyone always wanted more! 

Filipino Spaghetti is incredibly sweet due to both the Philippine store-bought spaghetti sauce and banana sauce. And because of the diabetes that runs in my family, I wanted to be reasonable. While I use organic cane sugar in this vegan Filipino spaghetti recipe, I am actually relying way more on a whole pound of carrots for the sweetness. The carrots also help give the spaghetti an orange hue which helps make it look like old school Filipino Spaghetti. I also removed the banana sauce altogether because I wanted to make a recipe that would only require things I’m likely to already have in my pantry.

Now I present to you my Vegan Filipino Spaghetti Recipe without Banana Sauce!  If you decide to use it, please read the notes thoroughly. Hope you like!

Print

30 Minute Vegan Filipino Spaghetti without Banana Sauce

Print Recipe

Easy 30 minute vegan Filipino Spaghetti Recipe without the need for banana sauce!

  • Author: Jan Carlisle @ Bakeroise
  • Prep Time: 10
  • Cook Time: 15
  • Total Time: 25 minutes
  • Yield: 8 servings 1x

Ingredients

Scale
  • 1 lb dried spaghetti noodles
  • a heaping tablespoon of salt for pasta water (don’t come at me with sodium comments – do your research)
  • 24–28 oz jar of your favorite tomato-based pasta sauce
  • 28 oz canned, unpeeled tomatoes
  • 12–16 oz vegan ground beef
  • 12–16 oz frozen carrots
  • 5 vegan hot dogs (not Italian sausage)
  • 1 large yellow onion, peeled and roughly chopped
  • ⅔ cup of organic cane sugar
  • ¼  cup olive oil
  • 5 cloves of garlic, peeled, ends removed and roughly chopped

Instructions

  1. Bring a 6 qt stockpot or 6 qt saucepan to medium heat.
  2. Once the pot is hot, add ¼ cup of olive oil.
  3. Once olive oil is hot, add the onion, garlic and frozen carrots and cook until garlic and onion are translucent, about 3-5 minutes.
  4. When done onion and garlic are done cooking, add the organic cane sugar, tomato-based pasta sauce and roasted tomatoes. Bring to a boil and let simmer for 20 minutes.
  5. Once simmering, cook pasta according to directions on the box. Just make sure to salt properly with the heaping tablespoon of salt once the water is boiling.
  6. When pasta is done cooking, drain the pasta using a colander and immediately rinse with cold water to stop cooking.
  7. Quickly discard the pasta water in the sink and return cooked pasta to the pot. Drizzle with olive oil and toss with tongs to coat each noodle as much as possible to avoid clumping.
  8. At this point the sauce should be done or close to done. Turn off heat.
  9. With an immersion blender, blend the sauce so that it’s not so chunky. Blend maybe about 75%. Just eyeball this, no worries if you have big chunks of the carrots, it’s good for texture and color.
  10. Salt to taste. Seriously, you need to salt enough.
  11. Add the pasta to the sauce, this will almost fill up the smaller pot but that’s okay. Keep the pasta pot accessible to use for the frying of the vegan meats.
  12. Fully submerge pasta in the sauce and let sit while you fry up your vegan hot dogs and vegan ground beef.
  13. Preheat to medium again and add olive oil when it’s hot.
  14. Drizzle olive oil to the bottom of the larger pasta stockpot. Once it’s hot, add the ground beef and vegan hot dogs to cook for a good 2-3 minutes (or follow instructions on the packaging. This isn’t real meat so it doesn’t have to cook as long.
  15. When vegan meat is done cooking, add to the pasta and carefully mix.
  16. Salt to taste again. 
  17. Serve in bowls with a sprinkle of dried parsley on top and enjoy!

Notes

  1. This is a very sweet dish. I generally don’t encourage people to switch out ingredients especially when they’re taking on non-white-centered dishes like mine unless it’s for health/ethical reasons. But adjusting sugar content is reasonable for obvious reasons. Diabetes runs in my family so I get it.
  2. To test if a pot or the oil is hot enough, use the water flick method (obviously only using a TINY bit of water…like quickly run your fingers tips under the running tap and use that) – if it snaps and crackles, then it’s ready. If it does nothing, then it’s not. Just don’t burn yourself.
  3. Make sure you salt your pasta water with a palmful of salt! If you’re not familiar, watch this two minute video to learn how to salt properly. This is important and non-negotiable if you don’t like bland food. If you don’t salt your pasta water properly, that’s on you. 
  4. It’s fine to use fresh or frozen vegetables. I just tried to make this as easy as possible.
  5. Make sure to taste and properly throughout the cooking process.
  6. When cooking, you will have to adjust temperature accordingly based on your own stove. I’m going off of my induction stove that tends to heat way more intensely than your regular gas or electric stove.
  7. You must move quickly when draining the pasta, etc. If you don’t get the olive oil on it, it’ll start to clump.
  8. Make sure not to have the heat too high for the vegan meats as you don’t want it to smoke and set off your smoke detector! 

Keywords: vegan, vegan filipino food, filipino spaghetti, filipino spaghetti, vegan dinner, dinner, filipino food, philippine cuisine, vegan philippine cuisine, sweet spaghetti, vegan sweet spaghetti

Did you make this recipe?

Share a photo and tag us — we can’t wait to see what you’ve made!

Vegan Spanish Bread Recipe

January 12, 2021

Affiliate Disclosure: As an Amazon Associate, I earn from qualifying purchases. Thank you for supporting Bakeroise.

I love vegan Spanish bread. Well, my own at least. I’ve never tried anyone else’s vegan version of the addictive Filipino Spanish bread. For those unfamiliar, Filipino Spanish bread is a delicious baked good in the Philippines. For anyone who’s ever had pandesal, it’s similar but instead is rolled up like a croissant and has a sugar and buttery filling that makes me think of toasted caramel and bread crumbs.

I first tried Spanish bread at my baby shower in San Francisco. They had it because I’d seen loved ones back in the Bay Area posting photos of the delicious treat. So when I traveled there for my baby shower, my gracious hostess made sure to have a box ready for me. It was absolutely wonderful and everyone at the shower also got to happily treat themselves to roll after roll of the Spanish bread as they referred to it as “señorita bread”. Yes, this is also called señorita bread.

It’s been six years since that day and I am now vegan and have my own little family. So I decided to make my own vegan Spanish bread to accommodate my family’s needs. But not only do my family members like my vegan Spanish bread but so do our friends and neighbors!

My daughter loves helping me make this vegan Spanish bread. Her favorite part is rolling the dough. So if you have a little one who likes to help when baking, this easy recipe will be perfect for you.

I present to you my Vegan Spanish Bread recipe, adapted from the talented baker and blogger, Sanna at Woman Scribbles. Thank you, Sanna! I hope you like this vegan Spanish bread version of your own!

Print

Easy Vegan Spanish Bread

spanish bread rolls sitting atop a plate
Print Recipe

★★★★★

5 from 1 reviews

This is my vegan version of the addictive Spanish Bread, a sweet and popular baked good in the Philippines. In the US it’s also known as Señorita Bread. Recipe adapted from Woman Scribbles.

  • Author: Jan Carlisle @ Bakeroise
  • Prep Time: 30
  • Cook Time: 20-25
  • Total Time: 45-55 minutes + 2 hours rise time
  • Yield: 16 rolls 1x
  • Category: Breads
  • Method: Baking
  • Cuisine: Filipino

Ingredients

Scale

For the Vegan Spanish Bread Dough:

  • 1 and ¼ cups unsweetened vegan milk, warm between 90-110 degrees
  • 2 and ¼ tsp active dry yeast
  • 5 ¼ cups or 683 grams of flour, divided + 2 tablespoons for kneading
  • 1 tsp kosher salt
  • ½ cup or 125 grams organic cane sugar
  • ⅓ cup or 18 grams vegetable oil
  • 2 vegan eggs 

For the Vegan Spanish Bread filling:

  • ½ cup or 65 grams all-purpose flour
  • 1 cup or 120 grams bread crumbs
  • ⅔ cup or 154 grams vegan butter
  • 1 ⅓ cup or 216 grams organic light brown sugar
  • ⅔ cup unsweetened vegan milk

For assembling the Vegan Spanish Bread into rolls:

  • ¾ cup or 90 grams bread crumbs
  • Aquafaba from can of chickpeas 

Instructions

Make the Bread Dough:

  1. In a stand mixer bowl, add the yeast first and pour the warm vegan milk over it. Stir gently and then let stand for 5 minutes or until foamy.
  2. Add the vegan eggs, cane sugar, vegetable oil and salt. Use rice paddle or spatula to combine just until mixed.
  3. Using the paddle attachment, turn on the mixer on the lowest setting and gradually add the 4 cups of the flour. Do this for about a minute until everything is just mixed. Then turn off mixer.
  4. Attach the dough hook attachment to your mixer. Knead the dough at lower setting at 2-4 (at most) and it takes me 2-3 minutes to get it nice and elastic and only very slightly sticky.
  5. Shape the dough into a ball and put it back in the stand mixer bowl. Then cover with a damp towel and let rise for 1 to 1.5 hours or until size has doubled.
  6. Cover with damp towel and let rise for 1 and ½ hours, or until the size is doubled. Start cleaning up and making your filling.

Making the filling:

  1. Heat the vegan butter in a medium saucepan on low. Careful not to burn. 
  2. Add and thoroughly stir each ingredient into pot one at a time in this order: brown sugar, flour, vegan milk, bread crumbs (so add ingredient, stir, add ingredient, stir, etc)
  3. Once all ingredients are in the pot, cook low for one minute, don’t let it get all bubbly and start reducing.

Assembling and baking the Vegan Spanish Bread:

  1. When the dough has risen to double the size, gently but firmly punch the dough down and divide it into 16 equal pieces. I use a scale for this to weigh each piece.
  2. Using a rolling pin, flatten each portion into more of an oval shape about 6 inches long. Try to put them all on the parchment paper or another floured surface so that they’re not piling on top of one another.
  3. When all the balls are flat ovals, start filling each one. The dough is pretty elastic so if it shrank while it was waiting to be assembled, just hold one edge up until gravity pulls at the bottom and stretches out the dough to the length you originally rolled it out to.
  4. Lay out each oval vertically. Using 1 tablespoon cookie scoop, take a heaping scoop of filling and place it in the middle of the dough. Then spread with spatula to evenly cover as much of the surface area as possible, right up to the edges.
  5. Roll each piece of dough croissant style (so starting from the wider side with the thinner side being visible when done).
  6. Arrange the rolls, none touching, in the baking tray lined with the parchment paper. They will rise quite a bit.
  7. Use a pastry brush to a layer of aquafaba on the top of each roll.
  8. Put each roll in the bed of breadcrumbs and gently sprinkle the milky tops to cover as much as of the surface possible.
  9. Cover baking tray with plastic wrap and let the rolls rise for another hour but set a timer for 45 minutes.
  10. After 45 minutes, preheat the oven to 350°F. When the oven is at 350°F and it’s been an hour since the bread started its second rise, bake the Spanish bread for 20-25 minutes, or until the rolls are golden. 


Equipment

Image of pastry brush

pastry brush

Buy Now →
Image of 1 tablespoon cookie scoop

1 tablespoon cookie scoop

Buy Now →

baking sheet

Buy Now →

parchment paper

Buy Now →

stand mixer

Buy Now →

Notes

  1. This can be time consuming because the dough has to rise and proof. You have two options to make it a two day process instead (way less stressful).
    1. Make the dough and let it rise overnight in the fridge and then assemble the rolls and let it rise the second time the next morning on the counter before baking.
    2. Make the dough and let rise on the counter in the evening and then assemble the rolls that same evening. Then you can stick it in the fridge overnight for the second rise. All you’d have to do the next day is bake! I like this option better.
  2. This is not an overly sweet bread. It tastes more like pandesal (another even more popular Filipino baked good) but with filling. I don’t like too much filling because it’s too sweet so if you need to double the recipe to make it sweeter, go for it. 
  3. Divide the dough into 16 even pieces. I like to weigh it and make sure each piece weighs the same. (1136 grams/16=71 grams per dough ball)
  4. After dividing, you do still have to shape it into an oval and not roll it when it’s still in the original triangular shape after dividing or else it’ll just be too thin and frustrating to spread filling on. 

Keywords: spanish bread, vegan spanish bread, vegan baking, vegan filipino food

Did you make this recipe?

Share a photo and tag us — we can’t wait to see what you’ve made!

30-Minute Vegan Filipino Adobo Recipe

January 9, 2021

Vegan Filipino Adobo

Affiliate Disclosure: As an Amazon Associate, I earn from qualifying purchases. Thank you for supporting Bakeroise.

Vegan Filipino Adobo

Hi! Today I bring you a 30-Minute Vegan Filipino Adobo Recipe. Along with vegan Filipino spaghetti, vegan Filipino adobo is my favorite Filipino food.

Vegan Filipino Adobo ingredients

I am an Oakland-born-and-raised, first-generation Filipina-American who grew up in a traditional Filipino household where we regularly ate traditional Filipino food.

Filipino Adobo refers to two things: an indigenous method of cooking and the unofficial dish of the Philippines. Please don’t confuse the Filipino cooking method with the Spanish one just because they share the same name. The name was actually imposed on the Filipino cooking method by the Evil Colonizers from the Spanish Empire.

Filipino adobo, as the dish, is traditionally meat-based and stewed in vinegar, salt, garlic, peppercorns and dried bay leaves. Every family has their own unique recipe which can include ingredients such as ginger, potatoes, carrots and onions.

No matter what, this is a vinegary dish and it is meant to be.

Adobo, as the Philippine cooking method, came to be when the indigenous people would stew their dishes in vinegar and salt to preserve it due to their hot climate. This was centuries before refrigerators were even invented. When the barbaric colonizers arrived from the Spanish Empire in the 16th century, they didn’t have any contribution to the cooking method except for the imposed name. They can take credit for influencing a bunch of other dishes like Filipino afritada and Spanish bread or but they cannot take any credit for this one or even champorado (that credit goes to the Mexicans)!

So if you ever hear someone try to claim that the Spanish colonizers influenced that method of cooking, you can suggest they look up “adobo de los naturales” and they’ll learn the truth.

Vegan Filipino Adobo

The Chinese traders in the Philippines, on the other hand, did have something to contribute to the dish (long after the dish existed): soy sauce. This was the beginning of adobong itim (black adobo due to soy sauce) which would go on to become known as the “traditional” version of the dish despite adobong puti (white adobo due to salt) being the original version of the dish.

Let’s talk about soy sauce for a little bit. There’s light soy sauce and what should’ve been dark soy sauce in this recipe. Dark soy sauce has sugar as an ingredient since it’s “the sweeter soy sauce” but because organic Chinese dark soy sauce is virtually nonexistent, I no longer use it.

Why not? Because conventional dark soy sauce that isn’t listed as vegan usually means that the sugar in the ingredients is conventional, which means that it’s been filtered through bone char. And that’s something that I do tend to get queasy about. That’s just where I draw my own line when it comes to what I’ll eat. Every vegan is different.

To get the sweeter taste that the dark soy sauce would normally contribute to the dish, I also add three tablespoons of organic light brown sugar. Dark brown sugar, while I love using it for baking my favorite cookies, would just make this dish too sweet.

Before I became vegan who wanted to turn this into a vegan Filipino adobo dish, I actually learned how to make adobong itim before adobong puti (white adobo) even though the latter is what I ate constantly throughout my childhood. Ironically, I did base this recipe on the adobong puti I had growing up. When I perfect my adobong puti recipe, I will share that as well.

Vegan Filipino Adobo

This recipe for adobong itim starts off with a whole head of garlic, a good chunk of chopped ginger and whole black peppercorns cooking in vegetable oil which release the most pungent and warm aroma. The tofu and soy curls are then cooked in their marinade before being cooked in a rapid simmer in a medley of oil, vinegar and light soy sauce. At least two dried bay leaves are then added before the rapid simmering process to add a light, fresh taste to help balance out the heaviness of the dish. The dish cooks for 15 minutes uncovered until even the tofu is nice and brown. Then it’s finally done!

“But why do you use so much oil? OMG that’s not healthy!”

This image has an empty alt attribute; its file name is revisedadobo-13.jpg

Well obviously! Which is why we’re not eating all of the oil. Let’s not be gross now!

Because we’re not using real meat, we’re not getting any rendered fats. So instead we are using natural vegetable oil which is way more ethical than rendering fat from what was once a living and breathing creature. The rendered animal fat was what cooked the aromatics well and helped the flavors cling to the proteins of traditional adobo. The vegetable oil we use in this recipe does almost the exact same thing except that it’s an oil that isn’t part of the protein itself.

When this rich and delicious adobong itim dish is done cooking, we will then drain it in a large, fine mesh strainer over a large bowl or food storage container and save the oil. In addition, we use a slotted spoon when serving to get rid of even more oil if possible.

But why do we save the bulk of the oil instead of discarding it? Well, it’s because the protein tends to dry out if it hasn’t been sitting in its marinade. So when reheating leftovers after straining excess oils, whether it’s on the stove or in the microwave, the protein that has been sitting in the marinade won’t dry out. This is true for even “real meat” so it’s not an issue only with soy. We’re not keeping the oil forever.

Soy is also a legume and a complete protein so both soy curls and tofu make a wonderful substitution for this dish.

Now that you have a very brief background on the history of Filipino adobo, I share with you my 30-Minute Vegan Filipino Reipe, adobong itim style. Remember to strain and drain that oil!

Print

30-Minute Vegan Filipino Adobo

Vegan Filipino Adobo
Print Recipe

★★★★★

5 from 2 reviews

This is my 30-minute vegan Filipino adobo recipe that actually comes close to real thing. It is rich, satisfying and full of flavor. The secret is being generous with all of the aromatics and using enough oil to ethically mimic the rendered animal fat that makes traditional adobo so rich and tasty.

  • Author: Jan Carlisle @ Bakeroise
  • Prep Time: 15
  • Cook Time: 15
  • Total Time: 30
  • Yield: 16 servings 1x
  • Category: Main
  • Method: Stewing
  • Cuisine: Philippine
  • Diet: Vegan

Ingredients

Scale
  • 1 cups vegetable oil or another neutral oil with high smoke point 
  • Two (2) 12 oz blocks of extra firm tofu, drained and cubed
  • 6 oz or 170 grams  soy curls (do not rehydrate in water beforehand)
  • One whole head of garlic, cloves crushed, peeled and ends removed
  • 2 inch or 27 grams, fat piece of ginger, peeled and roughly chopped
  • ¼ cup of whole black peppercorns
  • 1 ¾ cups white vinegar 
  • 1 ¾ light soy sauce, plus more to taste
  • 1 cup water
  • 1 tablespoon of organic light brown sugar
  • At least 2 dried bay leaves 

Instructions

  1. Preheat a large pot to medium high. When the pan is hot after about 1 minute, add all the oil to the wok or large pan.
  2. When the oil is hot enough after 1-2 minutes, add the garlic, ginger, bay leaves and peppercorns. Cook for 2-3 minutes or until the garlic is translucent but not brown.
  3. Carefully add the rest of the ingredients in the following order, evenly spreading around the pot as much as possible: brown sugar, soy curls, tofu, vinegar, water and soy sauce.
  4. Make sure all the ingredients, especially the soy curls and tofu, are submerged in the liquid as much as possible.
  5. Bring to a boil and then immediately bring to a rapid simmer  (so medium high) for 15 minutes.
  6. Adjust seasoning to taste (more light soy sauce if you want it to be more salty for example)
  7. Remove from heat and let rest for 5 minutes while you get your fine mesh strainer and a sealable food storage container big enough to hold leftovers.
  8. Using the fine mesh strainer, drain the oil into the sealable container as much as you can. You will keep this oil for storing the leftover adobo.
  9. With a slotted spoon, serve the not-super-oily adobo with white rice, preferably Jasmine.


Equipment

OXO Good Grips Silicone Slotted Spoon

Buy Now →

OXO Good Grips 8-Inch Double Rod Strainer

Buy Now →

ZWILLING Spirit 3-ply 6-qt Stainless Steel Dutch Oven

Buy Now →

Notes

  • The vinegar content for this is high as it is how I, as a Filipina, like it. Adjust to your preferences. This is a vinegary dish and is meant to be.
  • Because we’re not soaking the soy curls beforehand, the liquid in the pan is going to do the work.
  • I have an induction range so you have to adjust accordingly based on your own stove. If oil is splattering, then the heat is too high. So turn down the heat.
  • Use a mesh colander when draining the oil to not lose any peppercorns. The only thing we’re trying to lose before serving is excess oil.
  • Do not throw out the oil. The oil serves as a brine and marinade. The adobo will dry out if it’s not sitting in oil. Let it soak in the aromatics when it’s not being eaten.
  • Reiterating that this is not a soup. This is not a stew. The oil is not a broth. Because this is an oily dish, make sure to use a slotted spoon even after draining. 
  • The best way to eat this is served with Jasmine rice with a spoon in your dominant hand and a fork in your non-dominant hand. The fork pushed the rice into the spoon. So sensible. It’s the Filipino way.
  • I do eat peppercorns whole but not everyone does. You don’t have to. If you have any questions about the safety of it please do your own research.

Keywords: filipino food, adobo, filipino adobo, peppercorns, dried bay leaves, vinegar, soy sauce, simmer dish, vegan

Did you make this recipe?

Share a photo and tag us — we can’t wait to see what you’ve made!

  • « Go to Previous Page
  • Page 1
  • Interim pages omitted …
  • Page 14
  • Page 15
  • Page 16

Primary Sidebar

Categories

Recent Recipes

  • Vegan Filipino Afritada Inspired Tomato Stew
  • Mulled Pear and Apple Cider
  • Bakery Style Chocolate Chip Cookies
  • Shortcut Vegan Bolognese
  • Kimchi Chickpea Bowl
  • Facebook
  • Twitter
  • Instagram
  • Pinterest

Calendar

June 2025
M T W T F S S
 1
2345678
9101112131415
16171819202122
23242526272829
30  
« Dec    

Archives

  • December 2023
  • November 2023
  • September 2023
  • September 2022
  • March 2022
  • February 2022
  • January 2022
  • December 2021
  • November 2021
  • October 2021
  • September 2021
  • August 2021
  • July 2021
  • June 2021
  • May 2021
  • April 2021
  • March 2021
  • February 2021
  • January 2021

Recent Comments

  • Jan on Vegan Longevity Noodles – Yī Miàn
  • Kim on Vegan Longevity Noodles – Yī Miàn
  • Jan on Vegan Mongolian Beef Inspired Soy Curls
  • Jenn P on Vegan Mongolian Beef Inspired Soy Curls
  • Jan on 10 Ingredient Vegan Siomai

Footer

↑ back to top

About

  • Privacy Policy
  • Disclaimer
  • Terms & Conditions

Newsletter

  • Sign Up! for emails and updates

Contact

  • Contact
  • FAQ

As an Amazon Associate I earn from qualifying purchases.

Copyright © 2020 Brunch Pro on the Brunch Pro Theme