• Skip to primary navigation
  • Skip to main content
  • Skip to primary sidebar
  • About
    • Contact
    • Disclaimer
    • Privacy Policy
    • Terms & Conditions
  • FAQ
  • Vegan Recipes
    • Free Fridge Food
    • Special Diets
      • Anti-Inflammatory
      • Gluten-Free
    • Type of Meal
      • Breakfast
      • Lunch
      • Dinner
      • Snacks
    • Culturally-Inspired
      • Argentinean-Inspired
      • Chinese-Inspired
        • Dim Sum
          • 12 Months of Dim Sum
        • Noodles
      • Filipino Food
      • Italian-Inspired
      • Japanese-Inspired
      • Korean-Inspired
      • Malaysian-Inspired
      • Mexican-Inspired
      • Neapolitan-Inspired
      • Pacific Northwest
      • Russian-Inspired
    • Baking
      • Bars
      • Breads
      • Cakes
      • Cookies
    • Holiday Recipes
      • Christmas
      • Friendsgiving
    • Season
      • Autumn
      • Winter
    • Condiments
  • SHOP
    • My Pantry Favorites
  • 12 Months of Dim Sum

Bakeroise

Vegan Filipino Afritada Inspired Tomato Stew

Mulled Pear and Apple Cider

Bakery Style Chocolate Chip Cookies

Shortcut Vegan Bolognese

Kimchi Chickpea Bowl

Hearty Kale and Chickpea Tomato Soup

Vegan Upside Down Pear Cake with Crushed Candy Caps

Golden Beets and Brown Rice Bowl

Vegan Longevity Noodles – Yī Miàn

Farewell, 2021. Hello, 2022!

12 Months of Dim Sum Project 2021

Fennel Cake with Lingonberry Sauce

Northwest Delicata Squash Boats

November 22, 2021

Affiliate Disclosure: As an Amazon Associate, I earn from qualifying purchases. Thank you for supporting Bakeroise.

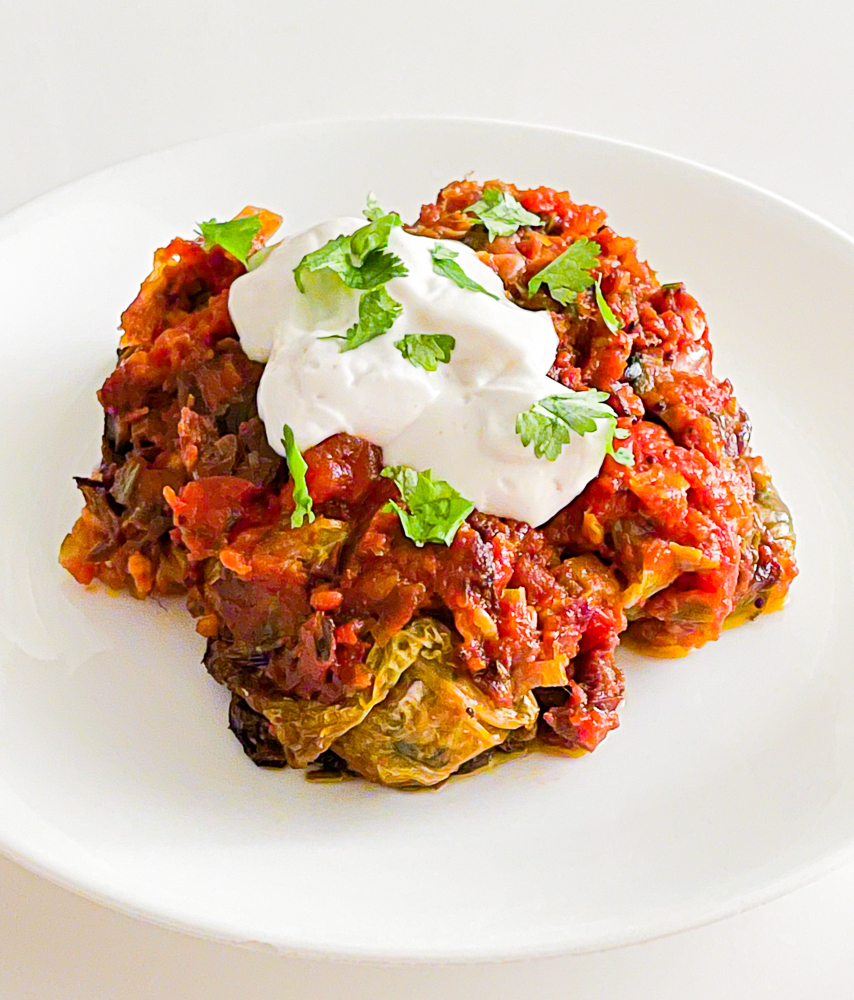
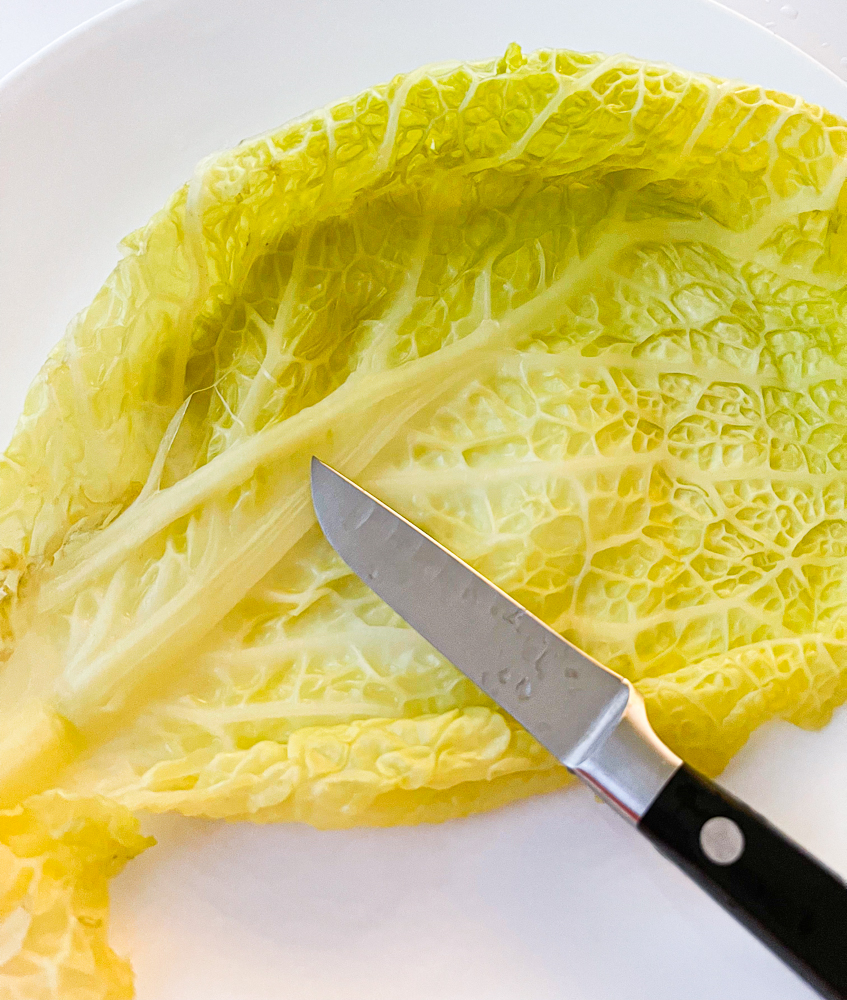
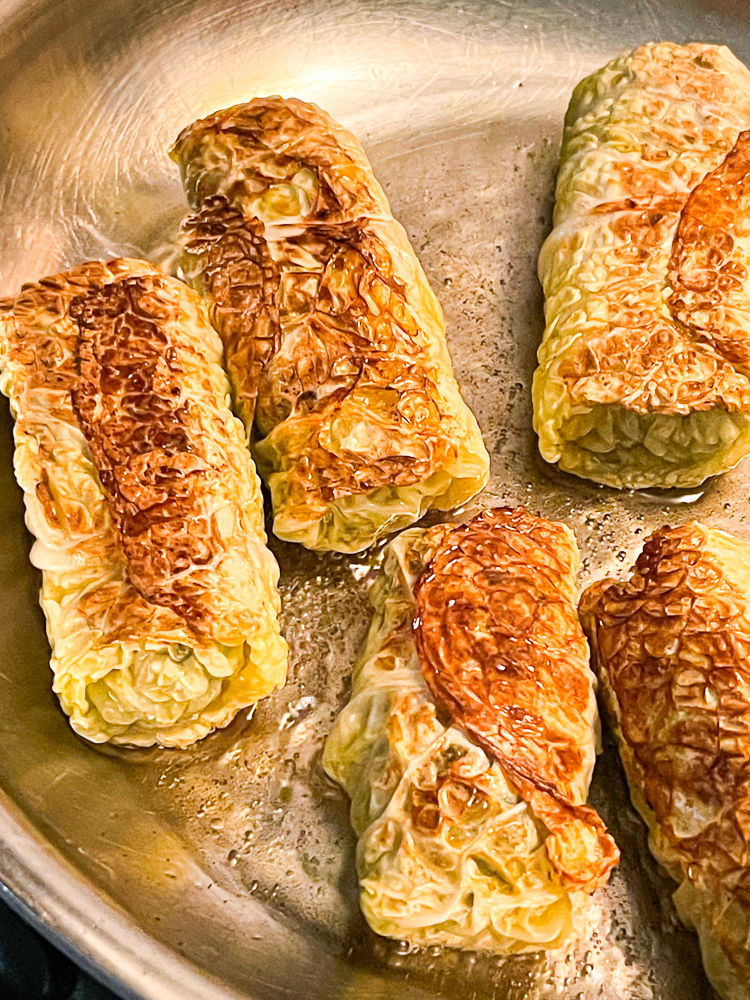
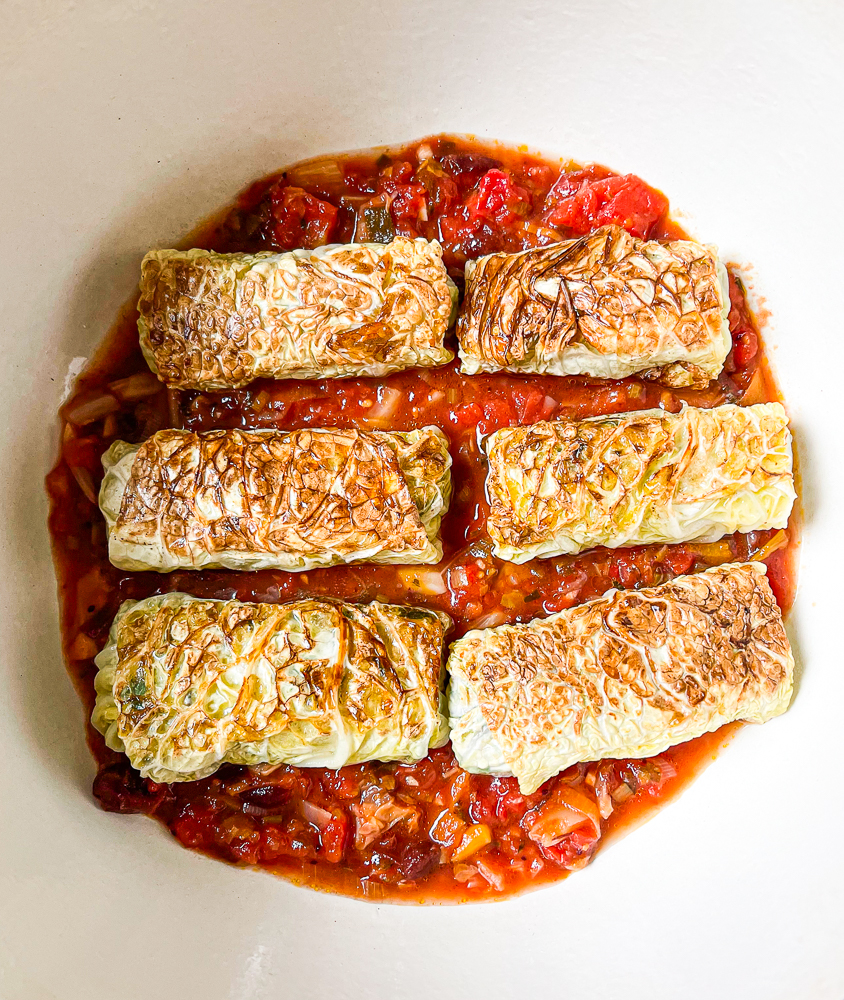
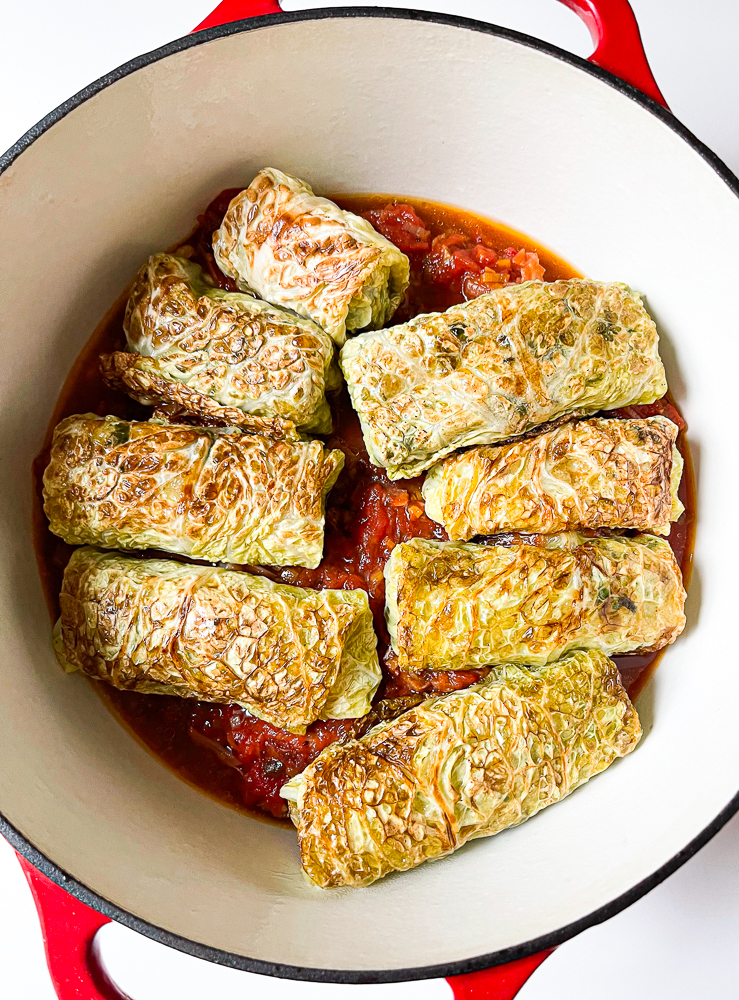
Today I am sharing my Northwest Delicata Squash Boats recipe! Don’t you just love sides you can eat with your hands? Get outta here with those knives and forks. If you want a recipe where you actually have to use that stuff, check out my Vegan Golubtsi Inspired Autumn Cabbage Rolls where you have to use both!

Delicata squash is, hands down, my favorite cold weather squash. I’m also partial to the sliced, caramelized version many people oddly compare to fries. I don’t think they taste like fries at all. But the seasoning (ahem, salt!) and combination of the sweet caramelization of the squash make it the perfect healthy treat mid-fall.

For this Northwest Delicata Squash Boats recipe, I wanted to make something “cute” with a fun presentation. Since it’s autumn, and everyone seems to like stuffed everything, I thought it would be fun to share this just in time for Friendsgiving (or Thanksgiving).

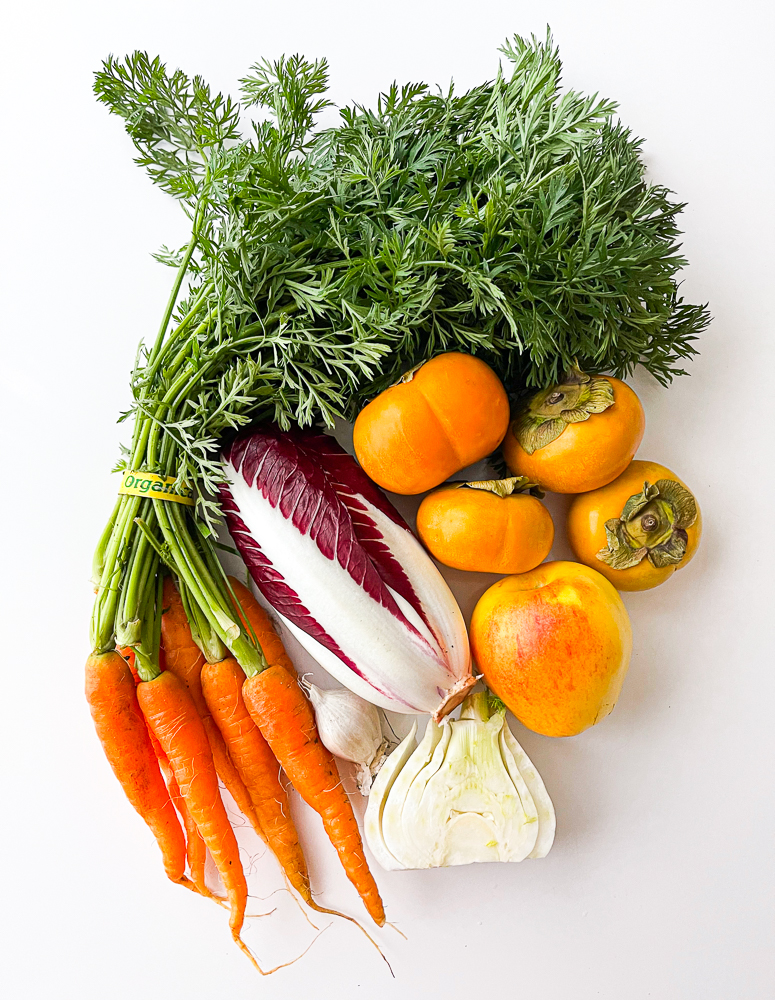
This Northwest Delicata Squash Boats uses ingredients are seasonal and locally grown in the Pacific Northwest. These Oregon-grown delicata squash are filled with a fried rice filling full of garlic, carrots, treviso radicchio and an accompanying persimmon and apple sauce.

The Chantenay carrots, Fuyu persimmons and fennel from Groundwork Organics, garlic from Vibrant Valley Farm, Treviso radicchio from Boldly Grown Farm and apple from Kiyokawa Family Orchards,

So how do we make our delicata squash boats?! Easy!

First we have to acknowledge the usual: Seasoning is important. This blog is not for those who intentionally refuse to season their food. There are those who truly can’t. Then there are those who truly won’t. Do your research and, while you’re at it, throw out any packaged soups if you’re that concerned.

So to start, we take our delicata squash and cut them in half lenthwise. My delicata squash are from Dancing Roots Farm.

We coat them with olive oil and salt appropriately.

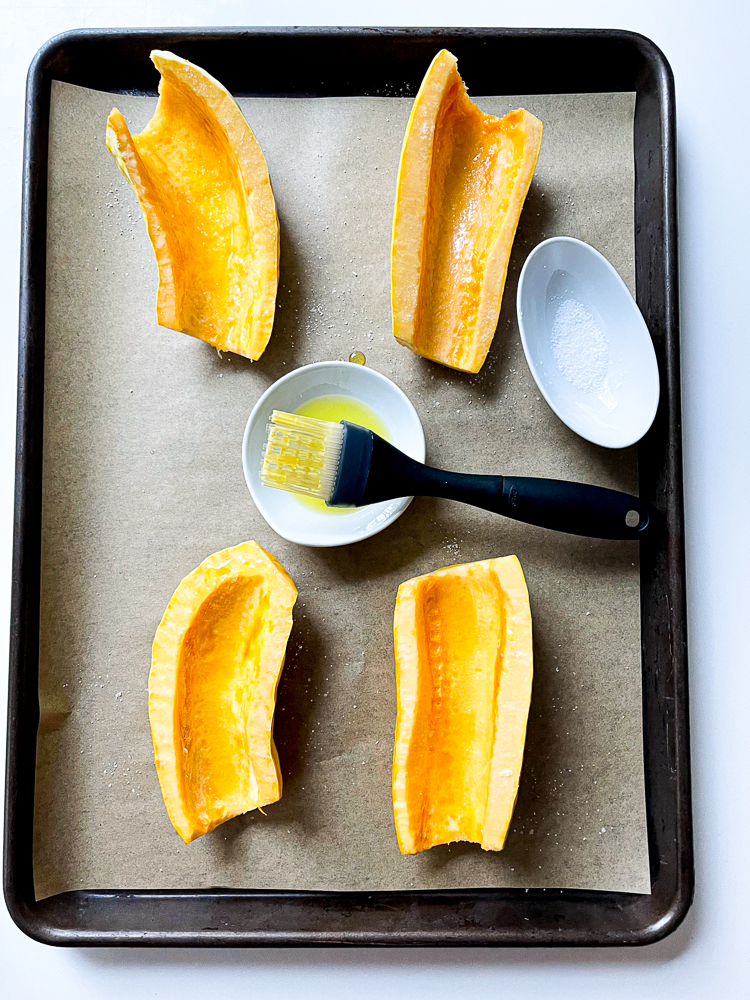
After salting them (you can’t see it but they’re seasoned above), we bake them in the oven for 45 minutes at 350° F. Some people like to flip them over so that the meat touches the pan (so no parchment paper) but for this recipe, I personally like to be able to cook the meat somewhat uniformly by having them all face upwards.

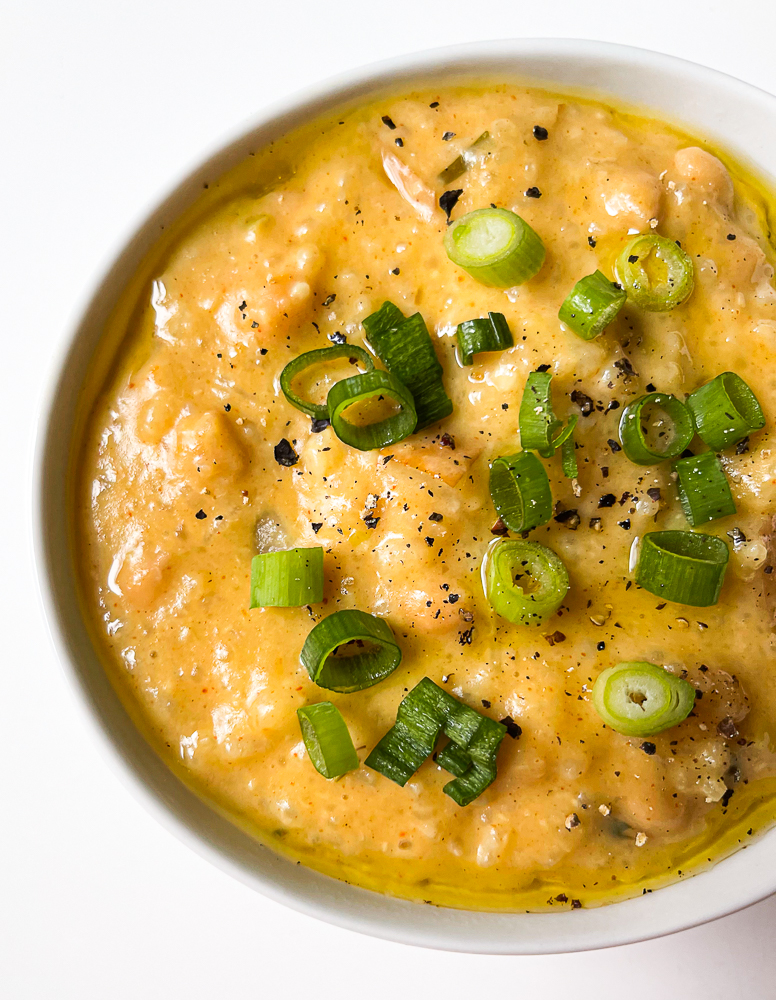
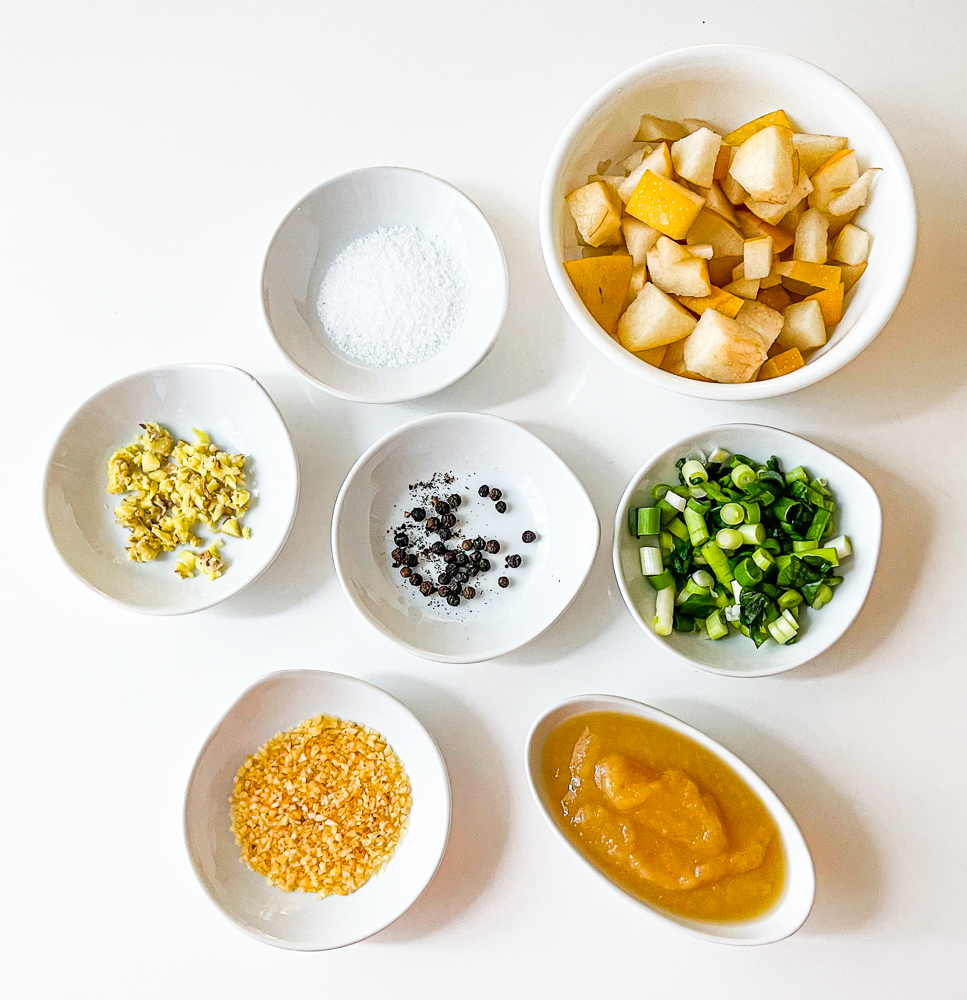
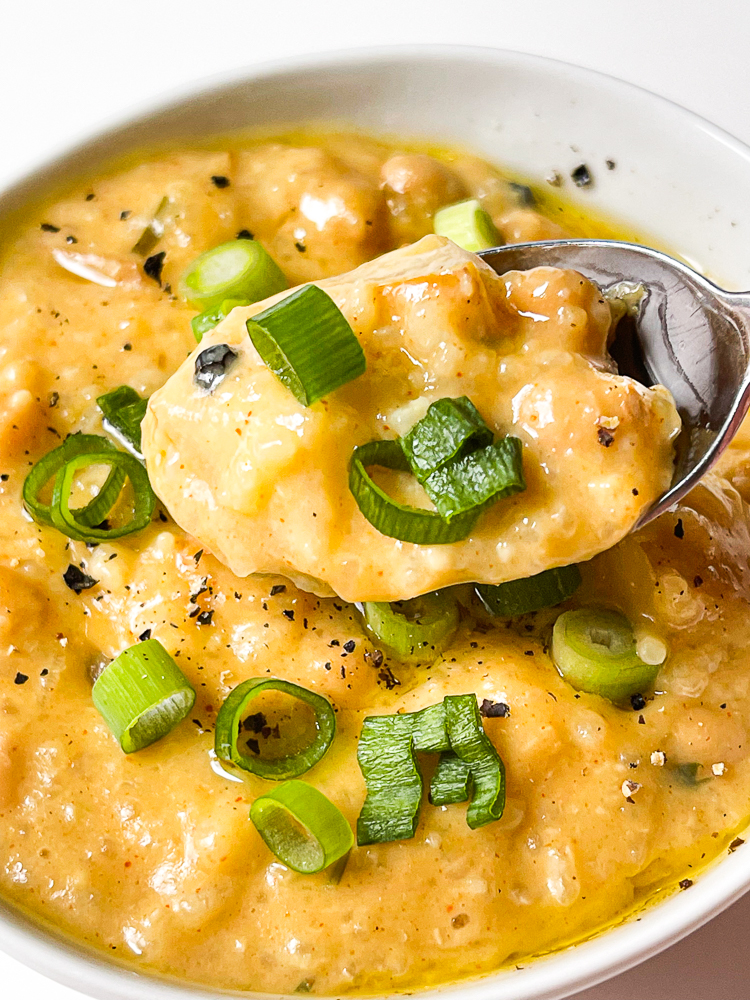
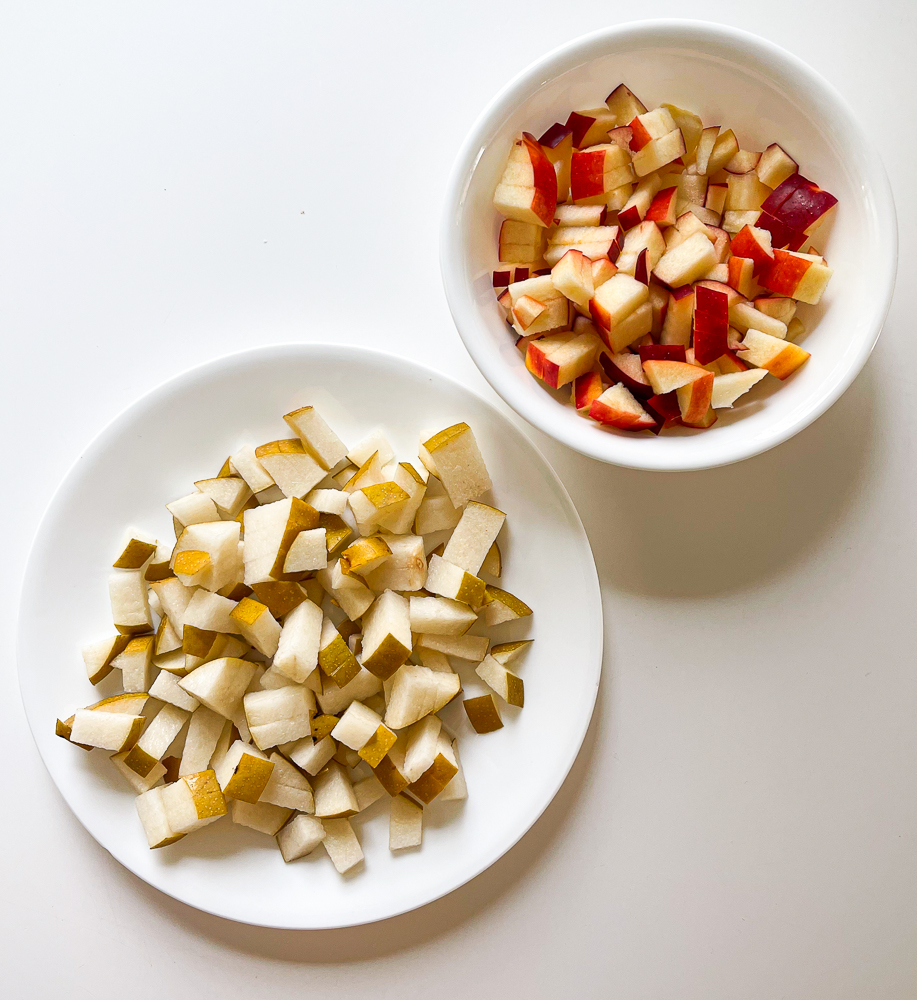
While the delicata squash is baking, we start our ripe Fuyu persimmon and apple sauce by chopping up some peeled persimmons and apples.

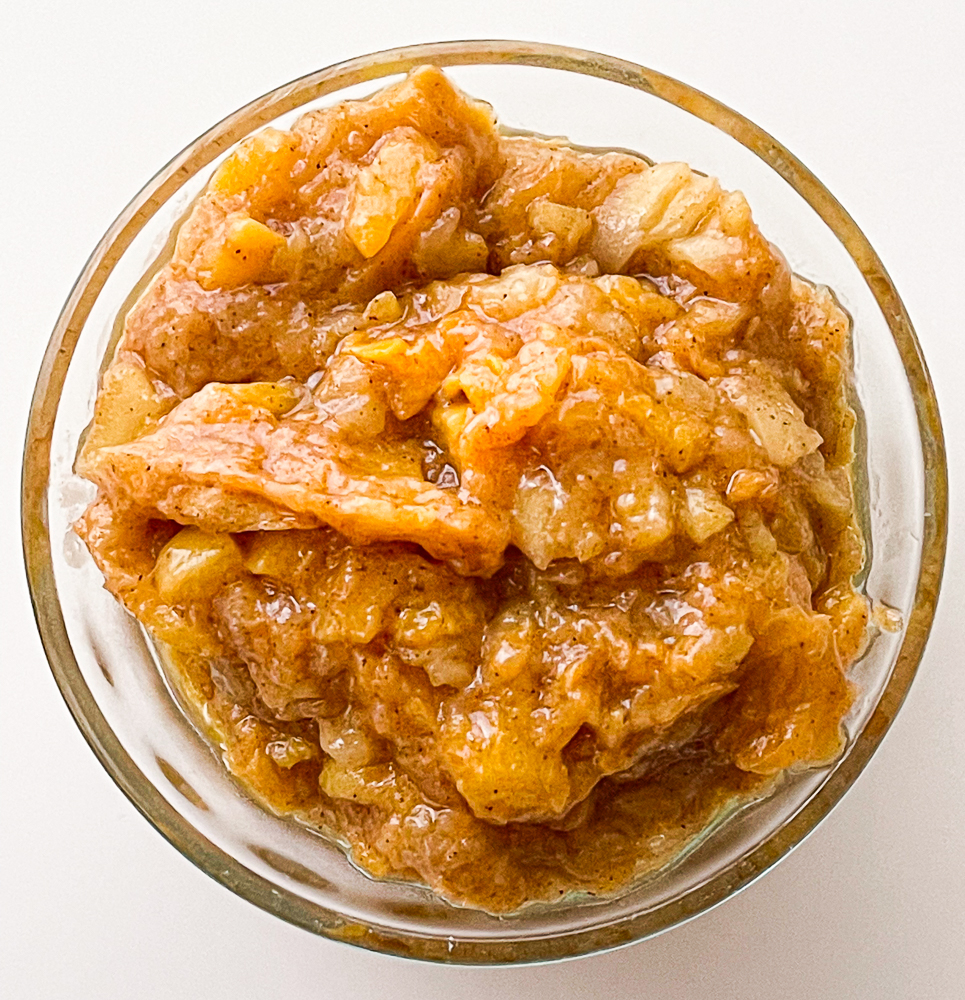
In a medium saucepan with olive oil coating the bottom, we cook them on medium heat for 3-4 minutes to break them down a little and then continue to cook them the way we would applesauce. We then add half a tablespoon of apple cider vinegar, half a teaspoon of Saigon cinnamon, a tiny bit of fresh cracked black pepper and salt to taste. We salt to taste as this is a naturally sweet sauce. We let this cook at a low simmer for ten minutes. Mash as we go so that it’s only semi chunky.

While the delicata squash is still baking and the persimmon and apple sauce is simmering on low, we make our fried rice filling.

So, just a heads up, I tried to make this as simple and as seasonal as possible but these would taste even better with caramelized onions. Just an option!

In a large pan with avocado oil or some other oil with a high smoke point, we fry up our chopped garlic, carrots, radicchio and fennel before adding in two cups of cooked white rice and a handful of torn cilantro and frying for a few minutes more until the flavors come togther.

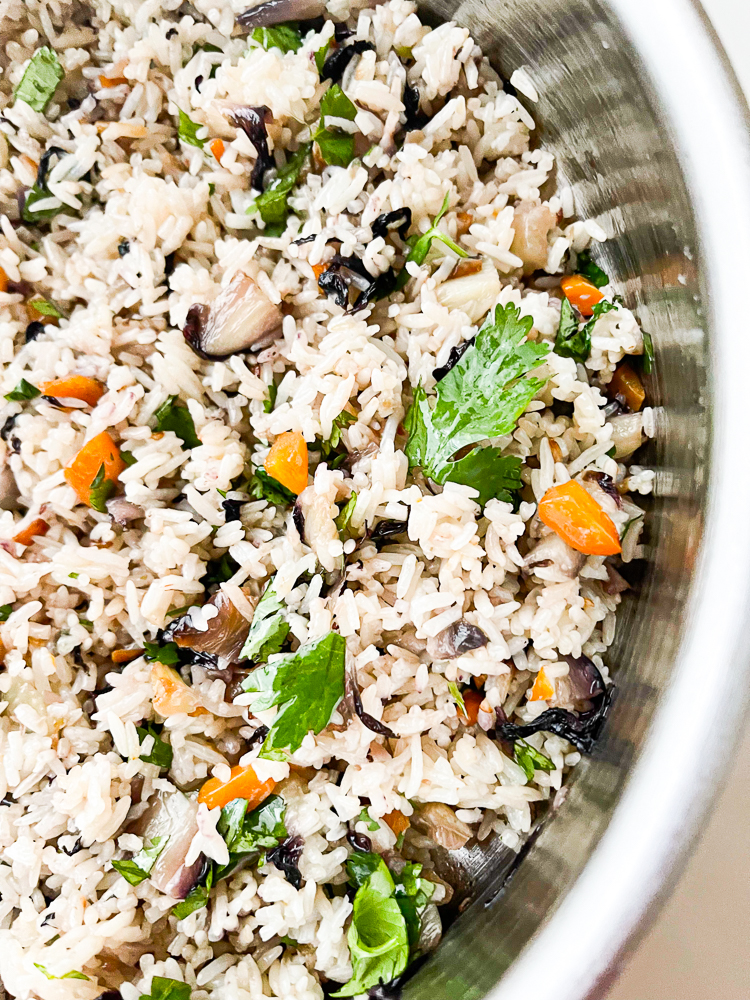
And, as always, salt your fried rice!

When your squash is done, remove from the oven and let cool. Let everything cool before assembling.

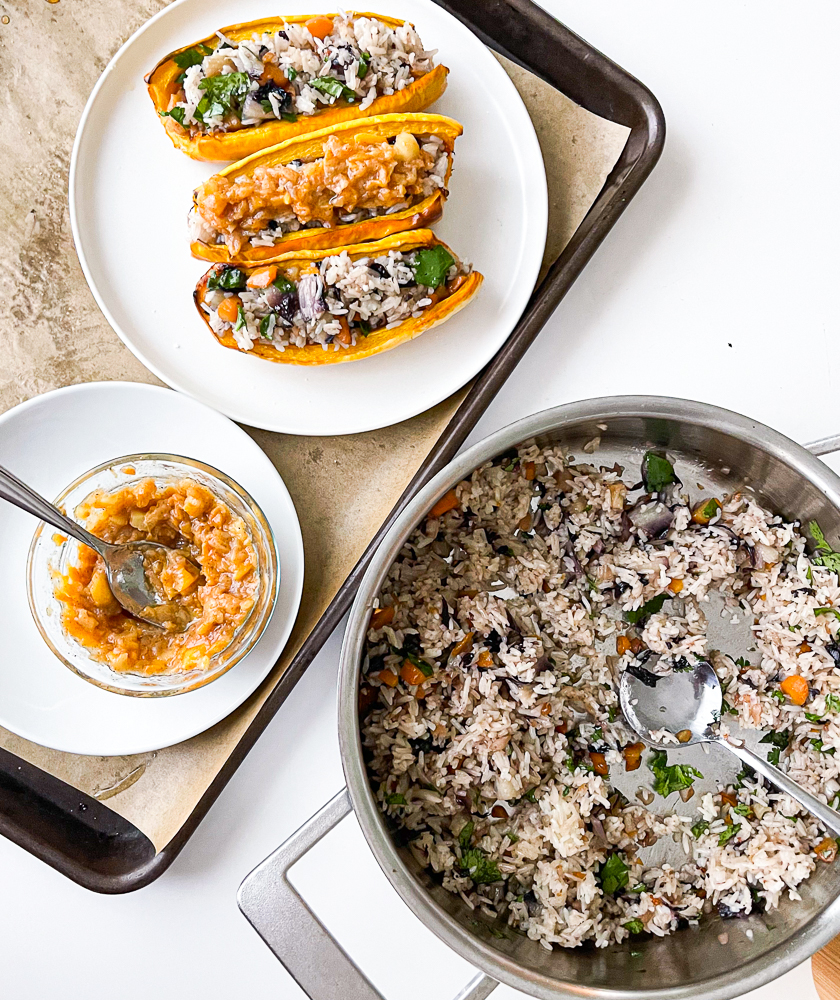
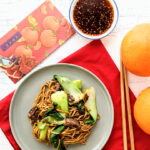
Assembling our Northwest Delicata Squash Boats is pretty simple. Take a delicata squash half and fill it with the rice filling and persimmon and apple sauce (order is at your discretion). And that’s it! Enjoy.

This picture is just for show. Way better to eat these like a hot dog!
Print

Northwest Delicata Squash Boats

Print Recipe

Tasty and autumnal Pacific Northwest Delicata Squash Boats recipe that uses local, seasonal ingredients. 

  • Author: Jan Carlisle @ Bakeroise

Ingredients

Scale

Delicata squash boats:

  • 2 ripe delicata squash, sliced in half lengthwise, gutted and seeded
  • Olive oil to coat
  • ½ a tablespoon of salt to season all four boats

 Persimmon Apple Sauce:

  • Olive oil to coat bottom of saucepan
  • 1 ripe Fuyu persimmon, peeled and roughly chopped into half inch pieces
  • 1 apple, peeled and roughly chopped into half inch pieces
  • ½ teaspoon Saigon cinnamon
  • Few cranks of fresh cracked black pepper (omit if not fresh)
  • ½ tablespoon of apple cider vinegar
  • Salt to taste

Fried Rice Filling (will yield extra for tasty leftovers):

  • 4 cloves of garlic, crushed and roughly chopped
  • ½ of a fennel bulb, roughly chopped
  • 1 whole radicchio head, thinly sliced
  • 2 cups cooked white rice
  • Handful of torn cilantro leaves, some stems okay
  • Salt to taste

Instructions

  1. Preheat oven to 350° F.
  2. Cover a baking sheet with parchment paper and lay down the four halves of delicata squash equally, meat side facing up. Coat tops and sides with olive oil. Liberally and evenly sprinkle with salt. Bake on middle rack for 45 minutes.
  3. While the squash is baking, bring a medium saucepan to medium heat and add olive oil. When hot, add the persimmon and apple pieces along with the apple cider vinegar,  Saigon cinnamon and fresh cracked black pepper. Mix throughly and Cook for 3-4 minutes. Bring to a boil then immediately bring to a low simmer and let simmer on low for 10-15 minutes, stirring to mix and avoid any sticky bottom. Appropriately salt to taste.
  4. While the squash is still roasting and sauce is simmering, bring a large pan to medium heat and add oil to coat bottom of pan. Add the chopped garlic, radicchio and fennel with a teaspoon of salt and cook for 3-4 minutes, careful not to brown. Then add the cooked rice and handful of chopped cilantro leaves and continue cooking for another 3-4 minutes for the flavors to come together. Appropriately salt to taste.
  5. When everything is done, let cool out in the open.
  6. To assemble, take one squash half which is now a “boat” and fill it with the rice filling and the sauce in any order. 

Notes

  • Make sure to salt to taste appropriately. If it is “bland”, then it hasn’t been seasoned enough with salt.

Did you make this recipe?

Share a photo and tag us — we can’t wait to see what you’ve made!

Vegan Golubtsi Inspired Autumn Cabbage Rolls

November 20, 2021

Affiliate Disclosure: As an Amazon Associate, I earn from qualifying purchases. Thank you for supporting Bakeroise.

I love dishes that are rich with tomato. Doesn’t matter if it’s a vegan Filipino Afritada stew over rice or a simple pizza for parents that uses canned tomatoes from Italy. I’ve always found the taste of tomatoey dishes comforting. Probably because I grew up eating Filipino-style Spaghetti and Filipino Afritada.

That’s why I’m back with this Vegan Golubtsi Inspired Autumn Cabbage Rolls Recipe.

This recipe is adapted from Bonnie Frumpkin Morales’ Golubsti recipe. Before I was vegan I was a rather enthusiastic foodie and I thought her restaurant, Kachka, was one of the best restaurants in Portland. And anyone who’s ever been to Kachka knows that their cabbage rolls are a hit! When I was already vegan and her cabbage rolls were no longer on my radar, I was ecstatic to find her recipe online because she specifically had a vegan version of it! You best believe I got on that right away.

I started making her cabbage rolls years ago. Through the years, I’ve played around with different seasonal ingredients and methods. So, years later, I now have my own different adaptations of her awesome recipe. And I am immensely grateful to the talented Bonnie for that.

Something I noticed the very first time I use this recipe is that it is pretty lengthy. I remember the first time, I started at 7am and don’t think I even finished until the late afternoon or even early evening! Fortunately, I’ve learned what works and doesn’t and something that helps me loads is splitting this into a multi-day project.

And, not surprisingly, the cabbage rolls came out perfect each time. The labor is worth it.

In Bonnie’s original vegan recipe, she uses oyster mushrooms and for this Vegan Golubtsi Inspired Autumn Cabbage Rolls recipe, I decided to stick with it since it’s mushroom hunting season here in the Pacific Northwest. In fact, a dear friend foraged some oyster mushrooms at one of the local parks here in Portland proper and generously gave me a huge bag of them.

For tihs Vegan Golubtsi Inspired Autumn Cabbage Rolls, I also used seasonal ingredients that I got from my subscription box from Milkrun.

So how do we make our Vegan Golubtsi Inspired Autumn Cabbage Rolls? Here we go:

Preparing the cabbage:

We start out with a huge savoy cabbage. I’ve cooked with two smaller cabbages in the past but having to work with only one is much easier in terms of organization.

Turning the large cabbage in boiling water can be tricky with just one big one but it’ll work with patience and two long utensils.

After boiling the savoy cabbage, we shave down the ribs with a paring knife so that the leaf is easier to roll. I like to take my time with this part but it can be tedious so I’ll listen to music or watch a show. Obviously I have to be careful since I’m using a knife!

We use as many of the leave as we can and we stop when we’re about to hit the base of it…when the head is about the size of your fist and you know you can’t roll it. It’ll be obvious. When you have a good pile of leaves, put it in the fridge in an airtight container.

Cut up the remaining leaves into thin slices and set it aside with all of the rib shavings. Store the leaves in an air tight container in the freezer and store the rib shavings in another airtight container in the fridge for the sauce which we are making next.

Making the sauce:

We bring a large pot to medium heat and coat the bottom with oil that has a high smoke point.

We cook the half of the thinly sliced leeks for 7 minutes on medium high. Add the garlic and cook for another 3 minutes. Then we add the carrots, cabbage trim and handful of parsley and cook for another 3 minutes.

We will add the crushed tomatoes and cranberry sauce along with the ¼ cup of water. We then bring the mixture to a boil and immediately bring it down to a simmer for 20 minutes. Salt to taste. Always. While this is simmering, we start work on the filling!

This sauce includes carrots from Groundwork Farms as well as leeks, parsley and garlic from Vibrant Valley.

When it’s done, we let it cool down before storing it in the fridge for the next day.

To make the filling:

Bring a large pan to medium heat and coat the bottom with oil. Add leeks and cook for 10 minutes until they’re a light golden color.

Add the garlic and oyster mushrooms and cook for another 20-25 minutes until a light golden brown. This does take a while because of mushrooms’ moisture.

Bring pan and contents to cool then add the cooked rice and parsley. Salt to taste. Always salt to taste properly. Salt enough.

Day 2: Assembling, frying and baking.

Cabbage Roll Assembly

We take a leaf and put a ⅓ of the filling at the bottom of the leaf. Then we fold the sides in if possible to secure the rice. Then we start to roll away from us, gently stretching the end of cabbage leaf to make sure we have a tight roll. Careful not to tear!

Snug cabbage rolls

At this point, we will preheat our oven to 400° F and also line the bottom of our dutch oven with at least ¼-1/3 of the sauce.

Then we start to carefully fry the cabbage rolls at medium high heat for 3-4 minutes per side.

I tend to fry about 5-6 at a time but the original recipe suggests only 3-4. You can try to work out what works best for you. They take longer to cook this way but less batches to dry. I also like to use a splash guard while it’s frying.

For each batch that is done frying, we add it to the dutch oven, making a layer on the bed of sauce underneath.

I never have a consistent way to arrange the cabbage rolls. I just make sure to stick to one layer at a time. It does help to have the cabbage rolls oriented the same way for ease of serving but I generally don’t care for my own.

After we set down the first layer of cabbage rolls, we cover it up with sauce and fry up the rest.

The second and top layer of the cabbage rolls.

We cover the second and top layer of the cabbage rolls with the remaining sauce and bake in the oven for one hour. Then reduce the heat to 350° F and bake for another hour.

When done, remove from the oven and let cool. Serve the cabbage rolls with vegan sour cream and some torn cilantro (or chopped dill if you prefer) on top!

Print

Autumn Cabbage Rolls with Savory Cranberry Sauce

Print Recipe

Autumn Cabbage Rolls with Savory Cranberry Sauce recipe perfect for the holidays. This recipe is adapted from Bonnie Frumpkin Morales’ Golubtsi recipe. 

  • Author: Jan Carlisle @ Bakeroise
  • Yield: 12–14 Cabbage Rolls 1x

Ingredients

Scale

1 large savoy cabbage head or 2 smaller cabbage heads

Sauce:

  • 1 medium or 50 grams of carrot, roughly diced
  • 1 leek stem (or 170 grams), thinly sliced
  • 28 ounces or 1,587 grams of canned tomatoes, crushed
  • 4 cloves of garlic, roughly minced
  • 1 cup canned cranberry sauce
  • ½ cup of water
  • Kosher salt to taste (taste appropriately)

Filling:

  • ¼ cup vegetable oil (or another oil with high smoke point)
  • 1 leek stems, thinly sliced
  • 2 leeks’ set of leaves, roughly minced
  • 8 oyster mushrooms, roughly diced (5 oz)
  • 4 cloves garlic, crushed and roughly chopped
  • 1 handful chopped parsley (or cilantro)

Topping:

  • Vegan sour cream
  • Chopped dill or torn cilantro leaves

Instructions

Prepping and cooking the cabbage leaves:

  1. In a large stockpot, boil cabbage for 10-15 minutes, rotating to cook all sides.  This takes 10-15 minutes depending on the size of your cabbage head(s) so keep an eye.
  2. When done, carefully remove and let cool.
  3. When cool, remove and discard the outermost leaves. Remove the next single most outermost leaf and use a clean towel to remove the excess water by patting the leaf. 
  4. Shave down the rib of the leaf. Do this for all the leaves until we get down to the core of the head which is the size of an apple. Set aside the rib trimmings as we will use this for the sauce. Chop up the rest of the cabbage leaves from the tiny core that would be too small to roll and roughly chop them into ½” pieces. Set aside and put them separately in air tight containers in the fridge.

Making the sauce:

  1. Bring a large pot to medium heat and add enough oil to coat the bottom. When oil is hot, cook the leeks for 5-7 minutes until they’re a light golden color. Add the garlic and cook for another 3  minutes until garlic is very aromatic – don’t brown. Then add the carrots and cabbage trim and cook for another 3 minutes until everything has been throughly mixed and cooked.
  2. Add the crushed tomatoes and cranberry sauce along with the ¼ cup of water. Mix the contents of the pot thoroughly. Properly salt to taste, bring the mixture to a boil and immediately bring it down to a simmer for 20 minutes. While sauce is simmering, work on the cabbage roll filling.

Making the cabbage roll filling:

  1. Bring a large pan to medium heat and add enough oil to coat the bottom. Add the the leeks and cook for 10 minutes until they’ve broken down. Because leek leaves tend to be fibrous, we want this to break down as much as it can now even though this sauce will bake in the oven later.
  2. Add the garlic and oyster mushrooms and cook for another 20 minutes until almost caramelized. This takes a while because of the moisture from the mushrooms.
  3. Bring pan and contents to cool then add the cooked rice and parsley (or cilantro). As always, properly salt to taste. 

Assembling the cabbage rolls:

  1. Take each cabbage leaf and lay it out flat in front of you vertically. 
  2. Add ¼ or ⅓ cup of filling to the bottom of the leaf and start rolling up. Fold the sides in as you go to help tuck the filling. Gently stretch the end of the cabbage leaf to ensure a tight roll. Do this for the rest of the cabbage leaves and filling.

Finally cooking the cabbage rolls:

  1. Preheat the oven at 400° F and add a third of the cranberry sauce to the bottom of the dutch oven creating a bed of sauce. Set aside but still on the stove where it’s close enough. Will need it as we fry our cabbage rolls.
  2. Bring a large pan to medium high heat and add oil. When oil is hot, carefully add the cabbage rolls. I try not to crowd the pan so much and the size of the cabbage rolls matter. I can cook 5-8 pieces at a time without crowding. Cook each side for 3-4 minutes. 
  3. When the cabbage rolls are done frying, add to the dutch oven, creating a single layer or cabbage rolls. Cover the cabbage rolls with sauce. 
  4. Repeat the process with the rest of the cabbage rolls and sauce. If there is excess sauce, just add it to the rest of the contents in the pot, making sure it’s evenly distributed.
  5. Cover the dutch oven with the lid and set on middle rack in oven. Bake for one hour. Then reduce heat to 350° F and bake for another hour. 

Serving:

  1. When cabbage rolls are done, serve two or three at a time. Top with vegan sour cream and fresh torn cilantro or dill.

Equipment

ZWILLING Spirit 3-ply 6-qt Stainless Steel Dutch Oven

Buy Now →

Did you make this recipe?

Share a photo and tag us — we can’t wait to see what you’ve made!

Savory Autumn Rice Porridge

November 15, 2021

Affiliate Disclosure: As an Amazon Associate, I earn from qualifying purchases. Thank you for supporting Bakeroise.

I love rice porridge as pointed out here, here and here. Therefore today I am sharing my Savory Autumn Rice Porridge recipe.

While this Savory Autumn Rice Porridge recipe focuses on both fresh and pantry ingredients, it is easily customizable for anyone’s taste. The star of the recipe as the chunks of Asian pears from Kiyokawa Family Orchards.

The fresh ingredients include ginger and green onions. The pantry ingredients avocado oil, dried mince garlic, peppercorns, canned chickpeas include unsweetened soy milk, garam masala, applesauce, kosher salt and good olive oil. And, of course, we use already-cooked rice for ease.

Some of the ingredients minus the chickpeas and rice

It’s pretty easy to put this Savory Autumn Rice Porridge together!

We soak the dried minced garlic in two teaspoons of water to rehydrate them for one minute.

We then bring a medium saucepan to medium heat and add some avocado oil to coat the bottom of the pan. Then we add the garlic, ginger, green onions (reserving some for garnish), and peppercorn and cook for 2-3 minutes.

We add the cooked white rice, 2 cups of the vegan milk and kosher salt in a saucepan and continue cooking for another 10 minutes. We will stir regularly to prevent burning. After 10 minutes, we will stir in the remaining cup of milk, applesauce, chickpeas, Asian pears and continue stirring for 2-3 minutes.

When done, we use a ladle to serve into bowls and drizzle good olive oil on top with a sprinkle of fresh cracked black peppercorn. Add extra sliced green onions for garnish.

Print

Savory Autumn Rice Porridge

Print Recipe

Super easy Savory Autumn Rice Porridge recipe made with both fresh and pantry ingredients.

  • Author: Jan Carlisle @ Bakeroise

Ingredients

Scale
  • 2 teaspoons of dried minced garlic
  • 2 inch chunk of fresh ginger, unpeeled and diced
  • 3 green onions, thinly sliced – divided
  • 2 cups cooked white rice
  • 3 cups unsweetened vegan milk, divided
  • ½ teaspoon kosher salt
  • 1 ½ teaspoon garam masala power
  • One can chickpeas, drained but not rinsed
  • 1 large Asian pear, roughly chopped
  • 90 grams of applesauce
  • 1.5 tablespoons good olive oil
  • Teaspoon peppercorn
  • More salt to taste

Instructions

  1. Soak the dried minced garlic in two teaspoons of water to rehydrate them for one minute.
  2. Bring a medium saucepan to medium heat. When hot, add avocado oil to coat the bottom of the pan. When oil is hot, add the garlic, ginger, ¾ of the green onions (reserving the rest for garnish-optional), and peppercorn. Cook for 2-3 minutes.
  3. Add the cooked white rice, garam masala powder, 2 cups of the vegan milk, and kosher salt. Continue cooking for another 10 minutes. Stir regularly to prevent burning.
  4. After 10 minutes, stir in the remaining cup of milk, applesauce, chickpeas, Asian pears and continue stirring and cooking for 2-3 minutes until everything is combined and cooked together. Salt to taste.
  5. Turn off heat. Use a ladle to serve into bowls and drizzle good olive oil on top with a sprinkle of fresh cracked black peppercorn. Add extra sliced green onions for garnish.

Notes

  • When reheating, add a little bit of water and be sure to salt to taste.

Did you make this recipe?

Share a photo and tag us — we can’t wait to see what you’ve made!

Gingery Chickpea and Potato Soup

November 14, 2021

Affiliate Disclosure: As an Amazon Associate, I earn from qualifying purchases. Thank you for supporting Bakeroise.

I just cannot stop with the soups! I love making them. Everyone loves them. It’s been rainy and cold. Therefore I am back with my Gingery Chickpea and Potato Soup for the Instant Pot!

This recipe is yet another seasonal one made with locally grown produce and is easily made in the Instant Pot. It is hearty, gingery and soothing especially for those who might be feeling under the weather – at least according to my neighbor who claimed to have felt better after eating it because of all the ginger! Ha!

This Gingery Chickpea and Potato Soup was meant to be incredibly hearty. I actually tested a soup recipe prior to this one and it just didn’t have enough oomph. So I thought, what better than to take a bunch of red thumb potatoes and throw them in the Instant Pot with a bunch of other delicious veggies and legumes? I also threw in loads of ginger because I simply love it and it’s not going away – especially during cold weather. In fact, I’m drinking lemon ginger tea as I type this!

But this Gingery Chickpea and Potato Soup isn’t just about the ginger, chickpea and potatoes. It’s packed with even more stuff like red lentils, garlic, carrots, Asian pears, honeycrisp apples, soy curls, bok choy and more! I’m telling you: It’s packed with so much stuff, it’s not even funny. Being a vegan, who took forever to figure out how to get my protein, you’ll notice how much I love soy curls.

Let’s appreciate the chopped up apples and Asian pears from Kiyokawa Family Orchards.

They are so good!

Here are the some of the other major ingredients:

The carrots are from Ralph’s Greenhouse. Garlic and potatoes are from Vibrant Valley. The potatoes were labeled as “medley” potatoes but these beautiful red ones specifically appear to be red thumb potatoes.

As for the flavors, I played around with different seasonings and after considering what’s worked in the past with the vegetables I was using, I decided to go with white pepper, chili powder and garam masala. And, obviously, I salted the food properly.

It was perfect.

To make this Gingery Chickpea and Potato Soup, we get out our Instant Pot. Everything is made in it.

We turn on our Instant Pot to sauté mode and coat the bottom of the pan in avocado oil (or other high heat oil). When hot, we add the ginger and garlic and cook for 2-3 minutes or until aromatic.

Then we add the potatoes, chickpeas, carrots, white pepper, chili powder and garam masala to cook for another 3-4 minutes.

Before everything cooks!

After the initial frying up of the aromatics and heavier ingredients, we add everything else: apples, Asian pears, soy curls, bok choy and water. We pressure cook this at 4 minutes and when done, we do a manual release.

When it’s done and you uncover the pot, you’ll notice that the potatoes have broken down nicely and you get a soft yet still relatively chunky and very satisfying soup. Give it a good, quick stir and your soup is ready.

The soup tastes even better with a drizzle of good olive oil and fresh cracked black peppercorns.

Hope you enjoy this soup! And if you’re under the weather, give it a try and let us know how you feel after a bowl of this gingery goodness.

Print

Gingery Chickpea and Potato Soup – Instant Pot

Print Recipe

Easy cold weather Gingery Chickpea and Potato Soup recipe for the Instant Pot with a cooking time of 4 minutes.

  • Author: Jan Carlisle @ Bakeroise

Ingredients

Scale
  • ¼  cup of avocado oil
  • 5 cloves of garlic, roughly minced
  • 24 grams ginger, unpeeled and roughly minced
  • 1 tablespoon of garam masala powder
  • 1 teaspoon white pepper
  • 2 ½  teaspoons chili powder
  • 2 small or 95 grams carrots, peeled and roughly chopped (about half cup)
  • 2 cups or 310 grams of red thumb fingerling potatoes, roughly chopped into ½” chunks (about 2 cups)
  • 1.5 cups red lentils, rinsed with any debris picked out
  • 1 large apple, unpeeled and roughly chopped
  • 1 large Asian pear, unpeeled and roughly chopped
  • 6 bok choy, separated, bottoms discarded
  • 2 cups of soy curls
  • 6 cups of water
  • Kosher salt (to taste)
  • Good olive oil for drizzling on top
  • Fresh cracked black peppercorn
  • Green onions for garnish (optional)

Instructions

  1. Turn on Instant Pot to sauté mode and coat the bottom of the pan in avocado oil (or other oil with high smoke point). When hot, we add the ginger and garlic and cook for 2-3 minutes or until aromatic.
  2. Add the potatoes, chickpeas, carrots, white pepper, chili powder and garam masala to cook for another 3-4 minutes. Salt to taste.
  3. After the initial frying up of the aromatics and heavier ingredients, we add everything else: apples, Asian pears, soy curls, bok choy and water. We pressure cook this at 4 minutes and when done, we carefully do a manual release.
  4. Stir the soup to do a final mix of the soup. Use ladle to serve into bowls. Drizzle with good olive oil and sprinkle fresh cracked black peppercorn on top. Add sliced green onions if you want an extra garnish. This is just a bonus.

Equipment

Image of Instant Pot

Instant Pot

Buy Now →

Notes

  1. This should not be a bland dish. Salt to taste appropriately. Do not skimp on the salt. Trust your taste buds.
  2. If you don’t have an instant pot, do steps 1 and 2 in a big pot. Instead of step 3, bring the pot to a boil and let simmer on low for 30 minutes or until potatoes are tender. 

Did you make this recipe?

Share a photo and tag us — we can’t wait to see what you’ve made!

  • « Go to Previous Page
  • Page 1
  • Page 2
  • Page 3
  • Page 4
  • Page 5
  • Page 6
  • Interim pages omitted …
  • Page 16
  • Go to Next Page »

Primary Sidebar

Categories

Recent Recipes

  • Vegan Filipino Afritada Inspired Tomato Stew
  • Mulled Pear and Apple Cider
  • Bakery Style Chocolate Chip Cookies
  • Shortcut Vegan Bolognese
  • Kimchi Chickpea Bowl
  • Facebook
  • Twitter
  • Instagram
  • Pinterest

Calendar

June 2025
M T W T F S S
 1
2345678
9101112131415
16171819202122
23242526272829
30  
« Dec    

Archives

  • December 2023
  • November 2023
  • September 2023
  • September 2022
  • March 2022
  • February 2022
  • January 2022
  • December 2021
  • November 2021
  • October 2021
  • September 2021
  • August 2021
  • July 2021
  • June 2021
  • May 2021
  • April 2021
  • March 2021
  • February 2021
  • January 2021

Recent Comments

  • Jan on Vegan Longevity Noodles – Yī Miàn
  • Kim on Vegan Longevity Noodles – Yī Miàn
  • Jan on Vegan Mongolian Beef Inspired Soy Curls
  • Jenn P on Vegan Mongolian Beef Inspired Soy Curls
  • Jan on 10 Ingredient Vegan Siomai

Footer

↑ back to top

About

  • Privacy Policy
  • Disclaimer
  • Terms & Conditions

Newsletter

  • Sign Up! for emails and updates

Contact

  • Contact
  • FAQ

As an Amazon Associate I earn from qualifying purchases.

Copyright © 2020 Brunch Pro on the Brunch Pro Theme