• Skip to primary navigation
  • Skip to main content
  • Skip to primary sidebar
  • About
    • Contact
    • Disclaimer
    • Privacy Policy
    • Terms & Conditions
  • FAQ
  • Vegan Recipes
    • Free Fridge Food
    • Special Diets
      • Anti-Inflammatory
      • Gluten-Free
    • Type of Meal
      • Breakfast
      • Lunch
      • Dinner
      • Snacks
    • Culturally-Inspired
      • Argentinean-Inspired
      • Chinese-Inspired
        • Dim Sum
          • 12 Months of Dim Sum
        • Noodles
      • Filipino Food
      • Italian-Inspired
      • Japanese-Inspired
      • Korean-Inspired
      • Malaysian-Inspired
      • Mexican-Inspired
      • Neapolitan-Inspired
      • Pacific Northwest
      • Russian-Inspired
    • Baking
      • Bars
      • Breads
      • Cakes
      • Cookies
    • Holiday Recipes
      • Christmas
      • Friendsgiving
    • Season
      • Autumn
      • Winter
    • Condiments
  • SHOP
    • My Pantry Favorites
  • 12 Months of Dim Sum

Bakeroise

Vegan Filipino Afritada Inspired Tomato Stew

Mulled Pear and Apple Cider

Bakery Style Chocolate Chip Cookies

Shortcut Vegan Bolognese

Kimchi Chickpea Bowl

Hearty Kale and Chickpea Tomato Soup

Vegan Upside Down Pear Cake with Crushed Candy Caps

Golden Beets and Brown Rice Bowl

Vegan Longevity Noodles – Yī Miàn

Farewell, 2021. Hello, 2022!

12 Months of Dim Sum Project 2021

Fennel Cake with Lingonberry Sauce

Asian Pear and Cinnamon Apple Rice Porridge

November 11, 2021

Affiliate Disclosure: As an Amazon Associate, I earn from qualifying purchases. Thank you for supporting Bakeroise.
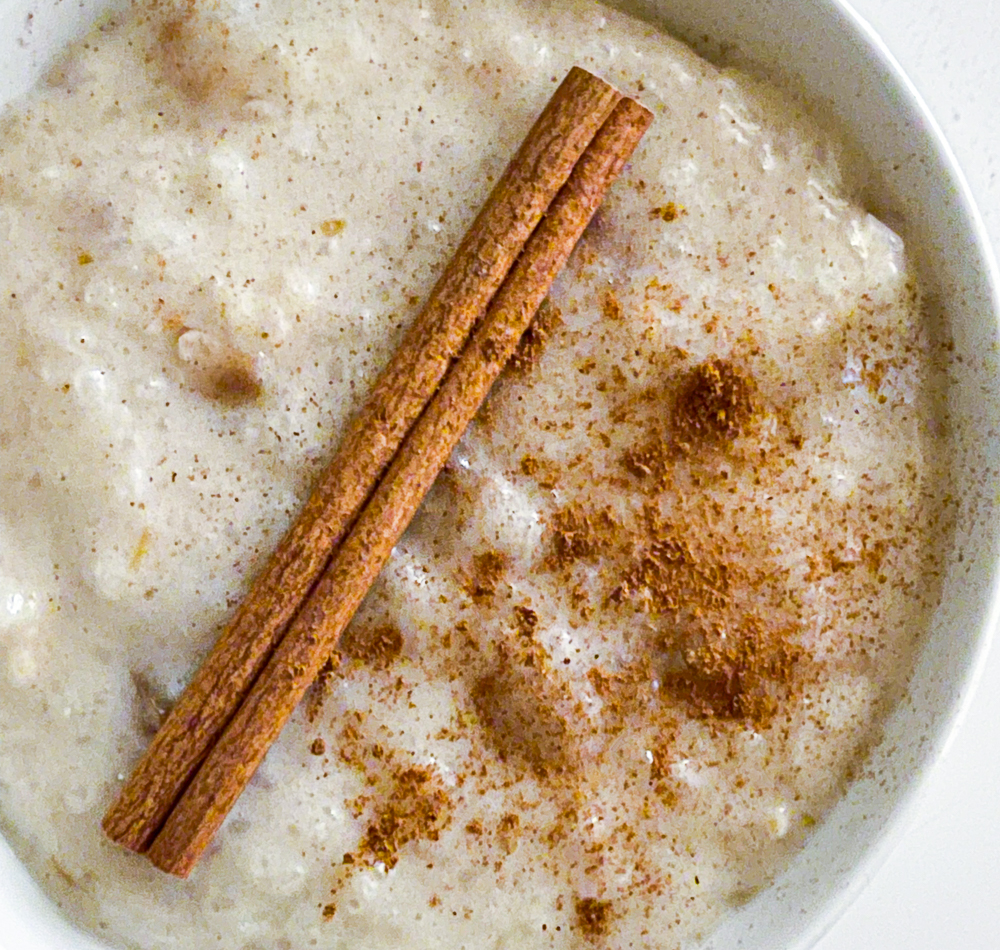
Today I am sharing an Asian Pear and Cinnamon Apple Rice Porridge Recipe. I ended up with loads of apples and several Asian pears from my kid’s school’s PTA apple sale and I knew I had to make this recipe. Obviously, it is vegan.

But first let’s appreciate this beautiful box of apples and Asian pears! These are from Kiyokawa Family Orchards and they always deliver fantastic pears and apples!
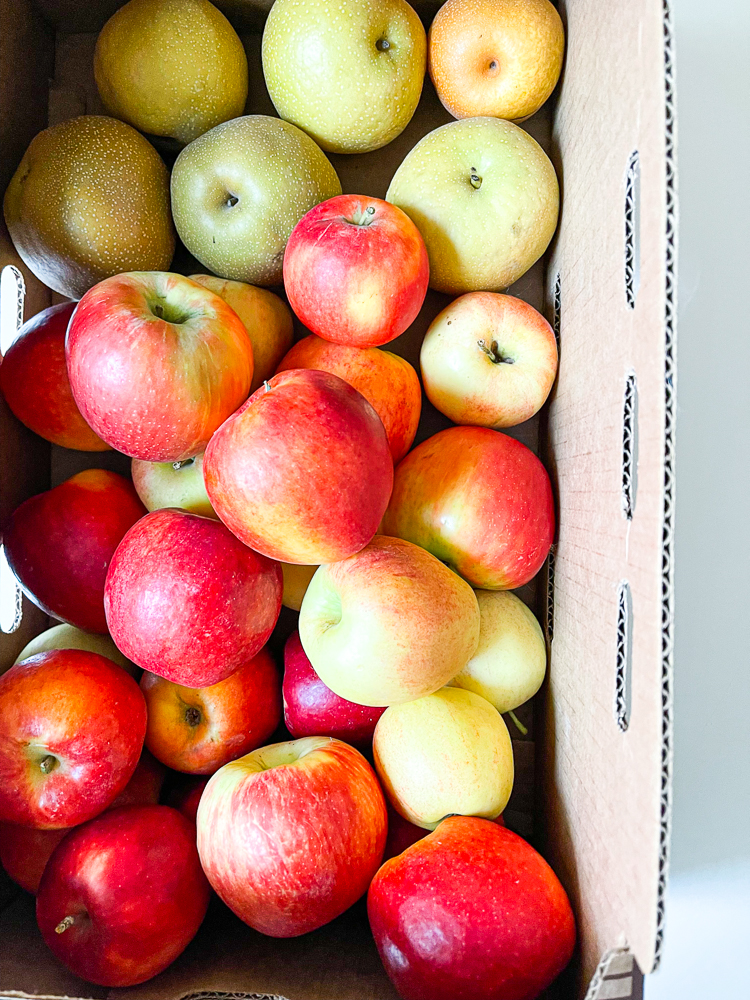
The Asian pears were generously given to me by another cool parent/friend from the school.

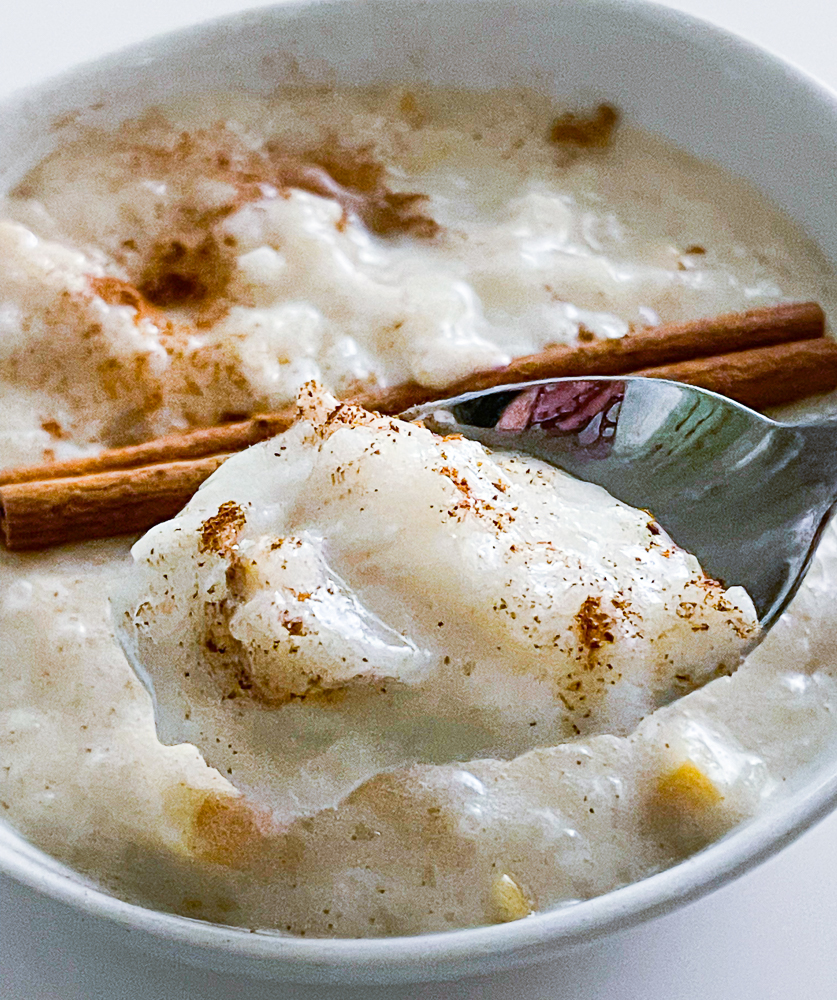
This Asian Pear and Cinnamon Apple Rice Porridge is a perfect treat on a cold, fall day. A day when ice cream probably wouldn’t feel so great. It’s hot, thick and creamy with the perfect hint of warm cinnamon spice. The cooked Asian pears and apples extract their juices into the rice porridge creating an even more autumnal medley of flavors.
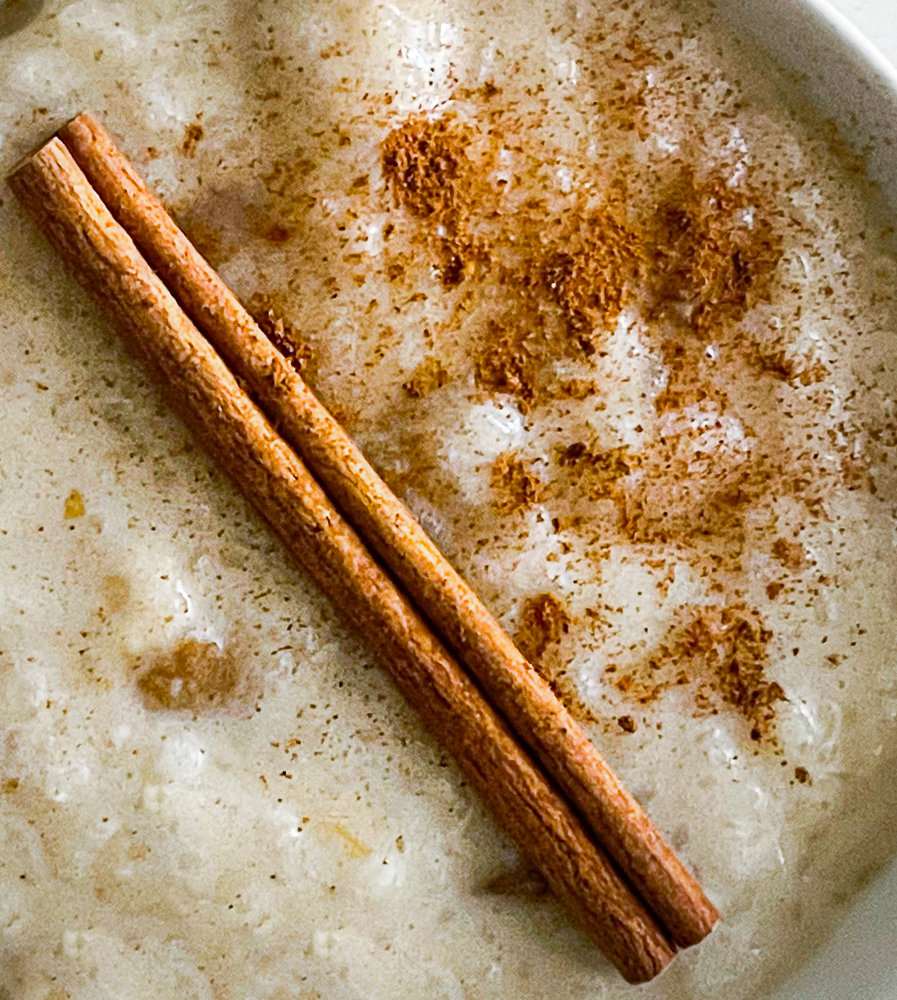
I’ve always been into rice porridge. As a Filipina-American, I grew up eating Filipino Champorado and appreciated being able to try out different types of rice porridge growing up.

This Asian Pear and Cinnamon Apple Rice Porridge recipe, however, is one I especially love because it uses already cooked rice. I veganized and adapted this stellar recipe from Jennifer Korpak Bechtel’s Old-Fashioned Creamy Rice Pudding recipe. Thank you, Jennifer!

And if you have an imperfect batch of rice (say if it tastes chalky or if it was undercooked, etc), you can use that rice to make this! So don’t throw out that imperfect batch of rice!

It’s pretty easy to make this Asian Pear and Cinnamon Apple Rice Porridge.
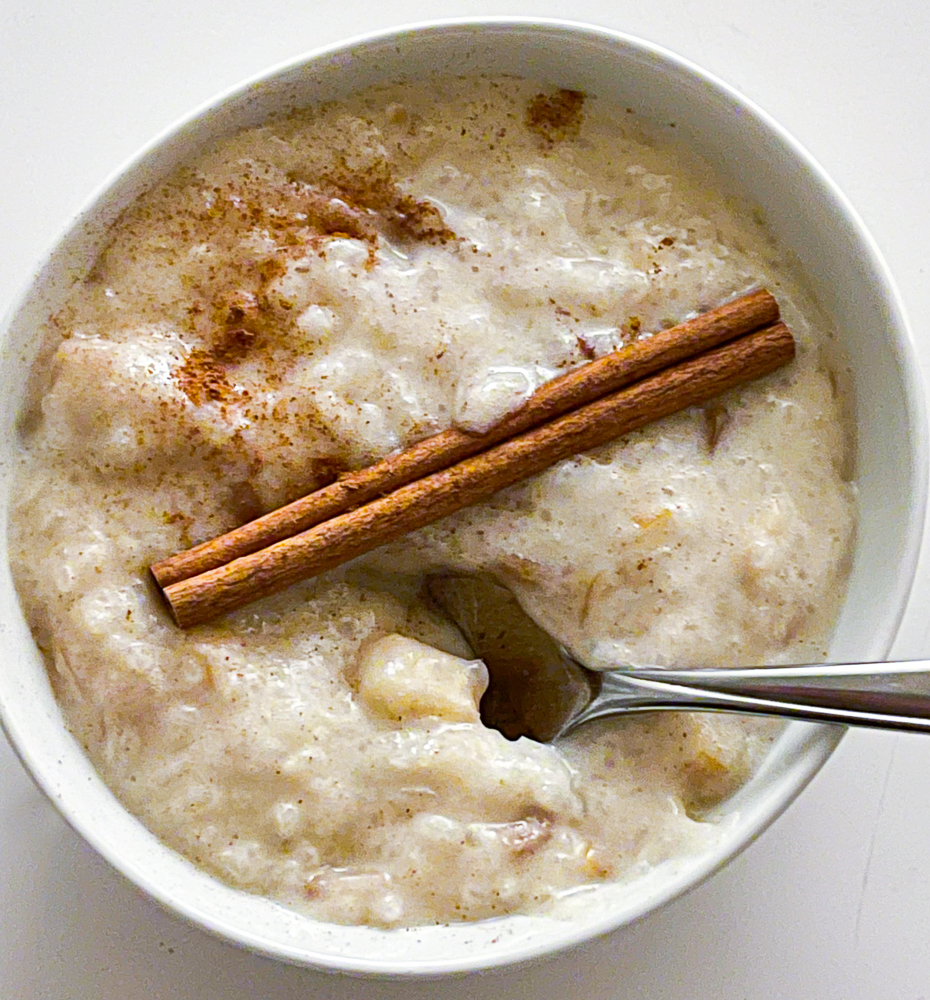
The ingredients are: cooked white rice, vegan milk (I used soy), chopped apple (I used Honeycrisp), chopped Asian pears, kosher salt, aquafaba, organic cane sugar, olive oil, vanilla extract.

First and foremost, you whisk that aquafaba until foamy! The aquafaba is a replacement for the egg in the original recipe. Whisk it by going back and forth instead of making large circles around the bowl. It’s much faster to go back and forth in a line. Set aside when done.

Bring a medium or large sauce pan to, add the already cooked rice, three cups of the milk, cinnamon stick and kosher salt over medium heat. Cook this for 15 minutes, regularly stirring to prevent burning at the bottom, until it’s all nice and creamy.

When it’s thick, add remaining cup of vegan milk, the foamy aquafaba (do a quick whisk to make it foamy), apples, Asian pears, organic cane sugar and stir for another couple of minutes.

The only non-negotiable part of this is that you have to stir regularly. Because it’s a relatively quick dish to make especially with already cooked rice, it’s not cooked at a low heat where you can just walk away. This is a dish you do have to pay attention to and stir. If you burn the bottom, that would not be great so, you know….stay there and pay attention.

Hope you enjoy this perfect Asian Pear and Cinnamon Apple Rice Porridge! Oh and if you have leftovers, they taste great the next day – even cold! Just add a splash of vegan milk, stir and devour. Enjoy!
Print

Asian Pear and Cinnamon Apple Rice Porridge

Print Recipe

Easy vegan Asian Pear and Cinnamon Apple Rice Porridge recipe. Recipe adapted from Jennifer Korpak Bechtel’s recipe on allrecipes.com.

  • Author: Jan Carlisle @ Bakeroise
  • Prep Time: 5
  • Cook Time: 15
  • Total Time: 20
  • Yield: 6 servings 1x

Ingredients

Scale
  • 3 cups cooked white rice – I prefer Jasmine of course
  • 4 cups unsweetened soy milk, divided
  • Cinnamon stick
  • ½ teaspoon kosher salt
  • 1 ⅓ cups chopped apple
  • 6 tablespoons aquafaba
  • ⅔ cup organic cane sugar
  • 1.5 tablespoons olive oil
  • 1 teaspoons vanilla extract
  • Optional: cinnamon or Saigon cinnamon powder to sprinkle on top


Instructions

  1. Whisk the aquafaba until all foamy and looking like a winter wonderland.
  2. Combine the cooked white rice, 3 cups milk, and kosher salt in a saucepan over medium heat. Cook for 15 minutes – until thick and creamy. Regularly stir to prevent burning.
  3. Stir in the remaining cup of soy milk, foamy aquafaba (quickly whisk if it started to separate), apples and Asian pears and organic cane sugar and continue stirring for 2-3 minutes.
  4. Turn off heat and add the olive oil and vanilla extract into the rice porridge. Stir until thoroughly mixed for 10-15 seconds.

Notes

  1. The apples and pears will turn brown due to oxidation when refrigerated overnight. But they are still good! So enjoy them and don’t throw them out. They will keep good in the fridge for 3-4 days.

Did you make this recipe?

Share a photo and tag us — we can’t wait to see what you’ve made!

Autumn Apple and Turnip Soup

November 5, 2021

Affiliate Disclosure: As an Amazon Associate, I earn from qualifying purchases. Thank you for supporting Bakeroise.

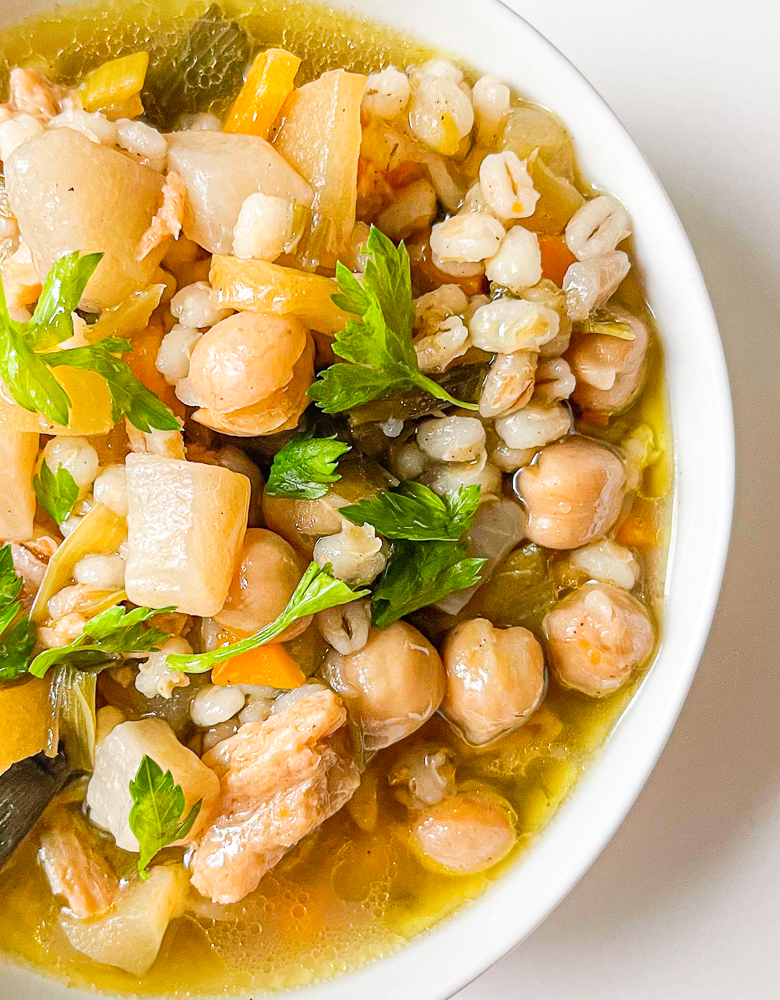
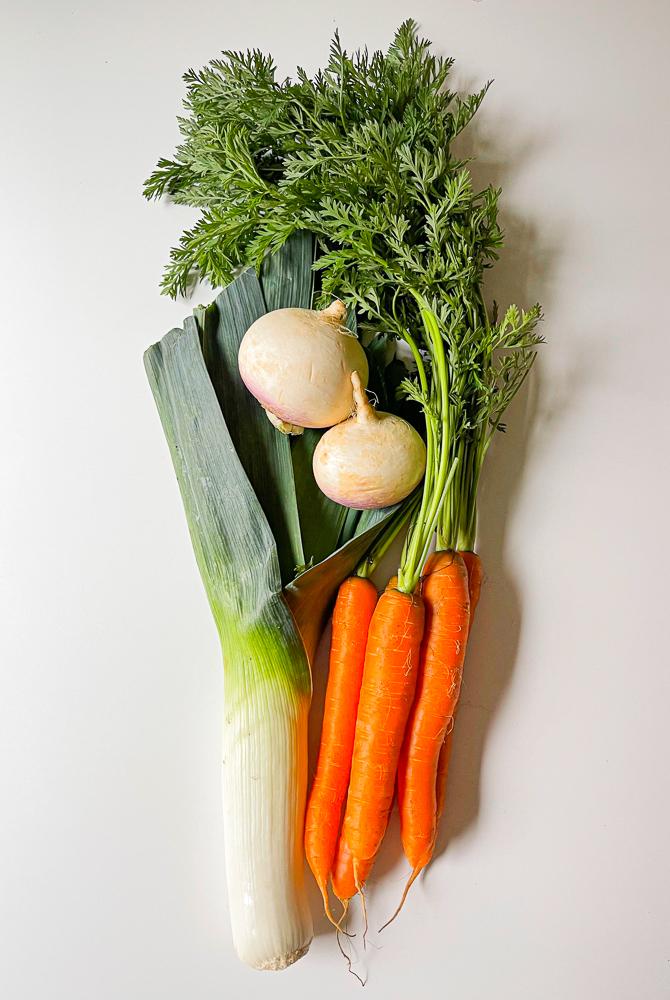
Gosh I really love autumn! I am back this time with a Autumn Apple and Turnip Soup. This Autumn Apple and Turnip Soup is a rich and hearty yet refreshing soup that is so easy to make that it would be criminal to not even try – at least on a nice, chilly fall day. This Autumn Apple and Turnip Soup is made with seasonal, local produce I got from my first ever Milkrun box, some pictured below:

Leek and turnips from Vibrant Valley, Turnips and Nantes Carrots from Ralph’s Greenhouse

I only used the leaves of the leek and saved the stem for another recipe. Because leaf stems are fibrous, I like to chop them up and cook them down as much as I can.

The apples I received in the box were Crimson Crisp apples from Kiyokawa Family Orchards.

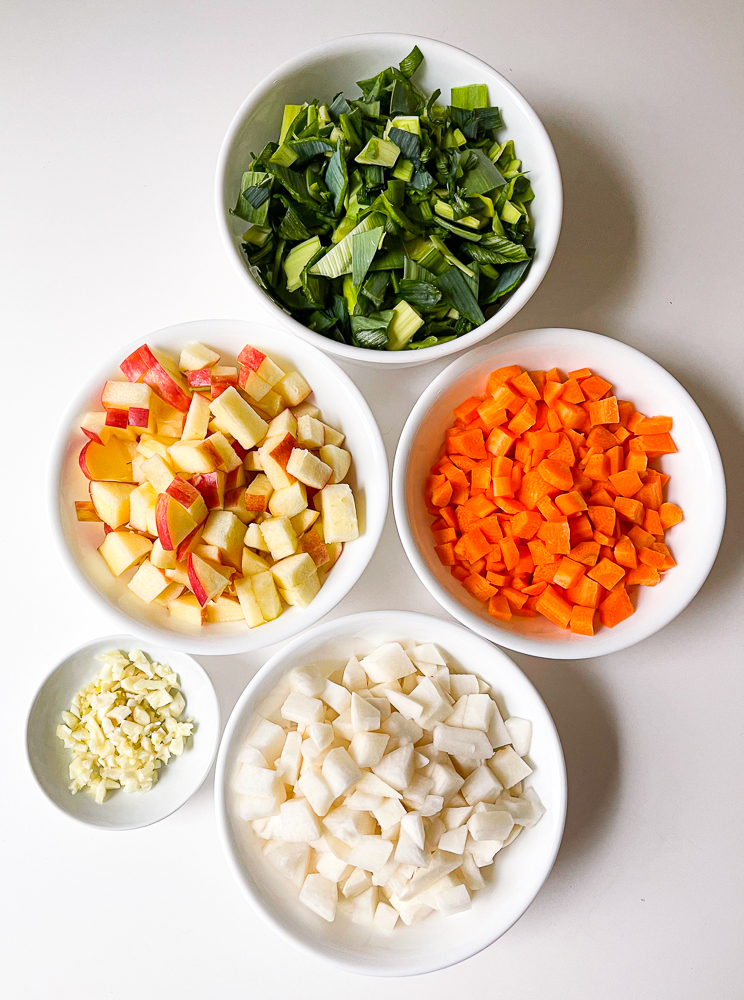
It was lucky coincidence that they were a crisp apples as I prefer to use them in general for cooking as they tend to retain their shape more. Here they are with the rest of the prepped ingredients.

The garlic (bottom left) was also from Vibrant Valley.

To make this Autumn Apple and Turnip Soup, we simply turn on the sauté function and add our olive oil. Then we cook the leeks, garlic, carrots and turnips for 10 minutes. It might seem long but it has to do with how much water is released by the turnips. After cooking for 10 minutes, we add some red wine vinegar to counter the relative spiciness of the turnips. We add a teaspoon of salt. And as usual, we salt to taste.

We continue cooking the leeks and garlic until they are a light amber color. This takes about 3-4 minutes.

For flavor, we use pumpkin spice seasoning that has cardamom in it. To put it bluntly, I used my own pumpkin spice mix that uses Saigon cinnamon instead of cinnamon and also has a strong ginger and cardamom flavor profile as well. For richness, we use vegan bouillon powder. Per usual, we continue to salt to taste throughout the whole cooking process and even when it’s done cooking because of all the barley and water in the dish. This is a requirement. This soup shouldn’t be bland.

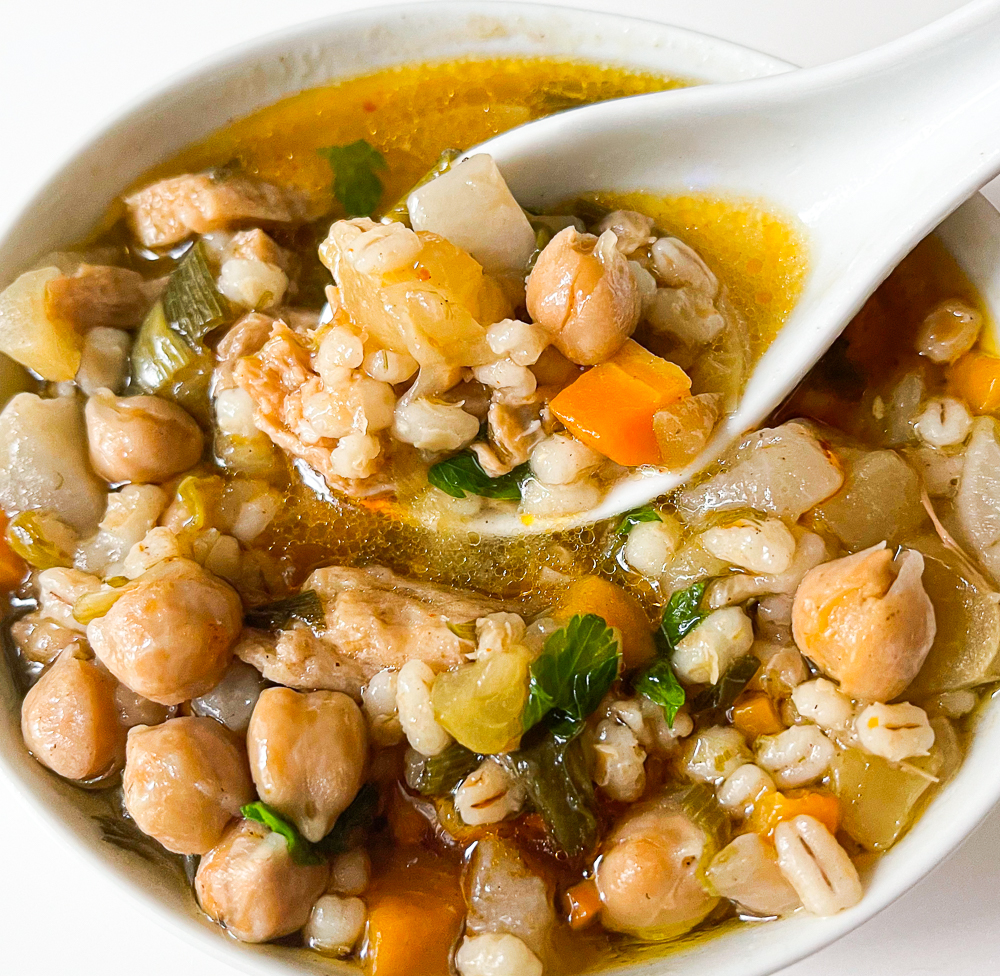
So along with our flavorings, we add our barley, soy curls, apples, chickpeas and 8 cups of water (make sure it’s below the pot’s max line). We mix everything thoroughly and pressure cook it for 4 minutes. Yes, pressure does have to build up and for me it took about 20 minutes.

When the Autumn Apple and Turnip Soup is done, we carefully do a manual release and serve.

There’s nothing extra that this dish “needs”. I generally like to put hot sauce or hot chili oil on everything but it didn’t actually go this time – surprisingly! I honestly think it’s perfect as it is so long as it’s salted properly and topped with an extra drizzle of good olive oil.

Hope you enjoy this Autumn Apple and Turnip Soup! If you try it, let me know what you think!

Print

Autumn Apple and Turnip Soup

Print Recipe

Pacific Northwest-inspired autumn barley apple and turnip soup made with chickpeas and soy curls with warm spices. This is made in an instant pot. 

  • Author: Jan Carlisle @ Bakeroise

Ingredients

Scale
  • ¼ cup olive oil
  • Three cloves of garlic, roughly chopped
  • Leaves of one leek, roughly chopped.
  • 3 medium carrots, peeled and roughly chopped – about 220 grams or 1.5 cups
  • 2 turnips – about 319 grams
  • 2 teaspoons red wine vinegar
  • 2 crisp apples, unpeeled and roughly chopped into ¾–1” pieces
  • 1.5 teaspoons pumpkin spice mix
  • 2 cups of soy curls, long pieces split into smaller pieces
  • 1 can of chickpeas, drained and rinsed (set aside the aquafaba if you’d like!)
  • ¾ cup barley
  • 6 tbsp vegan bouillon powder
  • 8 cups of water
  • optional: parsley for serving

Instructions

  1. Turn on sauté mode on Instant Pot and add the olive oil. When hot, add the leeks, carrots, garlic and turnips. Sprinkle the red wine vinegar all over and mix thoroughly. Cook down for 10 minutes. This is necessary to brown the leeks a little.
  2. Continue cooking to brown to an amber color for 3-4 minutes.
  3. Add everything else: crisp apples, pumpkin spice mix, soy curls, chickpeas, barley, bouillon powder and 8 cups of water.
  4. Cover Instant Pot with lid and set the seal to manual release.  Change mode on Instant Pot to pressure cook. Cook for 4 minutes. It might take some time to build pressure. 
  5. When soup is done cooking do a manual release. 
  6. Serve hot. Add a drizzle of good olive oil on top of each bowl. Enjoy.


Notes

  1. Since this is a soup with loads of barley and water, make sure to salt appropriately. This should not be a bland dish by any means especially with all the spice we add.

Did you make this recipe?

Share a photo and tag us — we can’t wait to see what you’ve made!

Crispy Red Belgian Endive Chips

November 2, 2021

Affiliate Disclosure: As an Amazon Associate, I earn from qualifying purchases. Thank you for supporting Bakeroise.

I love potato chips and I love leafy vegetables. One of my favorite leaf vegetables is Belgian endive. A head of it almost looks like a baby head of romaine lettuce. Very cute. But a lot more bitter! But here I am with a Crispy Red Belgian Endive Chips recipe.

Endive is a bitter leaf vegetable that tastes awesome on salad. In the summer, I like to have it cold and fresh with olive oil, a tiny splash of red wine vinegar and just enough salt to let its natural flavors come out. Now that it’s autumn, I want things that are less, well, cold.

And anytime I can, I love to make chips out of leafy greens. While this Belgian red endive that I just happened to have in my produce subscription box isn’t a leafy green, it’s still a fantastic leafy vegetable to turn into a crispy snack. So that’s why I am sharing this Crispy REd Belgian Endive Chips recipe with you today.

This recipe obviously centers around the endive. The three other ingredients are the olive oil, kosher salt and red wine vinegar. Because endive is a bitter vegetable on its own, I chose red wine vinegar to neutralize the bitterness.

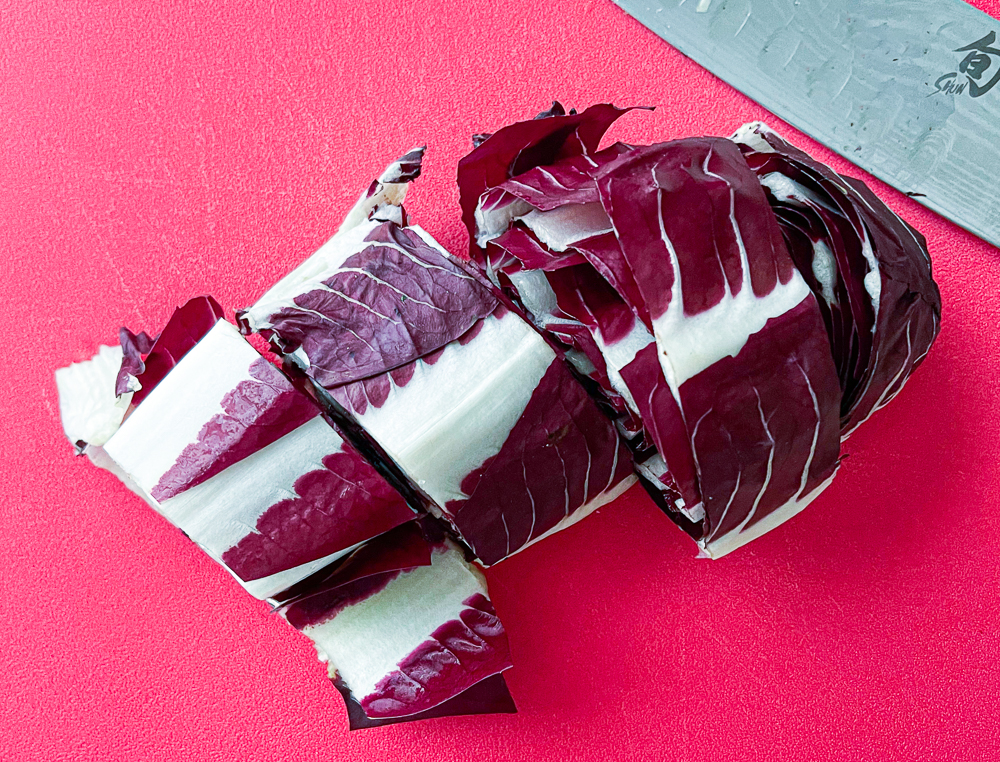
It’s pretty simple to make. First off, we cut the endive across into four sections. We discard anything that looks limp.

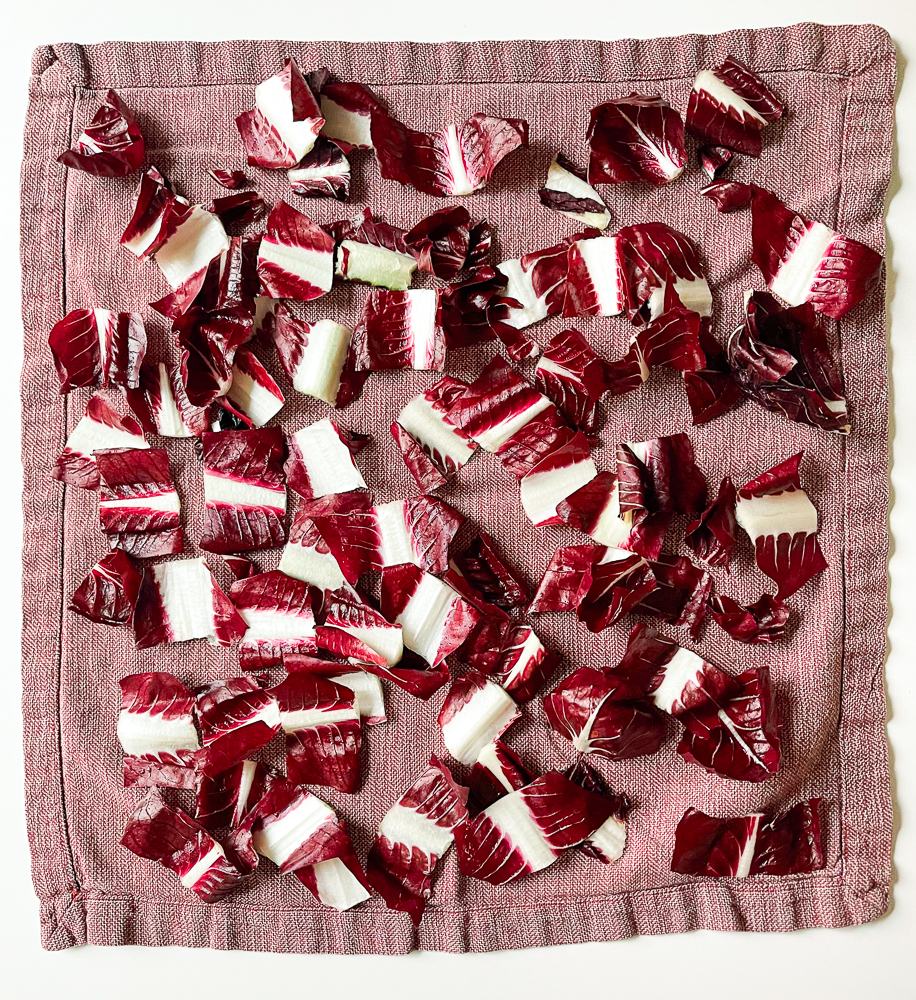
Afterwards, we rinse off every leaf and dry it. I use my salad spinner to dry the leaves and then lay each leaf in a layer, none touching on a cloth napkin to get the rest of the water droplets.

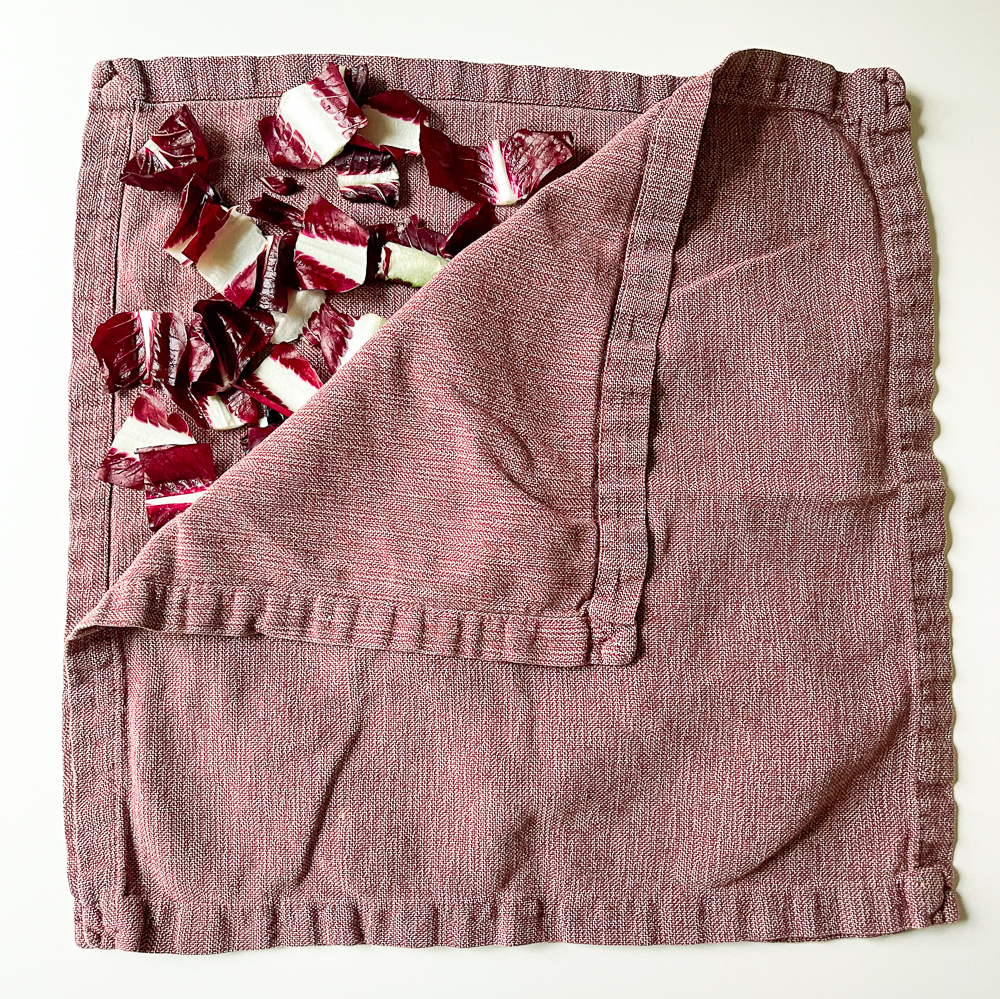
I place another napkin on top to get both sides and gently pat it.

This is as dry as it will get. The dryer the better so we don’t get soggy chips.

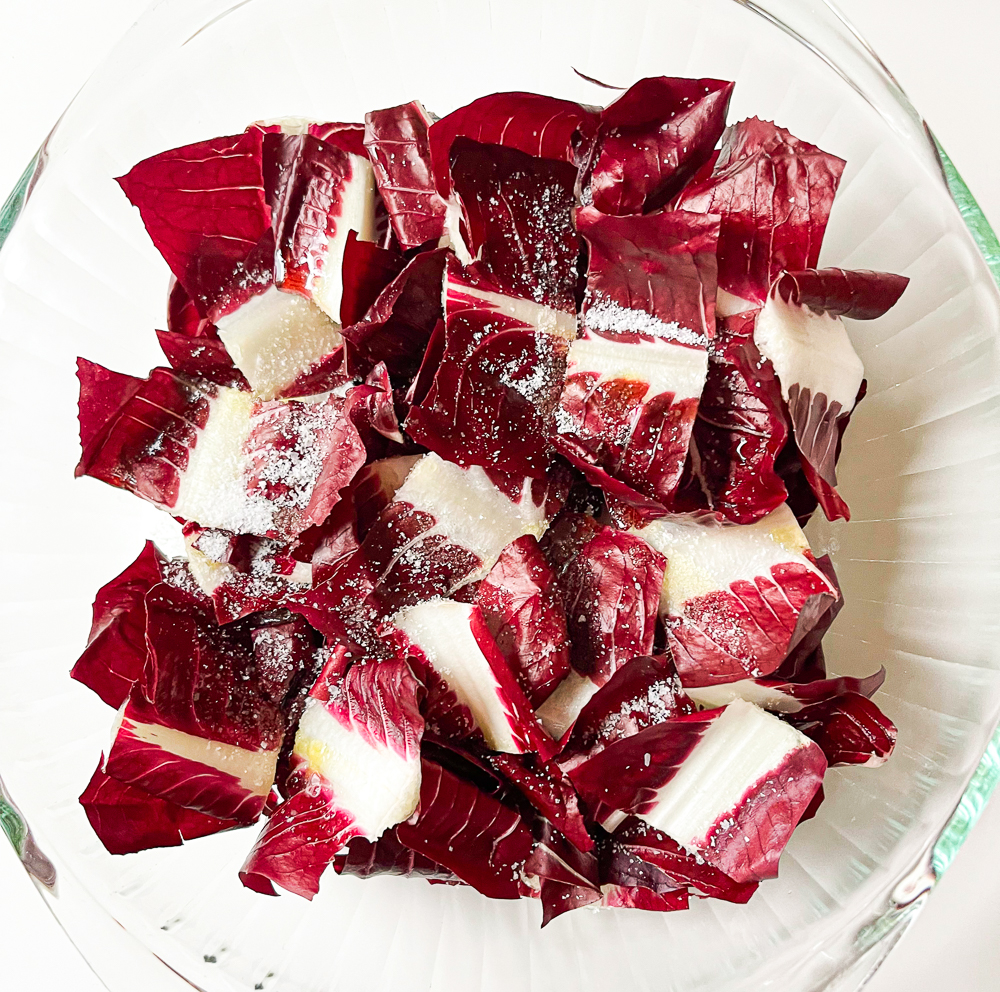
Before covering and shaking the bowl gently to evenly distribute the olive oil, red wine vinegar and kosher salt.

Afterwards, we toss it with olive oil, red wine vinegar and kosher salt. Be mindful about evenly distributing. Cover the bowl and gently shake to cover each leaf with the olive oil and salt.

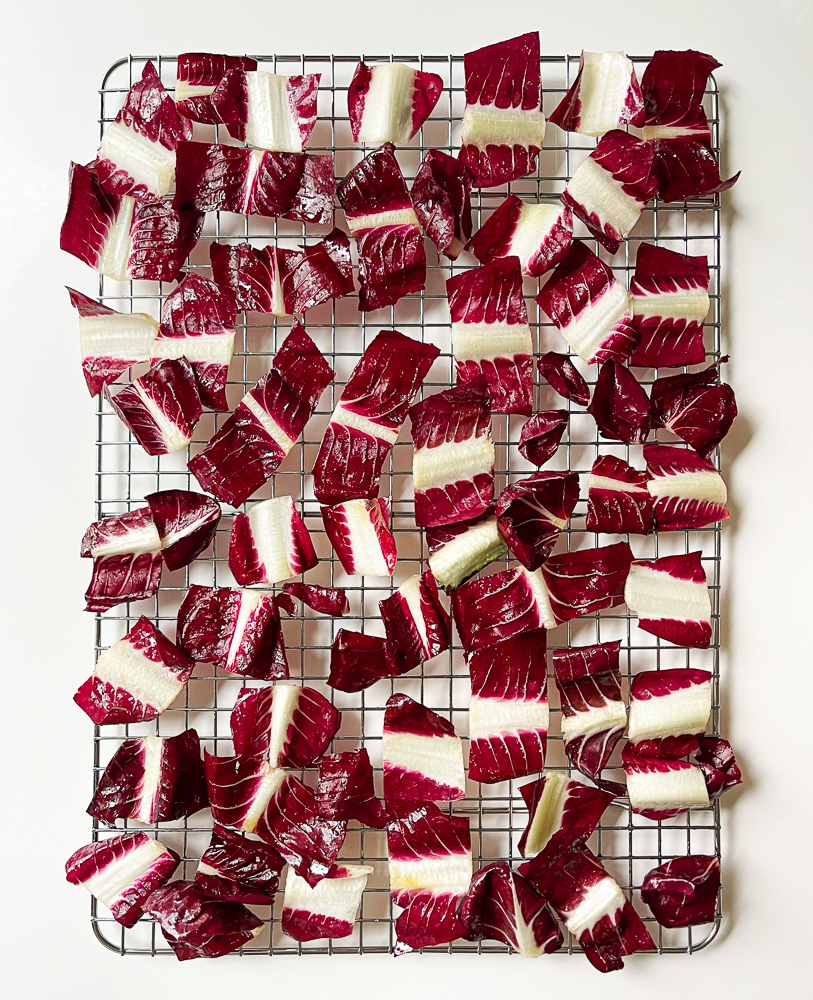
When everything is evenly coated, we place it on a wire baking rack that will sit on top of a baking sheet. The wire baking rack allows for better crisp.

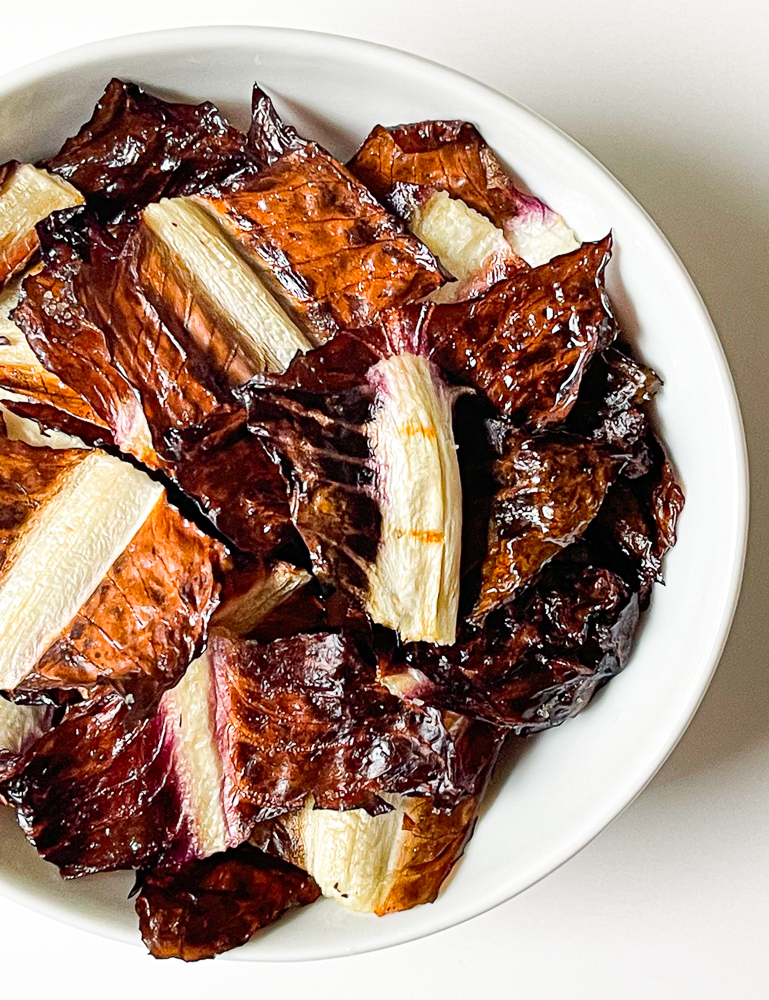
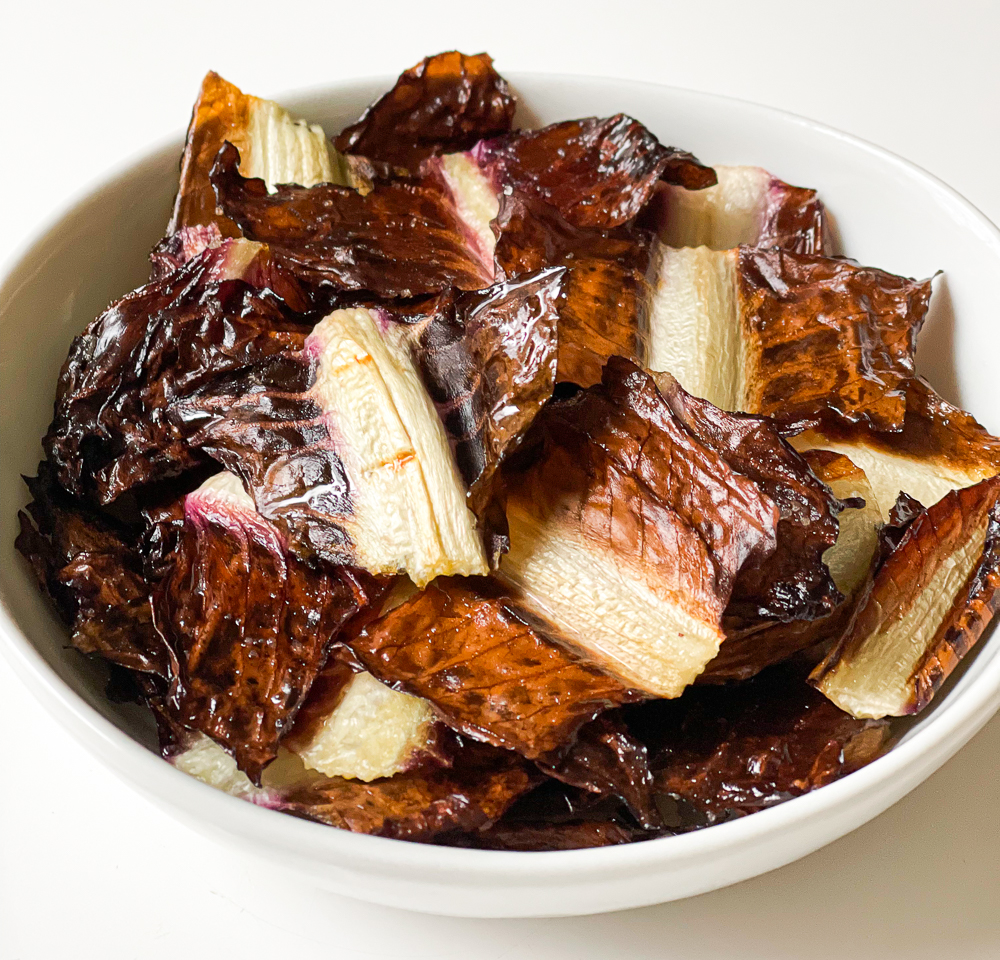
We bake it in the preheated oven for 15 minutes and have our Crispy Red Belgian Endive Chips!

Print

Crispy Red Belgian Endive Chips

Print Recipe

Super easy crispy red Belgian endive chips – or chicory chips!

  • Author: Jan Carlisle @ Bakeroise

Ingredients

Scale
  • One head red Belgian endive
  • Two tablespoons of olive oil
  • Two teaspoons of red wine vinegar
  • Two teaspoons of kosher salt

Instructions

  1. Preheat oven to 350°F
  2. Cut endive into four sections and discard any limp parts.
  3. Rinse the endive thoroughly but gently. Dry the endive leaves using a salad spinner if possible. Or place the leaves in a single layer on a cloth napkin or towel and cover to get all water droplets off.
  4. In a medium bowl, combine and toss the dry endive leaves, olive oil, red wine vinegar and kosher salt.
  5. When all the leaves are coated, place a wire baking rack in a baking sheet. Then make one layer of the leaves, none touching. Roast in batches if you need to.
  6. Bake in the preheated oven for 15 minutes. Keep an eye on it to prevent burning and adjust time as needed.
  7. Endive chips are done when they are a nice deep brown. Be sure not to burn.

Did you make this recipe?

Share a photo and tag us — we can’t wait to see what you’ve made!

Vegan Ma Lai Go Inspired Sponge Cake

October 27, 2021

Affiliate Disclosure: As an Amazon Associate, I earn from qualifying purchases. Thank you for supporting Bakeroise.

I am back with a Vegan Ma Lai Go Inspired Sponge Cake recipe for my 12 Months of Dim Sum Project! Yes, this would’ve been for September. I’m still showing up even though I’m late!

Ma Lai Go is the perfectly soft and steamed sponge cake at dim sum. Yes, it is a cake that isn’t baked in the oven but instead steamed in a bamboo steamer. It’s warm, fluffy, light and perfectly sweet and I love Chinese cakes the most because of those things.

There are opposing theories as to where Ma Lai Go originated but a common denominator is that the Chinese were always involved so I’d say some credit for this specific take on spongecake goes to them. But if you look at the words “Ma Lai” it’s “Malay”. There are also theories that the cake originated in Malaysia so credit goes to them as well of course! So Ma Lai Go would then be a Malaysian-inspired Chinese cake right? Let me know what you think in the comments! And if I’m wrong, please remember I’m human, make mistakes and am always open to learning. Thanks!

This Vegan Ma Lai Go Inspired Sponge Cake recipe is doubled and adapted from the Woks of Life Chinese Steamed Cake recipe.

This recipe uses aquafaba instead of eggs to help make the cake nice and fluffy in addition to what may seem to be loads of fresh baking powder but is actually the perfect amount! I know because I tested this four times. I was worried about the taste of baking powder coming through because it seemed to be so much but it didn’t. It’s perfect – to me! This recipe also highlights custard powder and I had to research to make sure that the custard powder I used was vegan.

I had to make this cake to get it just right so I’ll give you some tips.

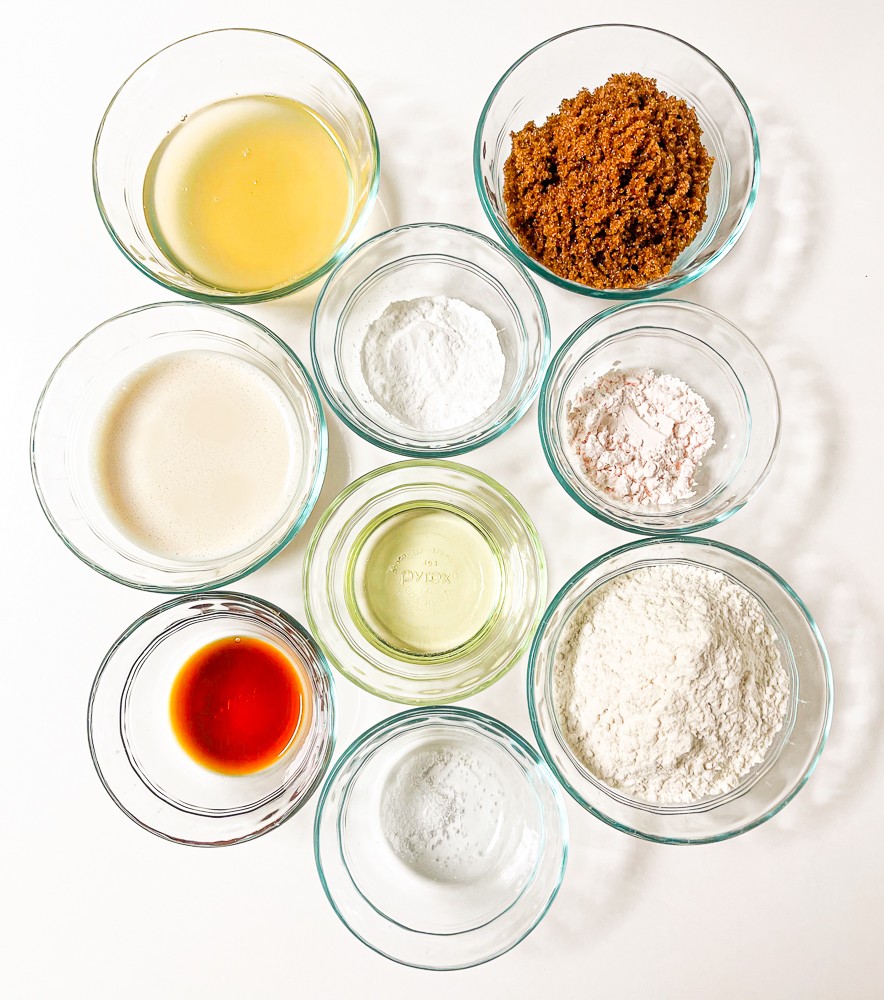
For our Vegan Mai Lai Go Inspired Sponge Cake, we use aquafaba at room temperature (canned chickpea brine), vegetable oil, organic dark brown sugar, vanilla extract, unsweetened vegan milk at room temperature(I tested with both almond and soy and they’re interchangeable), vegan custard powder, cake flour, kosher salt and fresh baking powder.

Let’s start out with the downright non-negotiables when it comes to the ingredients:

1: The aquafaba and vegan milk must be at room temperature. Use a thermometer if you need to heat up either ingredient and get it to measure it to room temperature (68°F).

2: The cake flour cannot be replaced with all-purpose flour. Cake flour is made from soft wheat and has lower gluten protein amounts than all-purpose flour. All-purpose flour has more protein therefore it produces denser baked goods. Obviously, we don’t want a dense cake. Stick with cake flour.

3: The baking powder also must be fresh. It cannot be the one that’s been sitting in the pantry for a year or sometimes even only several months. If you want to test the freshness of your baking powder, put a teaspoon of it in some boiling water. If it fizzes up, it should be fine. If it doesn’t, then it’s time to open up a new can.

If you substitute any of these ingredients for something else or use them when they’re at the wrong temperature, it will mess up the cake.

So let’s get started. Here’s how we make our Vegan Ma Lai Go Inspired Spongecake:

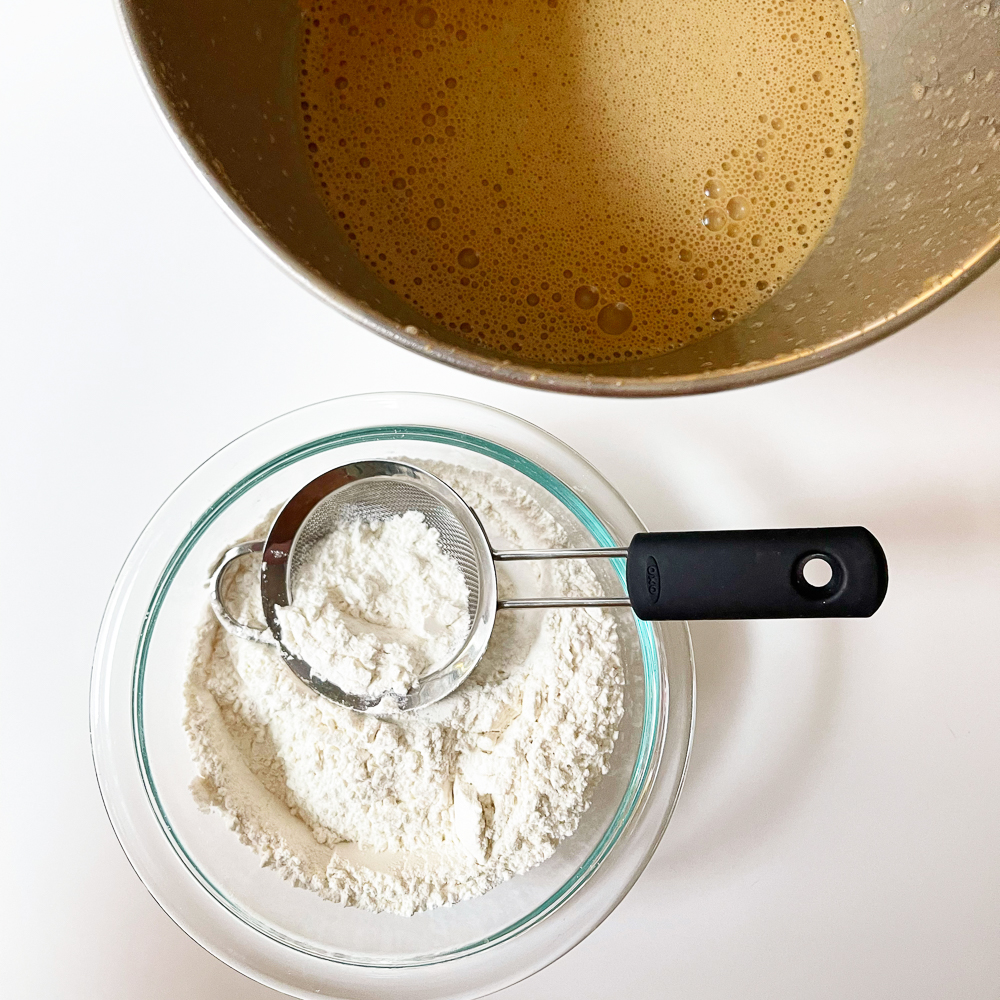
We whisk the aquafaba, vegetable oil and dark brown sugar on high using a stand mixer for five minutes exactly. Then we add the vanilla extract, vegan milk and custard powder and whisk again on high for another minute. Make sure you actually grabbed the custard powder and not the baking soda. You don’t want a gelatinous mess of a cake.

After the high power whisking, it’s time to add the cake flour, kosher salt and baking powder by sifting it little by little. We fold in the ingredients and prevent overmixing. In all my tests, I found that using a little sieve and adding the flour mix little by little (and folding in each time before the next small batch is added), produced the least amount of flour lumps. Worth the extra time and patience.

When the cake flour, salt and baking powder are all folded in, we let the batter sit uncovered for half an hour in its bowl.

Meanwhile, we’ll set up our steaming station by getting a 10 inch pan and filling it almost to the top with water and then setting it aside on the stove. The pan has to be almost full (but not all the way) because the water decreases as it steams. At one point, I accidentally burned another bamboo steamer tray because I ran out of water when I had the heat too high and the cake wasn’t cooked enough. My mistake. But for now, we set this pan aside, almost full.

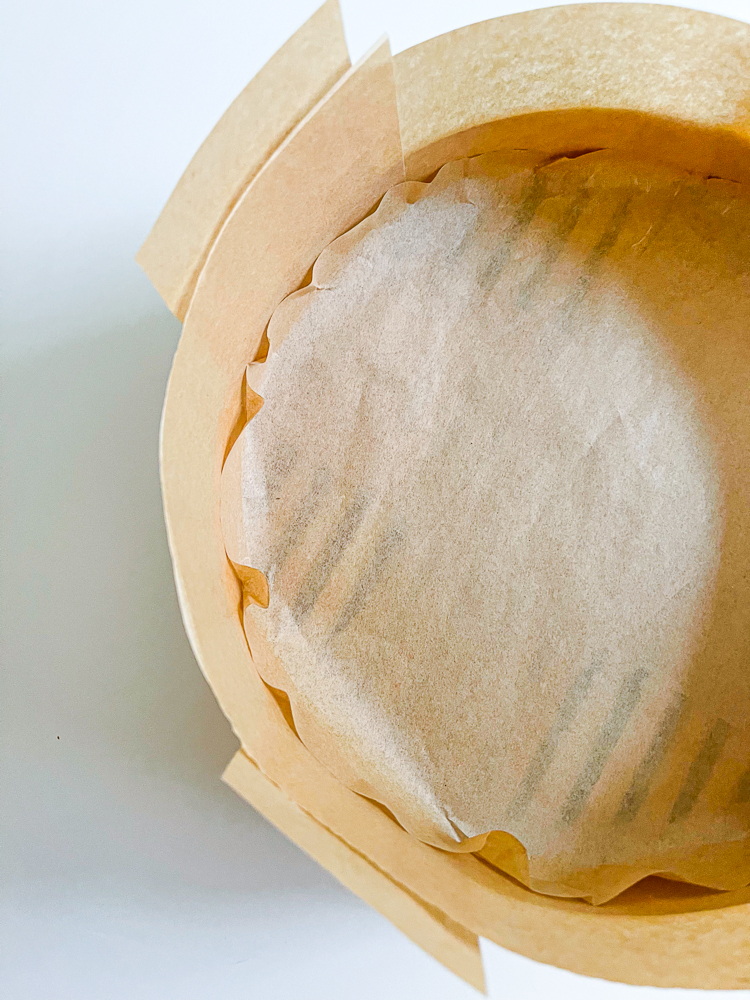
We line our 10 inch bamboo steamer tray with two large parchment paper strips we make ourselves to make “handles” so that we can pull the cake out with ease.

After making the handles, we line the sides with more parchment paper to create a higher wall, even if it means it leans over onto the top of the cake, to prevent any batter from spilling over the sides onto the steamer and lid. And, lastly, we add a round liner to the bottom of the pan.

That looks so sloppy but it works! Ideally the round liner would be smaller. But again, this works for me!

After the half hour of sitting batter is up, we pour it into the lined bamboo steamer and let it sit for another ten minutes. Meanwhile, we bring our large pan that’s almost filled to the top with water to medium heat. This will create the steam. It shouldn’t be boiling but more of a simmer. At ten minutes, we place the bamboo tray on the pan. The setup should look like this (but on the stove at medium heat obviously).

We let the cake cook for a good hour. After an hour we check with a toothpick to see if it’s done. If the toothpick comes out dry with a few crumbs, it’s just fine. If it’s wet, then obviously it’s not done. Cook for another 5-10 minutes.

When done, turn off heat and let sit for 10 minutes without moving anything. Then transfer the cake itself onto a wire rack to cool for half an hour before serving.

12 Months of Dim Sum Recipes

January 2021: Vegan Siomai

February 2021: Instant Pot Congee

March 2021: Vegan Potstickers with Ginger Scallion Tofu

April 2021: Crispy Golden Fried Tofu

May 2021: Toasted Cumin Scallion Pancakes

June 2021: Gluten-Free Asian Dipping Sauce

July 2021: Sweet Red Bean Paste and Perfectly Golden Sesame Balls

August 2021: Sweet Leeks and Ginger Bok Choy

September 2021: Vegan Ma Lai Go Inspired Sponge Cake

Print

Vegan Ma Lai Go Inspired Sponge Cake

Print Recipe

Recipe for a fluffy, light and perfectly sweet Chinese and Malaysian inspired spongecake that is served at dim sum called Ma Lai Go. This recipe is veganized and adapted from Woks of Life’s Chinese Steamed Cake recipe.

  • Author: Jan Carlisle @ Bakeroise
  • Prep Time: 25 minutes
  • Cook Time: 1 hour
  • Total Time: 1 hour 25 minutes

Ingredients

Scale
  • 1 cup and 2 tablespoon or 256 grams of aquafaba at room temperature
  • ½ cup or 100 grams of vegetable oil
  • 1 ½ cup or 240 grams organic dark brown sugar
  • 3 teaspoons or 13 grams vanilla extract
  • ⅔  cup or 164 grams of unsweetened almond milk at room temperature
  • 3 tablespoons or 36 grams of vegan custard powder
  • 2 cups or 240 grams of cake flour
  • ¼ teaspoon of kosher salt
  • 28 grams baking powder – must be fresh

Instructions

  1. Add the aquafaba, vegetable oil, and organic dark brown sugar to a stand mixer’s bowl. Using whisk attachment, mix on high for 5 minutes foamy. Do not overmix.
  2. Add the vanilla extract, almond milk, and custard powder to the bowl and mix on high again for one minute.
  3. In a small bowl, mix the cake flour, salt and baking soda. With a small sieve and a large spoon, alternate between sifting and folding in small amounts of all of the cake flour mix into the batter gently until just combined.  Set batter aside and let sit, uncovered, for 30 minutes.
  4. While the batter is resting, line a 10 inch bamboo steamer basket with parchment paper. Make 2-3 inch thick parchment paper strips and place them at the bottom of the steamer basket to make a cross. These will be your handles.
  5. Make two strips of parchment paper that are almost twice as tall as the steamer’s walls. Line the inside perimeter with the strips.
  6. Line the bottom of the bamboo tray with a round parchment paper.
  7. Fill large pan with water almost all the way and set aside on the stove.
  8. After 30 minutes, pour the batter into the bamboo steamer basket lined with parchment paper. Set aside for 10 minutes.
  9. Meanwhile, bring the large pan with water to medium heat. It should start simmering by 10 minutes. It not, bring to a boil and immediately bring to a gentle simmer.
  10. Once the water in pot starts to simmer, cover the bamboo steamer with its lid and set on top of the pan. Steam for 1 hour exactly. Do toothpick test at 1 hour. If it’s dry, your cake is done. If wet, steam for 5-10 minutes, checking with toothpick until done.
  11. When cake is done steaming. Turn off the heat and leave alone for ten minutes. After ten minutes, remove the lid carefully to avoid any steam and remove the cake from the bamboo steamer and transfer to a cooling rack. Let cool for 30 minutes before serving. 

Notes

  • Nothing can be substituted in this recipe. Please follow strictly.

Did you make this recipe?

Share a photo and tag us — we can’t wait to see what you’ve made!

  • « Go to Previous Page
  • Page 1
  • Interim pages omitted …
  • Page 3
  • Page 4
  • Page 5
  • Page 6
  • Page 7
  • Interim pages omitted …
  • Page 16
  • Go to Next Page »

Primary Sidebar

Categories

Recent Recipes

  • Vegan Filipino Afritada Inspired Tomato Stew
  • Mulled Pear and Apple Cider
  • Bakery Style Chocolate Chip Cookies
  • Shortcut Vegan Bolognese
  • Kimchi Chickpea Bowl
  • Facebook
  • Twitter
  • Instagram
  • Pinterest

Calendar

June 2025
M T W T F S S
 1
2345678
9101112131415
16171819202122
23242526272829
30  
« Dec    

Archives

  • December 2023
  • November 2023
  • September 2023
  • September 2022
  • March 2022
  • February 2022
  • January 2022
  • December 2021
  • November 2021
  • October 2021
  • September 2021
  • August 2021
  • July 2021
  • June 2021
  • May 2021
  • April 2021
  • March 2021
  • February 2021
  • January 2021

Recent Comments

  • Jan on Vegan Longevity Noodles – Yī Miàn
  • Kim on Vegan Longevity Noodles – Yī Miàn
  • Jan on Vegan Mongolian Beef Inspired Soy Curls
  • Jenn P on Vegan Mongolian Beef Inspired Soy Curls
  • Jan on 10 Ingredient Vegan Siomai

Footer

↑ back to top

About

  • Privacy Policy
  • Disclaimer
  • Terms & Conditions

Newsletter

  • Sign Up! for emails and updates

Contact

  • Contact
  • FAQ

As an Amazon Associate I earn from qualifying purchases.

Copyright © 2020 Brunch Pro on the Brunch Pro Theme