• Skip to primary navigation
  • Skip to main content
  • Skip to primary sidebar
  • About
    • Contact
    • Disclaimer
    • Privacy Policy
    • Terms & Conditions
  • FAQ
  • Vegan Recipes
    • Free Fridge Food
    • Special Diets
      • Anti-Inflammatory
      • Gluten-Free
    • Type of Meal
      • Breakfast
      • Lunch
      • Dinner
      • Snacks
    • Culturally-Inspired
      • Argentinean-Inspired
      • Chinese-Inspired
        • Dim Sum
          • 12 Months of Dim Sum
        • Noodles
      • Filipino Food
      • Italian-Inspired
      • Japanese-Inspired
      • Korean-Inspired
      • Malaysian-Inspired
      • Mexican-Inspired
      • Neapolitan-Inspired
      • Pacific Northwest
      • Russian-Inspired
    • Baking
      • Bars
      • Breads
      • Cakes
      • Cookies
    • Holiday Recipes
      • Christmas
      • Friendsgiving
    • Season
      • Autumn
      • Winter
    • Condiments
  • SHOP
    • My Pantry Favorites
  • 12 Months of Dim Sum

Bakeroise

Vegan Filipino Afritada Inspired Tomato Stew

Mulled Pear and Apple Cider

Bakery Style Chocolate Chip Cookies

Shortcut Vegan Bolognese

Kimchi Chickpea Bowl

Hearty Kale and Chickpea Tomato Soup

Vegan Upside Down Pear Cake with Crushed Candy Caps

Golden Beets and Brown Rice Bowl

Vegan Longevity Noodles – Yī Miàn

Farewell, 2021. Hello, 2022!

12 Months of Dim Sum Project 2021

Fennel Cake with Lingonberry Sauce

DIY Pumpkin Spice Mix with Saigon Cinnamon

October 20, 2021

Affiliate Disclosure: As an Amazon Associate, I earn from qualifying purchases. Thank you for supporting Bakeroise.

For the loyal readers who actually read the narratives on here: This is only my second post this month because my fridge started dying! I swear 2021 has got to be the year of broken appliances for us. We ordered a new fridge over a week ago and it’s taking forever to get here. Yesterday, we were feeling so gross about eating so much takeout and delivery instead of normally cooking healthier foods that we jumped the gun and ordered a smaller fridge that came today.

So soon we will have two fridges. Ha!

I’m back with a recipe for DIY pumpkin spice mix with Saigon cinnamon. Being that I was born and mostly raised in the US, I was exposed to pumpkin pie pretty early on. Despite having a bakery back in the Philippines, my family wasn’t really familiar with American baking. Our desserts came from the grocery store as we did the best we could to get by. But at every family Thanksgiving, we’d have our store-bought pumpkin pie until one of my younger cousins started baking it for the annual event.

As I got older, I gradually became exposed to different types of pumpkin spice desserts and my fondness for the autumnal spice mix grew as it became a nostalgic flavor that reminded me of warm memories. Then I remember that pumpkin spice coffee started to be a thing in college. I actually didn’t play that much into it but I remember tasting a pumpkin spice latte and not thinking it was too bad. Then again, I wasn’t into third wave coffee back then so my standards for coffee were obviously much lower.

If it isn’t already obvious, I tend to stray from the blander options. If you haven’t noticed, I am a big proponent of actually seasoning food with enough salt and I will put sweet and spicy Chinese chili oil or some other type of spicy condiment on just about everything. It’s just a personal preference.

Because of my preference for stronger flavor, I obviously wanted my pumpkin spice mix to be more pronounced. So this DIY pumpkin spice mix has a stronger cinnamon flavor due to the Saigon cinnamon. In general, this is the type of cinnamon that I prefer to both cook and bake with.

It is what works for me and I haven’t had any complaints yet.

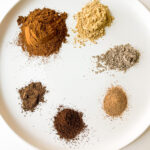
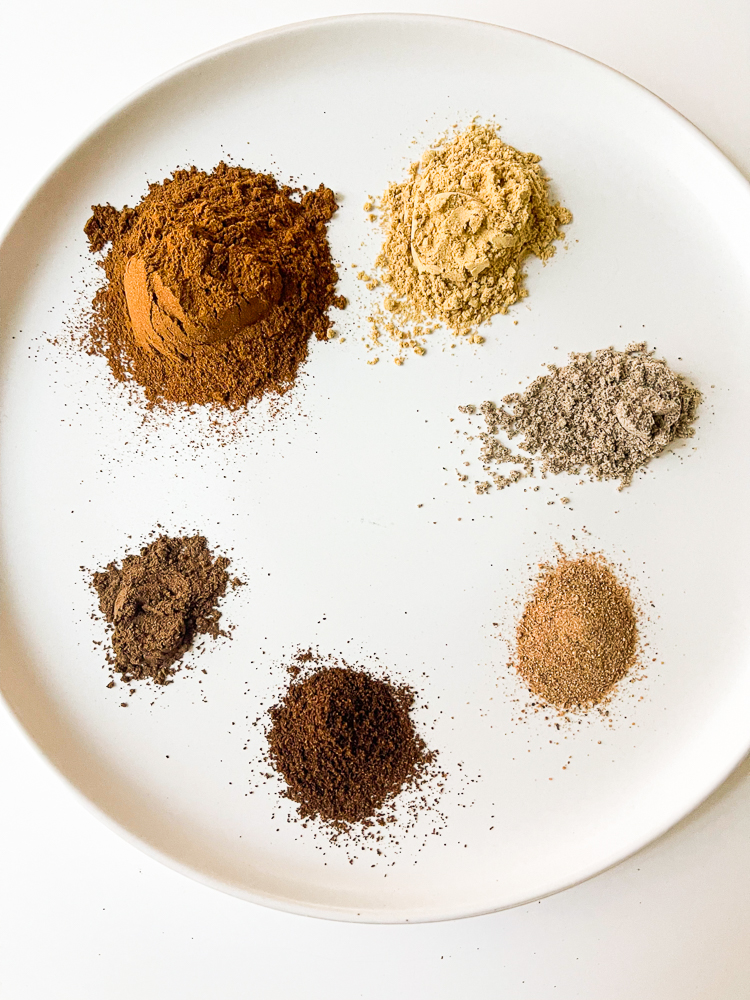
This DIY pumpkin pie spice mix with Saigon cinnamon also includes ground cloves, ground nutmeg, ground cardamom, ground ginger and allspice. Cardamom is another spice that is not uncommonly used in most pumpkin spice mixes but still not as popular as the more basic spice mixes you get at the store. And you’ll also notice that I love my pumpkin spice to be rather gingery as well. That love for ginger straight up comes from eating amazing gingery foods in Philippine cuisine since I was a small child.

To make this DIY pumpkin pie spice mix with Saigon cinnamon we just combine 2 tablespoons of Saigon cinnamon, 1 teaspoon of ground ginger, 1 teaspoon of cardamom, and ½ teaspoon of nutmeg and ¼ teaspoon each of cloves and allspice.

Print

DIY Pumpkin Pie Spice Mix with Saigon Cinnamon

Print Recipe
  • Author: Jan Carlisle @ Bakeroise

Ingredients

Scale
  • 2 tablespoons of Saigon cinnamon
  • 1 teaspoon of ground ginger
  • 1 teaspoon of ground cardamom
  • ½ teaspoon of ground nutmeg
  • ¼ teaspoon ground cloves
  • ¼ teaspoon ground allspice

Instructions

  1. Take all the spices and mix them all up!

Notes

  • Store in sealed container. Can fill up to a third or half of a spice jar. Keep in a cool, dark place.

Did you make this recipe?

Share a photo and tag us — we can’t wait to see what you’ve made!

Instant Pot Vegan Curry Chicken Soup

October 5, 2021

Affiliate Disclosure: As an Amazon Associate, I earn from qualifying purchases. Thank you for supporting Bakeroise.

OMG I love fall! I know it sounds “basic” with all that pumpkin spice everything but I don’t care. Not that I necessarily like or hate pumpkin spice but I love the coziness of the season that makes me grateful for my home, where we live and being able to be with my family. Having my family spread out around the world is pretty rough so I cherish my little family even more and friends, who are obviously my chosen family.

I also enjoy making soups therefore I am back with an Instant Pot Vegan Curry Chicken Soup recipe. Ever since moving to the Pacific Northwest a decade ago and falling in love with my now husband, who liked making making vegetable broth from scratch with specific ingredients, homemade soup has always been a favorite.

Speaking of this cold weather, the actual cold has been going around and it’s been brutal this year. So this Instant Pot Vegan Curry Chicken Soup is a great recipe for anyone who is sick – or really just for anyone who wants something comforting, hearty and flavorful. Make sure to have a fresh pot of rice ready (we always do because I’m hardcore Filipina when it comes to rice) because this would also make a great ulam for it.

Because I’m a busy homemaker and stay-at-home mom, I tend to do keep loads of frozen veggies in my freezer that are both store-bought and prepped fresh. It makes putting together soups like this one much more easy. I can’t tell you how many times I’ve wanted to make a soup but because having to take out a knife and cutting board would just be a dealbreaker.

This Instant Pot Vegan Curry Chicken Soup recipe is also onion-free. I’ve started using leeks in place of onions in a lot of my recipes because onions have always been difficult for our household in terms of tears – for both me and my husband. My little one? Not affected at all. Ha!

This Instant Pot Vegan Curry Chicken Soup recipe focuses on both pantry ingredients and whatever is fresh in the fridge. In this case, we add a cup of orochiette pasta to carb it up, soy curls for protein, frozen mixed mushrooms for umami, fresh peppers color and bok choy for fiber.

So how do we make it? Here we go!

First off, we make our fresh pot of white rice if we want. I like jasmine. Cook the rice how you normally do it. We can do everything else while it’s cooking. The rice is optional but I can’t live without it so it will most likely always be present in my recipes.

Second, if you want add the homemade Chinese chili oil that I put on everything, here is the recipe. It’ll only add 5-10 minutes to your cooking time. It’s super easy though. Using store-bought chili oil is as a condiment is fine as well. I would make this while the Instant Pot is building pressure as it can take a while.

Finally, here is how we make the soup:

We turn on our Instant Pot to sauté mode and add some vegetable oil or other neutral oil with a high smoke point. Then we simply toss in the frozen mushrooms, sliced leeks, three cloves of crushed and roughly chopped garlic, roughly diced ginger, roughly chopped fresh or frozen peppers and we sauté them for a few minutes in the oil until aromatic. Do this for a few minutes until the leeks are slightly brown (not caramelized because I don’t lie) but careful to not brown the garlic.

We turn off our Instant Pot and start adding everything else: two cups of soy curls, one cup of the orechiette pasta, bok choy all on top and the water to fill – half an inch shy of the max line. Do not overfill. I repeat: do not overfill unless you want to have some kind of an accident.

Since this is a pretty big pot of soup and I’m using water instead of vegetable broth, I rely on this Harvest Vegetarian Bouillon Mix and a tablespoon of pantry curry powder for even more flavor. I tend to season to taste but for this specific recipe I do put at least a couple of tablespoons in the pot. Note: This specific vegetarian bouillon mix I use has MSG for anyone who “feels weird about it”…but in case you’re interested, here are my thoughts on MSG.

Then we pressure cook it on high at 4 minutes! When done, do a quick release and it’s ready to serve. Keep in mind, it’ll take time to build pressure so be patient. It’s taken me 20 minutes before!

If you serve this with rice, season to taste with salt or soy sauce if you mix it together. Then add your chili oil on top for spice.

Hope you you love this super comforting Instant Pot Vegan Curry Chicken Soup!

Print

Instant Pot Vegan Curry Chicken Soup

Print Recipe

This is a super easy Instant Pot Vegan Curry Chicken Soup with a spicy option. Serve over rice optional.

  • Author: Jan Carlisle @ Bakeroise

Ingredients

Scale
  • ¼ cup of vegetable oil or other neutral oil with high smoke point
  • 1 leek stalk, both green and white parts thinly sliced into thin half moons and circles – ends discarded
  • 1 red bell pepper, roughly chopped
  • 3 cloves of garlic, crushed and roughly chopped
  • Inch of unpeeled ginger, roughly diced
  • 10 ounces of frozen mixed mushrooms
  • 2 cups of dehydrated soy curls
  • 1 cup of orochiette pasta
  • 4 stalks of baby bok choy, root end removed
  • 1.5 tablespoons of vegan bouillon mix
  • 1 tablespoon of curry powder
  • Water to fill instant pot

Instructions

  1. Turn Instant Pot on sauté mode. Add vegetable oil.
  2. Add the leeks, frozen mushrooms, chopped red bell pepper, ginger and garlic. Sauté for 3-4 minutes.
  3. Turn off Instant Pot and add the soy curls, one cup of orochiette pasta and baby bok choy on top.
  4. Add water to fill to max line – half an inch lower than the max line as to not overfill. Do not overfill.
  5. Add the vegan bouillon mix and curry powder. Adjust to taste. Mix the contents to distribute the flavors.
  6. Cover instant pot with lid. Seal the instant pot fully and point the steam release handle to “sealing” mode.
  7. Pressure cook on high for 4 minutes. It will take time to build up the pressure (sometimes 20-30 minutes) so please be patient.
  8. If you want a spicy option, make your Chinese chili oil while the pressure builds in Instant Pot using this recipe. Store-bought chili oil is fine too.
  9. When soup is done cooking, carefully do a manual release and let the steam out. Watch out for the steam.
  10. Season to taste  with soy sauce or salt if needed.
  11. Serve with rice and drizzle chili oil on top.

Equipment

Image of Instant Pot

Instant Pot

Buy Now →

Notes

  • When adding this to rice, the taste will obviously be diluted depending on the amount of rice. So season to taste when mixing with the rice.

Did you make this recipe?

Share a photo and tag us — we can’t wait to see what you’ve made!

Sweet Leeks and Ginger Bok Choy

September 28, 2021

Affiliate Disclosure: As an Amazon Associate, I earn from qualifying purchases. Thank you for supporting Bakeroise.

Y’all, you will love this Sweet Leeks and Ginger Bok Choy recipe! It takes less than thirty minutes to make and is bursting with umami flavors from the natural sugars of the leeks and soy sauce while also being healthy with loads of fiber from the bok choy. The recipe is easily adjustable to your liking so long as you season to taste so the chances of failing at making this dish delicious are slim to none.

This is for my 12 Months of Dim Sum Project! I haven’t had the chance to post anything dim su related since July so this post will be the one for August. I do plan to post again before the month is over. I hope. Ha! Busy mama life!

I intentionally made this recipe because a good family friend of ours is not a fan of onions so I’ve been replacing onions with leeks in a bunch of recipes. It’s actually a little difficult to do sometimes as the texture is completely different but in this recipe, the cooked down leeks that render natural sugars packs the dish with loads of umami flavor.

The primary ingredients are leeks, ginger and bok choy. I actually had a problem with my bok choy as they were slightly wilted. It was simple though. All I had to do was soak them in ice water and I was able get them back!

The process itself is simple so I won’t be doing a step-by-step tutorial.

We cook the sliced leeks in a few tablespoons of hot oil on medium for 20 minutes and add some chopped up ginger and garlic. We season with soy sauce to taste. We adjust the heat and deglaze with water as we need. We then continue cooking for two minutes after adding the ginger and garlic. At this point, we throw in a tablespoon of organic cane sugar for flavor. Then we add a couple of tablespoons of water to steam our bok choy and we cover it and let it cook for a few minutes. I will admit that sometimes I let it steam for longer because I like my bok choy to be completely wilted.

Cooked ginger, leek and bok choy in a dish with Chinese chili oil and soy sauce drizzled over

When we’re done we season to taste again and if we want, add flaky and peppery Chinese chili oil for spice!

12 Months of Dim Sum Recipes:

January 2021: Vegan Siomai

February 2021: Instant Pot Congee

March 2021: Vegan Potstickers with Ginger Scallion Tofu

April 2021: Crispy Golden Fried Tofu

May 2021: Toasted Cumin Scallion Pancakes

June 2021: Gluten-Free Asian Dipping Sauce

July 2021: Sweet Red Bean Paste and Perfectly Golden Sesame Balls

August 2021 (posted in September 2021): Sweet Leeks and Ginger Bok Choy

Print

Sweet Leeks and Ginger Bok Choy

Cooked ginger, leek and bok choy in a dish with Chinese chili oil and soy sauce drizzled over
Print Recipe

This is an incredibly easy 30-minute sweet leeks and ginger bok choy recipe.

  • Author: Jan Carlisle @ Bakeroise

Ingredients

Scale
  • ¼ cup of vegetable oil or other neutral oil with high smoke point like peanut or grapeseed
  • 1 large leek stem, sliced across into ¼” strips  – use all parts except for the root end which we discard immediately
  • 3 inches of ginger, unpeeled and roughly minced
  • 3 cloves of garlic, crushed and roughly chopped
  • 6 bunches of baby bok choy, bottoms cut off so the stems are separate
  • 1 tablespoon of organic cane sugar
  • Light soy sauce to taste
  • Water for deglazing and steaming
  • Optional: Chinese Chili Oil

Instructions

  1. In a very large pot, bring ¼ of oil to medium-high heat. When oil is hot, add the leeks. Let leeks cook for 20 minutes. Adjust heat as needed so that the leeks do not burn. We want it to cook enough to render some sugars despite not caramelizing.
  2. After 20 minutes, there should still be oil in the pot but if not, deglaze with a couple tablespoons of water if anything is sticky at the bottom. Add the ginger and garlic. Cook for 2-3 minutes until garlic is aromatic. Season with soy sauce and sugar to taste.
  3. Turn heat to medium and add a couple of tablespoons to the pot to deglaze. Immediately add the bokchoy and cover. Let sit and steam for three minutes. If you want your bok choy to wilt more like mine, steam for an additional three minutes.
  4. When done, toss the bok choy with everything else and season with soy sauce to taste if needed.
  5. Serve and, optionally, add Chinese Chili Oil for some heat!

Did you make this recipe?

Share a photo and tag us — we can’t wait to see what you’ve made!

Vegan Frozen Pizza for Parents

September 23, 2021

Affiliate Disclosure: As an Amazon Associate, I earn from qualifying purchases. Thank you for supporting Bakeroise.

I’m a busy parent who just loves to put together last minute dishes.

No, not really – haha! But it’s a requirement of the job so I’ve gotten used to it.

This Vegan Frozen Pizza for Parents recipe started off as a simple Instagram post and isn’t one of my more thought out posts and recipes that have been tested a million times. But I’m posting anyway. Why? Because it’s just so easy to pull off for what it is: a quick, pizza dinner that’s decent in the tummy! Components can easily be switched out and I wanted something chill to refer back to and share with other busy people – especially fellow busy parents. But obviously, this is a pizza for anyone who wants to save time – not just my fellow busy parents!

So obviously this isn’t in any way an authentic recipe.

I actually didn’t start making these Vegan Frozen Pizza for Parents until I had 10 frozen crusts in my freezer. And, no, keeping 10 frozen crusts (not dough, mind you, so it’s already shaped) is not something I normally do! When I had family visiting, I ran out of time to make pizza dough and a friend picked up these crusts for me at the store. And with everything awful going on at the same time, even using frozen crusts were too much for me so we ended up just ordering from one of my favorite restaurants in the neighborhood, Cibo.

So the crusts just sat in my freezer for a while until one day, when I was overwhelmed and tired but happened to have ingredients, I made a frozen pizza. And another. And another.

They were frozen pizzas, sure…but they were very decent! This Vegan Frozen Pizza for Parents isn’t a revolutionary recipe. It’s just that in the age where people are praised for making everything from scratch despite the labor and time it takes but shamed the minute they take any shortcuts so they can rest a little, I thought it was important to stay authentic and admit that, hey, we all need to take shortcuts and that’s totally fine. We can’t always do every single thing ourselves and most people can’t afford to eat takeout daily. And obviously, I’m not into debt so there’s that. So we do what we can to find that middle ground.

And this Vegan Frozen Pizza for Parents is that perfect middle ground.

Four things that make an awesome Vegan Frozen Pizza for Parents:

A decent frozen pizza crust: I use the one from Trader Joe’s. I’m talking about pizza crusts, again and not dough. There’s no thawing time and you don’t have to shape it yourself. So that’s a lot of time saved.

Good canned pizza sauce: So far I like Pomi or Mutti canned tomatoes. Save yourself having to handwash a knife and have your fingers smell like garlic unless you really want to make your own. If you are indeed not wanting to labor this time and/or if basil is out of season, I would use the canned pizza sauce from Italy. Repeat: The tomatoes have to be from Italy.

Vegan Mozzarella Cheese: So far, I like both Planet Foods and Violife, both which I have purchased from Costco.

Produce from my garden

Colorful toppings: I usually like to stick to three toppings and the toppings simply are dependent on what’s available. For this pizza, I used garden cherry tomatoes, homegrown basil, windowsill green onions and Mama Lil’s Hot Peppers. In the fall, I’ll have no tomatoes so I’ll have to use other seasonal ingredients but most likely will have to pre-cook them first as part of the prep. If I wanted to use that kale in the picture, I’d obviously have to massage it with olive oil and sprinkle it with some kosher salt before I put it on the pizza.

In terms of assembly, I just use ¼ cup, give or take, of the pizza sauce for a ten inch pizza to avoid any sogginess while still getting good coverage. Simply sprinkle the cheese around and then add the everything else with the exception of the basil which goes on after baking.

We bake our Vegan Frozen Pizza for Parents it in a preheated oven. In terms of what temperature, I followed the instructions of the package but it made the pizza take even longer than the listed time. Because we’re using a frozen pizza crust that’s already been cooked, I was nervous about burning but I still wanted to adjust to something higher. Turning up my conventional oven all the way (at broiler temp and with the pizza at least 8 inches away from the to) for the next pizza turned out to be better. It also only took a minute or two. However, I suggest following the instructions on the frozen pizza package first and then adjusting to what works in your own oven, kitchen, situation, etc. I have a conventional induction range so I do find that it’s a lot more powerful in terms of heat.

Hope you find this Vegan Pizza for Parents recipe helpful!

Print

Vegan Frozen Pizza for Parents

Print Recipe

Super easy and quick vegan pizza recipe for busy parents…and everyone else who wants to save some time and energy but still have something good! This recipe yields one pizza. Feel free to scale. 

  • Author: Jan Carlisle @ Bakeroise
  • Prep Time: 5
  • Total Time: 5 minutes
  • Yield: 1 pizza 1x
  • Diet: Vegan

Ingredients

Scale
  • 1 frozen crust
  • ¼ pizza sauce
  • ½ cup of vegan mozzarella cheese
  • Colorful toppings of your choice – example: chopped garden vegetables, chili oil, pickled peppers, fresh herbs, etc

Instructions

  1. Preheat your oven to instructions specified on the frozen pizza packaging. Adjust temperature,  time and pizza rack appropriately. If you end up putting it on broil, double check to make sure the pizza itself is at least 8 inches away from the oven. I cook my pizzas on broil for 1-2 minutes on the center rack. 
  2. Assemble pizza by unwrapping the frozen pizza and setting it down flat. Evenly distribute the ¼ cup of pizza sauce on the surface of the pizza. Adjust if needed but don’t use too much or else it’ll get soggy.
  3. Sprinkle the vegan mozzarella cheese evenly over the sauce. Adjust quantity to your liking. I personally love loads on mine. 
  4. With exception to any basil, add whatever toppings you’d like on top of the pizza, evenly distributing. 
  5. Bake the pizza according to instructions on frozen pizza package (and with whatever appropriate adjustments) on the preheated baking steel.
  6. When done, remove with a pizza peel and set on a cutting board.
  7. Immediately add torn basil if you have any on hand. 
  8. Cut and serve. 

Did you make this recipe?

Share a photo and tag us — we can’t wait to see what you’ve made!

  • « Go to Previous Page
  • Page 1
  • Interim pages omitted …
  • Page 4
  • Page 5
  • Page 6
  • Page 7
  • Page 8
  • Interim pages omitted …
  • Page 16
  • Go to Next Page »

Primary Sidebar

Categories

Recent Recipes

  • Vegan Filipino Afritada Inspired Tomato Stew
  • Mulled Pear and Apple Cider
  • Bakery Style Chocolate Chip Cookies
  • Shortcut Vegan Bolognese
  • Kimchi Chickpea Bowl
  • Facebook
  • Twitter
  • Instagram
  • Pinterest

Calendar

June 2025
M T W T F S S
 1
2345678
9101112131415
16171819202122
23242526272829
30  
« Dec    

Archives

  • December 2023
  • November 2023
  • September 2023
  • September 2022
  • March 2022
  • February 2022
  • January 2022
  • December 2021
  • November 2021
  • October 2021
  • September 2021
  • August 2021
  • July 2021
  • June 2021
  • May 2021
  • April 2021
  • March 2021
  • February 2021
  • January 2021

Recent Comments

  • Jan on Vegan Longevity Noodles – Yī Miàn
  • Kim on Vegan Longevity Noodles – Yī Miàn
  • Jan on Vegan Mongolian Beef Inspired Soy Curls
  • Jenn P on Vegan Mongolian Beef Inspired Soy Curls
  • Jan on 10 Ingredient Vegan Siomai

Footer

↑ back to top

About

  • Privacy Policy
  • Disclaimer
  • Terms & Conditions

Newsletter

  • Sign Up! for emails and updates

Contact

  • Contact
  • FAQ

As an Amazon Associate I earn from qualifying purchases.

Copyright © 2020 Brunch Pro on the Brunch Pro Theme